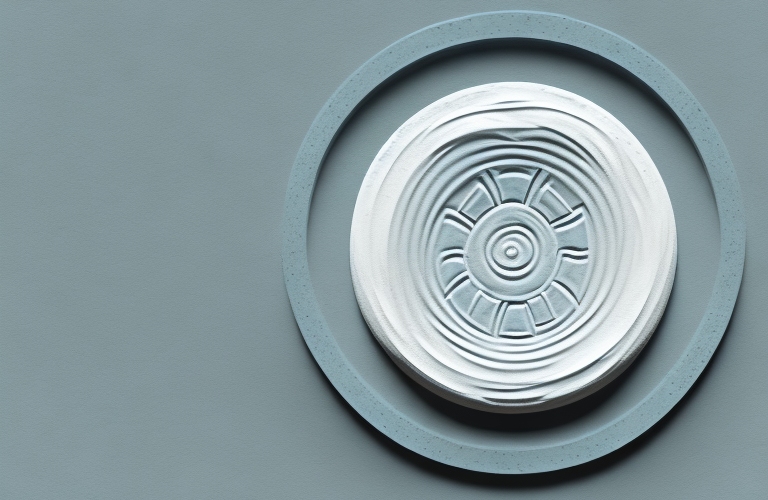
Glazed pottery is a popular art form that has been in existence for centuries. As a result of various factors such as temperature variations and human errors during the firing process, some glazed pottery pieces may develop cracks or have a less than desirable appearance. This is where re-firing comes in. Re-firing glazed pottery is a process of re-firing ceramic pieces that did not turn out as intended, giving them a second chance to achieve the desired result. In this article, we will provide a step-by-step guide to re-firing glazed pottery.
Introduction to Re-Firing Glazed Pottery
Re-firing glazed pottery is a technique used to rectify some of the mistakes made during the initial firing process. At times, pieces may not have heated evenly enough, or there could have been variances in temperature or an issue with the clay body. As such, re-firing is a process that helps to rectify these problems, and in some circumstances, this process may lead to a more successful piece.
It is important to note that re-firing glazed pottery should only be done in certain circumstances. If the piece has cracks or other structural issues, re-firing may not be effective and could even cause further damage. Additionally, re-firing can alter the color and texture of the glaze, so it is important to test a small area before committing to the entire piece. With careful consideration and proper technique, re-firing can be a useful tool in achieving the desired outcome for a piece of pottery.
Reasons for Re-Firing Glazed Pottery
There are various reasons why you may want to re-fire glazed pottery, including:
- The pieces have cracks due to air pockets within the clay particles that were not sufficiently eliminated during the first firing.
- Some pieces may have not fired adequately or may have been too low or too high in temperature, resulting in an undesirable finish.
- In some cases, glazes may have dripped or ran during the initial firing, giving an unfavorable impression that needs correcting.
- Finally, some pieces may have been contaminated during the initial firing process.
Another reason for re-firing glazed pottery is to add additional layers of glaze or to correct any imperfections in the glaze. This can be done by applying a new layer of glaze and firing the piece again to achieve the desired effect. Additionally, re-firing can also be used to enhance the colors of the glaze or to create a unique texture on the surface of the pottery.
Preparing the Pottery for Re-Firing
Before you can re-fire your glazed pottery, you need to ensure that it is adequately prepared. Begin by examining the pottery piece for any cracks, chips, or abnormalities. Note that you do not want to re-fire a piece that is already damaged or broken, as this will only cause further damage. If any visible damage exists, it is best to consult a professional for professional assistance.
Next, ensure that the pottery is clean to avoid any possible contamination during the re-firing process. Clean the pottery thoroughly using a brush or a damp towel to remove all dust and residue from the previous firing process.
After cleaning the pottery, it is important to let it dry completely before re-firing. Any moisture left in the pottery can cause it to crack or explode during the firing process. To ensure that the pottery is completely dry, leave it in a warm, dry place for at least 24 hours.
Once the pottery is dry, you can begin the re-firing process. It is important to follow the firing instructions for the specific type of glaze used on the pottery. Over-firing or under-firing can cause the glaze to melt or not adhere properly, resulting in a ruined piece of pottery.
Choosing the Right Kiln for Re-Firing Glazed Pottery
When choosing a kiln for re-firing, choose one that is rated for the temperature you intend to use to refire your glazed pottery. Ensure that the kiln is capable of reaching high temperatures without any issues. This is because the porcelain bodies used in glazed pottery need higher temperatures to cure adequately.
You may consider using a pyrometer to ensure that the kiln operates at the desired temperature level. This device measures the actual temperature inside the kiln, making it easy to know the exact temperature of your pottery during the firing process.
It is also important to consider the size of the kiln when choosing one for re-firing glazed pottery. If you have larger pieces of pottery, you will need a larger kiln to accommodate them. Additionally, if you plan on firing multiple pieces at once, you will need a kiln with enough space to fit them all comfortably. Keep in mind that a larger kiln may require more energy to operate, so factor in the cost of electricity or gas when making your decision.
Setting up the Kiln for Re-Firing Glazed Pottery
To set up the kiln for re-firing glazed pottery, you’ll need to load the kiln properly. Ensure that there is enough space between each piece and that the pieces do not touch. This avoids any possible contact or glaze contamination issues.
Set up your kiln shelves in a way that allows heat to circulate freely underneath the pottery. This ensures even heat transfer and exposes the pottery to the right temperature, ensuring that the pieces receive the required amount of heat.
Before firing the kiln, it’s important to check the condition of the kiln shelves and make sure they are free of any debris or glaze drips. Any debris or drips can cause the pottery to stick to the shelves, ruining the pieces and potentially damaging the kiln.
It’s also important to monitor the temperature of the kiln throughout the firing process. Keep an eye on the temperature gauge and adjust the temperature as needed to ensure that the pottery is fired to the correct temperature and for the appropriate amount of time.
Loading and Unloading the Kiln for Re-Firing Glazed Pottery
When loading and unloading the kiln, be cautious not to damage any pieces. Wear safety gear, including gloves, safety glasses, and protective clothing, to avoid any possible injury. Take out the hot pieces carefully, allowing time for them to cool down before handling them.
It is important to note that when re-firing glazed pottery, there is a risk of the glaze running or melting off the piece if it is not fired correctly. Make sure to follow the recommended firing schedule and temperature for the specific glaze used. Additionally, it is recommended to place the pieces on kiln shelves with enough space between them to allow for proper air circulation and prevent any pieces from touching each other.
Firing Schedule for Re-Firing Glazed Pottery
Before re-firing your glazed pottery pieces, ensure that you have a firing schedule that includes the firing temperature and hold times. The most significant temperature to note is the duration of the preheat program. Ensure that the pottery is exposed to the right heat level throughout the heating process.
Note that the temperatures and hold time vary from one piece to another, and it is essential to adhere to specific guidelines when re-firing the pottery. This ensures a successful re-firing process.
When re-firing glazed pottery, it is crucial to consider the type of glaze used. Some glazes require a higher firing temperature than others, and failure to adhere to the recommended temperature can result in the glaze not fusing correctly. It is, therefore, essential to check the manufacturer’s instructions for the glaze used before re-firing the pottery.
Additionally, it is advisable to inspect the pottery for any cracks or defects before re-firing. Any cracks or defects can worsen during the firing process, resulting in the piece breaking or shattering. If any defects are found, it is best to repair them before re-firing the pottery.
Monitoring the Kiln during Re-Firing Process
When re-firing glazed pottery, it is essential to monitor your kiln during the firing process. Regularly check the kiln temperature, the pyrometer, and the kiln environment throughout the entire process.
If the kiln needs adjustment, make the necessary changes in temperature, ventilation, and heating to ensure that the pottery is not over-exposed, resulting in over-fire, or under-exposed, resulting in under-fire.
It is also important to keep an eye on the color of the pottery during the firing process. If the color appears to be changing too quickly or unevenly, it may be an indication that the kiln needs to be adjusted. Additionally, it is recommended to use a timer to keep track of the firing time and make sure that the pottery is not over-fired or under-fired.
Another factor to consider is the type of glaze being used. Some glazes require a slower firing process, while others may require a faster firing process. It is important to research and understand the specific requirements of the glaze being used to ensure that the firing process is appropriate for the type of pottery being created.
Cooling down and Finishing after Re-Firing Glazed Pottery
Allow the fired pottery to cool in the kiln. Do not remove the pottery from the kiln before it has fully cooled, as this can cause additional damage or deformities to the piece.
After the pottery has cooled to room temperature, remove it from the kiln and examine it for any visible signs of problems or additional trouble in the finished product. You may wish to apply a sealant to give the pottery a uniform glossy finish.
Troubleshooting Common Problems during Re-Firing Glazed Pottery
Despite your best efforts, some issues may arise during re-firing glazed pottery. Some of the common issues include:
- Cracks during firing, indicating issues with the clay body or the temperature at which the pottery was heated
- Blisters on the pottery’s surface, indicating that air pockets were not fully eliminated during the firing process
- Uneven glaze coverage, indicating issues with glaze application techniques and the temperature at which the pottery was heated.
Consult with an expert in glazed pottery re-firing for advice on how to resolve these common issues.
Tips and Tricks for Successful Re-Firing of Glazed Pottery
Ensure that your piece has fully cooled before removing it from the kiln. This helps avoid the possibility of any cracks or deformities in the pottery. It also ensures that you can handle your piece safely without any injury.
When setting up the pottery in the kiln, ensure that you have enough space between each piece to avoid any contact and avoid glaze contamination issues. This also ensures that each piece receives the necessary heat for a successful re-firing process.
Conclusion on re-firing glazed pottery
Re-firing glazed pottery is a technique that can rectify some of the mistakes made during the initial firing process. It’s a difficult process that requires patience and expertise. Utilize the tips and tricks outlined in this guide to help you achieve a successful re-firing process. Remember to take your time during each step, paying attention to detail to avoid any possible issues or damage.