If you’re new to pottery, or even if you’re an experienced potter, the process of centering clay can be a bit daunting. However, with a little bit of practice and some careful guidance, anyone can master the art of clay centering. In this comprehensive guide, we’ll take you through all the steps you need to follow in order to get your clay perfectly centered on the pottery wheel.
Understanding the basics of clay centering
Before you start the actual centering process, it’s important to understand what exactly you’re trying to achieve. Put simply, clay centering is the process of getting the clay to spin in a perfectly symmetrical manner on the wheel. This is important, because it allows you to shape and mold the clay into a variety of forms and designs later on.
To achieve this symmetrical spin, you need to apply pressure to the clay in a specific way. Essentially, you’re using your hands to push the clay into the center of the wheel as it spins, gradually shaping it into a perfectly centered ball. This can take some practice, but with a few helpful tips, anyone can get the hang of it.
One important tip to keep in mind when centering clay is to keep your hands wet. This helps to prevent the clay from sticking to your hands and allows for a smoother, more controlled movement. Additionally, it’s important to maintain a consistent pressure on the clay as you work, using your fingers and palms to gently guide it into the center of the wheel. With practice and patience, you’ll be able to master the art of clay centering and create beautiful pottery pieces that are both functional and aesthetically pleasing.
Essential tools for centering clay
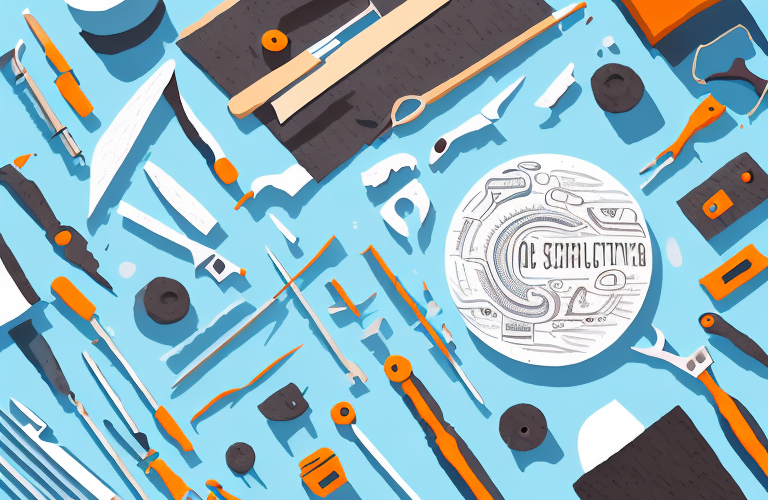
Before you start centering your clay, there are a few tools you’ll need to have on hand. First and foremost, you’ll need a pottery wheel. This should already be set up and ready to go before you start working with the clay. You’ll also need a bucket of water, a sponge, and a set of clay trimming tools (including a rib, a needle tool, and a scoring tool). Finally, you’ll need a lump of clay. This can be purchased from a craft store or pottery supply shop.
Once you have all of your tools ready, it’s important to prepare your workspace. Make sure you have a clean and flat surface to work on, and that you have enough space to move around comfortably. You may also want to consider wearing an apron or old clothes, as working with clay can get messy.
When you’re ready to start centering your clay, it’s important to remember to take your time and be patient. This can be a difficult skill to master, but with practice, you’ll get the hang of it. Don’t be afraid to ask for help or guidance from a more experienced potter, and remember to have fun and enjoy the process!
Preparing your workspace for clay centering
Once you have all your tools in place, it’s time to set up your workspace. Make sure you’re working in a clean, well-lit area with plenty of space to move around. Set out your clay trimming tools and fill your water bucket. Finally, prepare your clay by kneading it gently for a few minutes to make it pliable and easy to shape.
Before you begin centering your clay, it’s important to consider the temperature and humidity of your workspace. If the air is too dry, your clay may crack or become difficult to work with. If the air is too humid, your clay may become too soft and lose its shape. To maintain the ideal conditions, you can use a humidifier or dehumidifier, or cover your clay with a damp cloth while you work.
Another important factor to consider is your posture and positioning while centering. It’s best to sit at a comfortable height with your back straight and your feet flat on the ground. Keep your elbows close to your body and use your body weight to apply pressure to the clay. This will help prevent strain or injury to your arms and back.
Step 1: Preparing the clay for centering
With your workspace ready, it’s time to start centering your clay. Begin by taking a lump of clay about the size of a grapefruit and placing it on the center of your pottery wheel. Use your hands to gently press the clay down onto the wheel, making sure it sticks firmly in place.
Before you start centering the clay, it’s important to make sure that it has the right consistency. If the clay is too dry, it will be difficult to work with and may crack. On the other hand, if the clay is too wet, it will be too soft and won’t hold its shape. To test the consistency of the clay, try squeezing it in your hand. It should hold its shape without cracking or crumbling.
Once you’ve placed the clay on the wheel, you can begin the process of centering. This involves using your hands to apply pressure to the clay, while also using the wheel to spin it around. The goal is to create a symmetrical shape that is evenly distributed around the center of the wheel. This can take some practice, but with patience and persistence, you’ll be able to master the technique and create beautiful pottery pieces.
Step 2: Positioning the clay on the wheel
Once your clay is secured to the wheel, take a moment to position it properly. Use both hands to shape the clay into a cone shape, with the widest part at the bottom and the narrowest part at the top. This will help the clay spin evenly on the wheel.
Next, use your thumbs to create a small indentation in the center of the clay. This will help to center the clay on the wheel and prevent it from wobbling as it spins. Make sure the indentation is not too deep, as this can cause the clay to collapse.
Once you have positioned the clay, turn on the wheel and adjust the speed to a comfortable level. Keep your hands wet throughout the process to prevent the clay from sticking to your fingers. Now you are ready to begin shaping your clay into your desired form!
Step 3: Applying pressure to start the centering process
With your clay properly positioned, it’s time to start the actual centering process. Start the wheel spinning slowly and use your hands to begin applying pressure to the clay. Keep your hands moist by dipping them into the water bucket regularly.
As the wheel spins, use your hands to press down on the clay and shape it into a symmetrical ball. Make sure to apply equal pressure to all sides of the clay, so that it spins evenly. This can take some practice, so don’t get discouraged if it doesn’t work perfectly the first time.
Step 4: Shaping and refining the clay
Once your clay is centered, it’s time to start shaping it into whatever form you desire. Use your clay trimming tools to shape and refine the clay as needed, scoring it to add texture and using the rib to smooth out any rough edges. Be sure to stay patient and take your time, as this is the step where you’ll really start to see your vision taking shape.
Common mistakes to avoid while centering clay
While centering clay can be a little tricky at first, there are a few common mistakes that you can easily avoid. First, make sure you’re not applying too much pressure to the clay, which can cause it to warp or become misshapen. Additionally, be careful not to let your hands dry out or become too wet, as this can also affect the symmetry of the spin. Finally, be sure to keep your workspace clean and tidy, as stray bits of clay or debris can interfere with your ability to work effectively.
Tips and tricks for perfecting your clay centering technique
As with any new skill, practice makes perfect when it comes to centering clay. If you’re having trouble getting the hang of it, try watching some online tutorials or taking a class with an experienced potter. Additionally, experiment with different types of clay and pottery techniques to find the methods that work best for you.
Troubleshooting common issues during the centering process
If you’re having trouble centering your clay, there are a few common issues that you may need to address. If the clay is wobbling or shaking, try slowing down the wheel speed or adjusting your hand pressure. If the clay won’t stick to the center of the wheel, you may need to moisten it slightly or adjust the clay cone shape to create a more secure base.
How to know when your clay is perfectly centered
So how can you tell when your clay is perfectly centered? The easiest way is to simply look at it as it spins on the wheel. If the clay is spinning in a perfectly symmetrical manner, it’s centered. You can also gently touch the clay to feel for any unevenness or bumps.
What to do after you have centered your clay
Once your clay is perfectly centered, it’s time to start shaping and molding it into your desired form. Use your clay trimming tools to carefully shape the clay, taking care to make sure it stays centered throughout the process. Finally, remember to enjoy the creative process and have fun with your new pottery skills!
Advanced techniques for experienced potters
If you’re an experienced potter looking to take your skills to the next level, there are a variety of advanced centering techniques you can experiment with. These might include using different types of clay, varying your hand pressure, or incorporating new shapes and designs into your pottery. Don’t be afraid to experiment and try new things!
Frequently asked questions about clay centering
Still have questions about clay centering? Here are a few common FAQ’s:
- Q: Can I use any type of clay for centering?
- A: Generally, most types of clay will work for centering. However, some types may be more difficult to work with than others.
- Q: Can I use other tools besides a pottery wheel for centering?
- A: While a pottery wheel is the most common tool for clay centering, it is possible to use other tools as well (such as hand-building techniques).
- Q: How long does it take to center clay?
- A: Centering clay can take anywhere from a few minutes to several hours, depending on the size and complexity of the piece you’re creating.
With these tips, tricks, and techniques under your belt, you should be well on your way to mastering the art of clay centering. So go ahead – get your hands dirty and start experimenting with this incredibly rewarding and satisfying skill!