Ceramic objects can be delicate and easily break, but with the right tools and techniques, you can repair them and restore their beauty. In this guide, we will show you how to repair ceramics step by step, and provide you with essential information on types of ceramics to repair, tools required, safety measures, and tips for maintaining and caring for your repaired ceramics. Read on to learn how to repair ceramics like a pro.
Understanding the Different Types of Ceramics to Repair
Before attempting to repair your ceramics, it’s crucial to understand the various types of ceramics and their characteristics. The two main types of ceramics are china and earthenware. China is a highly refined ceramic material that is usually translucent and has a hard, smooth surface. Earthenware, on the other hand, is raw clay-based and is less refined, making it more porous and less sturdy than china. Understanding the differences between these ceramics helps to determine the right approach for their repair.
It’s also important to note that there are different types of glazes used on ceramics, which can affect the repair process. Some glazes are more resistant to heat and chemicals, while others may be more delicate and require a gentler approach. Additionally, the age and condition of the ceramic can also impact the repair process. Older ceramics may be more fragile and require more careful handling, while newer ceramics may be more durable and easier to repair. Taking these factors into consideration can help ensure a successful and long-lasting repair.
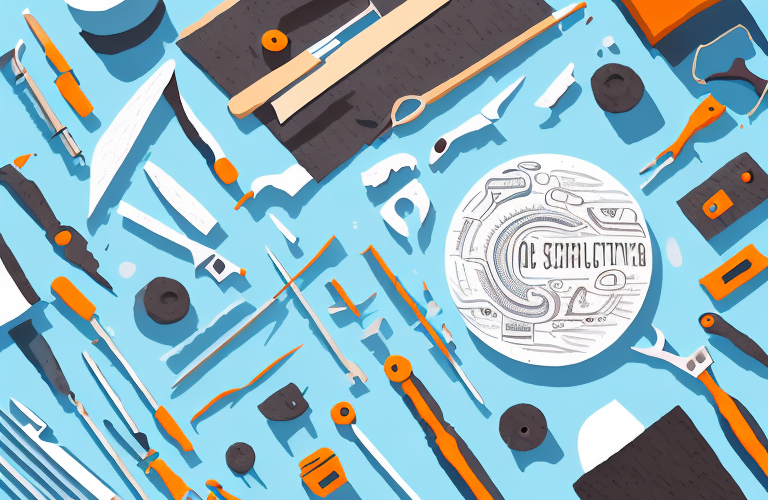
Tools and Materials Required for Ceramic Repairs
Repairing ceramics requires specific tools and materials, including a clean workspace, epoxy, a putty knife, sandpaper, a dust mask, gloves, and a quality paint or glaze. Make sure to gather everything you need before starting the repair process, and ensure that your work area is clean, well-ventilated, and free from distractions.
When selecting epoxy for ceramic repairs, it is important to choose a product that is specifically designed for ceramics. Some epoxies may not adhere properly to the surface of the ceramic, leading to a weak bond and a less effective repair. Additionally, it is important to follow the manufacturer’s instructions carefully when mixing and applying the epoxy, as improper use can also lead to a weak bond.
After completing the repair, it is important to allow the epoxy to fully cure before using or displaying the ceramic item. This can take anywhere from a few hours to a few days, depending on the specific product used and the temperature and humidity of the workspace. Rushing the curing process can result in a weaker bond and a less effective repair, so it is important to be patient and allow the epoxy to fully set before handling the item.
Safety Precautions to Follow When Repairing Ceramics
When repairing ceramics, it’s essential to take safety seriously. Always wear gloves, a dust mask, and protective eyewear to prevent inhaling any toxic particles or getting glue on your skin. Make sure to handle your tools carefully and avoid rushing as you work.
Additionally, it’s important to work in a well-ventilated area to avoid inhaling any fumes from the glue or other chemicals used in the repair process. If possible, use a respirator to further protect your lungs. It’s also a good idea to keep a first aid kit nearby in case of any accidents or injuries. Remember to dispose of any hazardous materials properly and wash your hands thoroughly after completing the repair.
Assessing the Damage: Identifying Cracks, Chips, and Breaks
Before repairing your ceramic object, it’s important to assess the damage and identify the types of cracks, chips, or breaks that need to be addressed. Carefully examine the object and mark any weak points before proceeding to the next step.
One common type of crack is a hairline crack, which is a thin, shallow crack that doesn’t go all the way through the object. Another type of crack is a deep crack, which is a wider and deeper crack that may require more extensive repair. Chips are small pieces that have broken off the object, while breaks are larger pieces that have completely separated from the object.
It’s important to also consider the location of the damage. If the crack or break is in a high-stress area, such as the handle of a mug, it may require a stronger adhesive or reinforcement to prevent further damage. Additionally, if the object is a valuable antique or has sentimental value, it may be worth consulting a professional before attempting any repairs.
How to Clean and Prepare the Surface Before Repairing
Cleaning your ceramic object before repair is essential to ensure that the surface is free from dirt, dust, or debris that can hinder the adhesive’s effectiveness. Gently use warm soapy water to clean the surface and then dry it thoroughly before proceeding.
After cleaning the surface, it is important to inspect it for any cracks or chips that may need to be filled before proceeding with the repair. Use a magnifying glass to carefully examine the surface and mark any areas that require attention.
If the surface has any stubborn stains or discoloration, you can use a mixture of baking soda and water to gently scrub the surface. Avoid using abrasive cleaners or tools that can scratch or damage the surface. Once you have cleaned and inspected the surface, you are ready to proceed with the repair.
Techniques for Filling in Cracks and Chips in Ceramic Objects
When filling in cracks, chips, and breaks in ceramics, use a high-quality epoxy that is waterproof and heat-resistant. Apply a small amount of the adhesive using a putty knife and then spread it evenly over the damaged area. Wait for the glue to dry, gently scrape any excess glue using a putty knife, and then sand the surface using sandpaper to level it out.
It is important to note that the color of the epoxy may not match the color of the ceramic object. To ensure a seamless repair, consider using a ceramic paint or glaze to match the color of the object. Apply the paint or glaze over the repaired area and let it dry completely before using or displaying the object.
How to Reattach Broken Pieces of Ceramics
If your ceramic object has broken into several pieces, reattaching them requires a bit more skill and patience. Follow the same guidelines as above but apply the adhesive in small sections, and hold the pieces firmly together for at least 24 hours until the glue dries completely.
It’s important to note that not all adhesives are suitable for ceramic repairs. Make sure to use a high-quality ceramic adhesive that is specifically designed for this purpose. Additionally, if the broken pieces have any sharp edges, use sandpaper to smooth them out before attempting to reattach them. This will help ensure a more secure and seamless repair.
Tips for Smoothing Out Uneven Surfaces on Repaired Ceramics
Smoothing out uneven surfaces on repaired ceramics requires finesse and attention to detail. Use a light touch when sanding the surface, and focus on the area that needs the most attention. Pay attention to any bumps or ridges and continue sanding until the surface is smooth to the touch.
Another important tip is to use a fine-grit sandpaper, such as 220 or 320 grit, to avoid scratching the surface of the ceramic. It’s also important to clean the surface thoroughly before sanding to remove any dirt or debris that could scratch the surface.
If the repair is on a decorative piece, such as a vase or figurine, consider using a clear coat or glaze to protect the surface and give it a polished look. Apply the clear coat or glaze according to the manufacturer’s instructions and allow it to dry completely before handling the piece.
Painting or Glazing Over Repaired Ceramic Objects
After repairing your ceramic object, you can opt to paint or glaze it over to make it look more presentable. Use a quality paint or glaze that matches the original color as closely as possible, and apply it in light, even strokes. Allow the paint or glaze to dry, and then apply another coat if needed.
When choosing a paint or glaze, it is important to consider the type of ceramic material you are working with. Some materials may require a specific type of paint or glaze to adhere properly and achieve the desired finish. It is also important to ensure that the repaired area is completely dry and free of any dust or debris before applying the paint or glaze.
If you are unsure about how to properly paint or glaze your repaired ceramic object, it may be helpful to consult with a professional or do some research to find tutorials or guides. With the right tools and techniques, you can transform your repaired ceramic object into a beautiful and functional piece once again.
Common Mistakes to Avoid When Repairing Ceramics
When repairing ceramics, it’s easy to make mistakes that can ruin the object’s overall appearance. Avoid using too much glue, as it can cause cracking and excess glue to seep out. Also, don’t sand too vigorously, as this can damage the surface. Finally, don’t rush and try to do everything at once; take your time, and focus on each step to avoid costly errors.
Another common mistake to avoid when repairing ceramics is not properly cleaning the surface before beginning the repair process. Any dirt, dust, or debris on the surface can prevent the glue from adhering properly, leading to a weak bond and potential future damage. It’s important to thoroughly clean the area with a gentle cleanser and allow it to dry completely before beginning the repair.
How to Maintain and Care for Repaired Ceramics
After repairing your ceramic objects, make sure to take care of them properly to avoid further damage or deterioration. Avoid exposure to extreme temperatures, handle them with care, and use soft cleaning materials to clean them.
Troubleshooting: What to Do If Your Ceramic Repair Does Not Hold Up
If your ceramic repair job doesn’t hold up, don’t panic. Try to identify the problem and assess what went wrong. It may be that the adhesive wasn’t suitable for the specific ceramic material, or the surface wasn’t cleaned thoroughly enough. Follow the same repair process, but this time, use a more robust glue or adhesive, and handle the object more cautiously.
With the right tools, materials, and technique, repairing ceramics is a straightforward process that anyone can do. Follow the steps outlined above, and you’ll have your beautiful ceramic objects repaired in no time. Happy repairing!