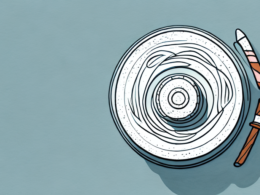
If you have ever owned a piece of ceramic or pottery, you know that accidents happen. Broken ceramics can be a frustrating and upsetting experience, but they don’t have to be the end of the road. Repairing a broken ceramic is a viable option that can bring damaged pieces back to their original state. This article will provide an in-depth guide on how to fix a broken ceramic step by step.
Why Fixing Broken Ceramics is Important
Repairing a broken ceramic is important because it can extend the life of your cherished items. Additionally, it can save you money by avoiding the need to replace expensive pieces. Repairing broken ceramics also contributes to sustainability efforts by reducing the number of items that end up in landfills.
Moreover, fixing broken ceramics can also help preserve the cultural and historical significance of certain items. Many ceramics hold sentimental value and may have been passed down through generations. By repairing these items, we are able to maintain their historical and cultural significance for future generations to appreciate and learn from.
Understanding the Different Types of Ceramic Damage
Ceramics can break in a variety of ways, but they generally fall under two categories: clean breaks and chipped/cracked ceramics. Clean breaks occur when a ceramic is broken into two or more pieces, while chipped/cracked ceramics have smaller bits missing or cracks along the surface. It is important to note the type of damage, as different types of damage will require different repair methods.
One common cause of ceramic damage is thermal shock. This occurs when a ceramic object is exposed to sudden and extreme changes in temperature, causing it to expand or contract rapidly and leading to cracks or breaks. Another cause of ceramic damage is physical impact, such as dropping or hitting the object. This can result in both clean breaks and chipped/cracked ceramics.
When it comes to repairing ceramic damage, clean breaks are often easier to fix than chipped/cracked ceramics. Clean breaks can be mended using adhesives specifically designed for ceramics, while chipped/cracked ceramics may require filling in the missing pieces with a putty or epoxy. In some cases, the damage may be too severe to repair and the object may need to be replaced entirely.
Tools and Materials You Will Need to Repair Your Ceramic
Before attempting to repair your ceramic, you will need a few tools and materials on hand. The essential tools for repairing ceramics include: gloves, safety glasses or goggles, a mask, epoxy glue, X-acto or craft knife, masking tape, sandpaper, and a putty knife.
In addition to the essential tools, you may also need some specialized materials depending on the type of ceramic you are repairing. For example, if you are repairing a ceramic vase, you may need to purchase a ceramic filler to fill in any gaps or cracks. If you are repairing a ceramic figurine, you may need to purchase paint or glaze to match the original color of the figurine.
It is important to note that some ceramics may require more advanced tools and techniques to repair. If you are unsure about how to repair a specific type of ceramic, it is recommended that you seek the advice of a professional or consult a repair guide before attempting any repairs on your own.
Safety Precautions to Follow When Repairing Your Ceramic
Safety is crucial when working with adhesives and ceramics. Make sure you work in a well-ventilated area and wear protective equipment such as gloves, safety glasses or goggles, and a mask. Additionally, it’s important to read and follow the instructions on the adhesive you’re using.
Another important safety precaution to keep in mind is to avoid using adhesives that contain harmful chemicals. Always check the label of the adhesive before using it and make sure it’s safe for use on ceramics. If you’re unsure, consult with a professional or do some research to find a safer alternative.
It’s also important to handle broken ceramics with care. Sharp edges can cause cuts and injuries, so be sure to wear gloves and handle the pieces gently. If the ceramic is broken into small pieces, use a broom and dustpan to clean up the area and dispose of the broken pieces properly.
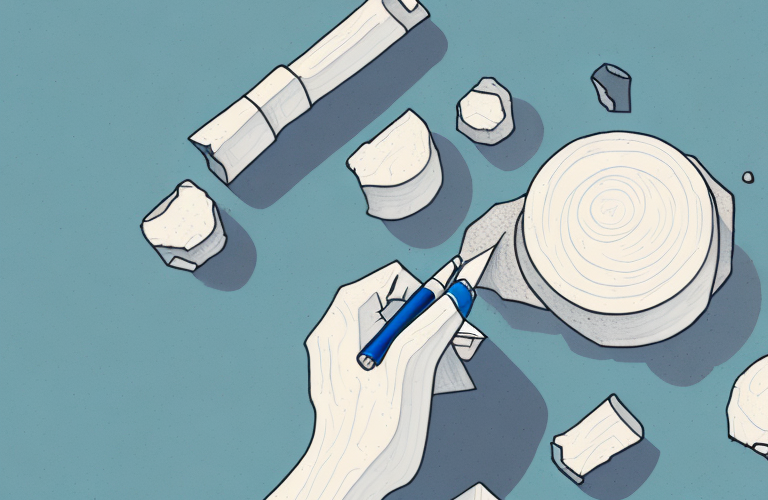
Step 1: Assessing the Damage
The first step in repairing a broken ceramic is assessing the damage. Take your time and identify any chips, cracks, or missing pieces. This will help you prepare for the repair process by identifying the specific materials needed for the job.
It’s important to note that not all ceramic repairs are the same. The type of ceramic, the location of the damage, and the extent of the damage can all impact the repair process. For example, a hairline crack in a decorative ceramic vase may require a different approach than a large chip in a ceramic tile.
Before beginning any repairs, it’s also important to clean the ceramic thoroughly. Any dirt, dust, or debris can interfere with the bonding process and weaken the repair. Use a gentle cleanser and a soft cloth to clean the ceramic, and allow it to dry completely before proceeding with the repair.
Step 2: Preparing the Ceramic for Repair
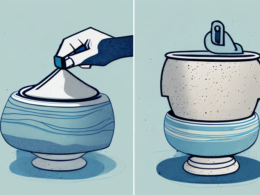
Once you have assessed the damage, prepare the ceramic for repair. Clean the broken pieces thoroughly and remove any old adhesive or debris. Make sure the pieces are dry before moving on to the next step.
Next, you will need to choose the appropriate adhesive for the type of ceramic you are repairing. There are different types of adhesives available, such as epoxy, cyanoacrylate, and silicone. Read the instructions carefully and apply the adhesive sparingly to avoid excess glue seeping out of the cracks.
After applying the adhesive, hold the broken pieces together firmly for a few minutes to allow the glue to set. You can use clamps or tape to hold the pieces in place if necessary. Once the adhesive has fully cured, you can sand down any excess glue and paint over the repaired area to match the rest of the ceramic.
Step 3: Applying Adhesive for a Strong Bond
Apply epoxy glue to one part of the ceramic and gently press the broken pieces back together. Hold the pieces in place for 1-2 minutes to allow the glue to set. Repeat the process until all the broken pieces are securely attached. Use masking tape to hold the pieces together while the adhesive dries.
It is important to note that different types of adhesives may be more suitable for certain types of ceramics. For example, super glue may work better for small, delicate pieces, while epoxy glue may be better for larger, heavier pieces. It is also important to follow the manufacturer’s instructions for the adhesive being used, as some may require a longer drying time or specific application techniques. Always wear gloves and work in a well-ventilated area when using adhesives.
Step 4: Sanding and Finishing Your Repaired Ceramic
After the adhesive has dried completely, remove the masking tape and use a putty knife to scrape off any excess glue from the surface of the ceramic. Once the glue is removed, sand the surface of the ceramic using sandpaper until the repair is smooth and even.
After sanding, wipe the surface of the ceramic with a damp cloth to remove any dust or debris. Then, apply a ceramic glaze or paint to match the color and finish of the surrounding area. Allow the glaze or paint to dry completely before using the ceramic item again.
Tips for a Seamless Repair Job
If you want to achieve a seamless repair job, there are a few things to keep in mind. First, make sure you use a good quality adhesive like epoxy glue. Properly cleaning the broken pieces before applying the adhesive is also important. Additionally, try to match the color of the adhesive to the color of the ceramic for a better aesthetic finish.
Another important tip is to allow enough time for the adhesive to dry completely before using the repaired item. Rushing the drying process can result in a weaker bond and a less durable repair. It’s also a good idea to avoid exposing the repaired item to extreme temperatures or moisture for at least 24 hours after the repair is complete. Following these tips will help ensure a successful and long-lasting repair job.
Common Mistakes to Avoid When Fixing Ceramics
There are a few common mistakes people make when fixing ceramics. These include using the wrong adhesive, not cleaning the broken pieces properly, and rushing through the repair process. Take your time and follow the steps in this guide for the best results.
Another common mistake to avoid when fixing ceramics is not using enough adhesive. It’s important to apply enough adhesive to ensure that the broken pieces are securely held together. If you don’t use enough adhesive, the pieces may not bond properly and the repair may fail.
Additionally, it’s important to consider the type of ceramic you are repairing. Different types of ceramics may require different types of adhesive or repair techniques. For example, repairing a delicate porcelain figurine may require a different approach than repairing a sturdy ceramic mug. Make sure to research the best approach for your specific ceramic item before attempting to repair it.
How to Prevent Future Damage to Your Ceramics
Preventing damage to ceramics involves being cautious and handling them with care. Avoid placing heavy objects on ceramics, and make sure they are properly stored to prevent accidental damage. Additionally, avoid using ceramics in situations where they might be exposed to extreme temperatures or pressure.
DIY vs Professional Ceramic Repairs: Which One Should You Choose?
Deciding whether to repair your ceramics yourself or hire a professional largely depends on the severity of the damage. Simple repairs like clean breaks and small chips can easily be fixed with a DIY approach. However, if the damage is extensive or if you’re dealing with expensive or valuable ceramics, it’s best to seek professional help.
Where to Find Replacement Parts for Your Broken Ceramics
If you need to replace parts of your broken ceramics, reach out to specialized ceramic repairers, pottery shops, or contact the manufacturer directly. Finding replacement parts might take time and research, but it’s important to do it right to avoid further damage or disappointment.
Conclusion: Final Thoughts and Recap of the Steps Involved in Fixing a Broken Ceramic
Overall, repairing a broken ceramic is a viable option that can extend the life of your cherished items. Remember to proceed with caution, use the appropriate tools and materials, and take your time. Follow the steps outlined in this guide for the best results.