If you’re interested in mastering the art of pottery wheel throwing, you’re in for a treat. Pottery is a craft that has enjoyed a resurgence of popularity in recent years, and the pottery wheel is an essential tool for creating beautiful, functional pieces. In this comprehensive guide, we’ll cover everything you need to know about pottery wheel throwing, from the history of the craft to the tools you need to create your own pottery studio at home.
The History of Pottery Wheel Throwing: From Ancient Times to Modern Day
In the ancient world, pottery was an essential part of daily life. The first pottery wheels were invented in Mesopotamia around 4000 BCE, and the craft quickly spread throughout the world. The ancient Greeks, for example, were renowned for their elegant pottery, and pottery from China’s Tang Dynasty is still highly prized today. In modern times, pottery is still valued for its beauty and functionality, and pottery wheel throwing remains a popular pastime and profession.
One of the most significant developments in pottery wheel throwing was the introduction of the electric pottery wheel in the 20th century. This innovation allowed potters to create more precise and consistent pieces, and it revolutionized the pottery industry. Today, many potters still use traditional kick wheels, but electric wheels are becoming increasingly popular.
Another important aspect of pottery wheel throwing is the use of different types of clay. Different clays have different properties, and potters must choose the right clay for their desired outcome. For example, porcelain clay is known for its translucency and delicate appearance, while stoneware clay is more durable and suitable for functional pieces. Understanding the properties of different clays is essential for creating successful pottery pieces.
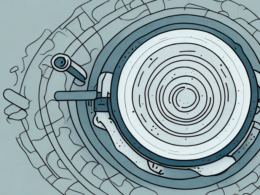
The Anatomy of a Pottery Wheel: Understanding the Different Parts
Before you can start throwing pottery, you need to understand the different parts of a pottery wheel. The wheel head is the spinning plate where you’ll place your clay, and the foot pedal controls the speed of the wheel. The splash pan catches excess water and clay, and the bat pins hold the clay in place while you work on it. Understanding the different parts of your pottery wheel is essential for a successful throwing experience.
In addition to the basic parts of a pottery wheel, there are also optional accessories that can enhance your throwing experience. For example, a trimming tool can help you shape and refine your pottery after it’s been thrown, while a Giffin Grip can hold your pottery securely in place while you work on it. Additionally, some pottery wheels come with built-in features like adjustable height and tilt, which can make it easier to find a comfortable throwing position. By exploring these additional options, you can customize your pottery wheel to suit your specific needs and preferences.
Choosing the Right Clay for Your Pottery Wheel Project
Choosing the right clay for your project is crucial for a successful pottery wheel throwing experience. There are different types of clay available, including earthenware, stoneware, and porcelain. Each type of clay has different properties, such as shrinkage rate and firing temperature, so it’s essential to choose the right clay for your project. Additionally, you can choose between different colors of clay, depending on your desired end result.
Another important factor to consider when choosing clay is its plasticity. Plasticity refers to the clay’s ability to be molded and shaped without cracking or breaking. Some clays are more plastic than others, making them easier to work with on the pottery wheel. If you’re a beginner, it’s recommended to choose a clay with high plasticity to make the throwing process smoother.
It’s also important to consider the intended use of your pottery when choosing clay. If you’re making functional pieces like plates or bowls, you’ll want to choose a clay that is durable and can withstand frequent use. Stoneware is a popular choice for functional pottery because it’s strong and non-porous. On the other hand, if you’re making decorative pieces, you may want to choose a clay that has a unique texture or color to enhance the visual appeal of your piece.
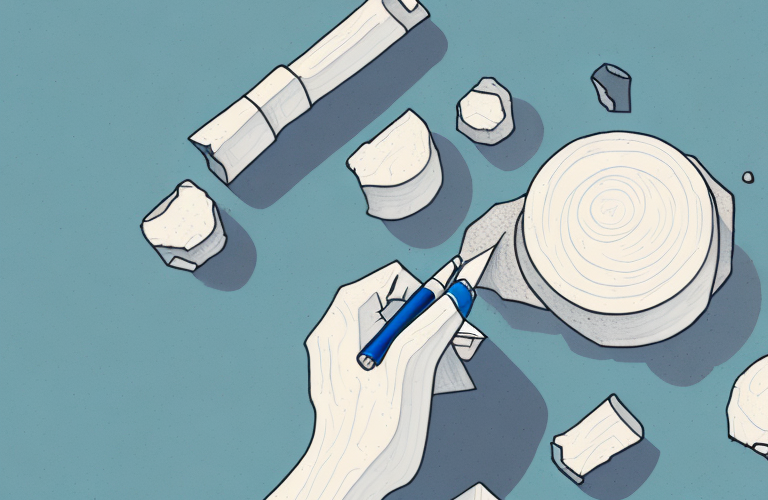
Preparing Your Clay: Wedging and Centering Techniques
Preparing your clay is essential for a successful throwing experience. Wedging your clay helps to remove any air pockets and prepare it for shaping. Centering your clay is the next step and involves getting it into the middle of the wheel head before you begin shaping it. There are different techniques for wedging and centering, so it’s essential to find the one that works best for you.
When wedging your clay, it’s important to pay attention to the consistency of the clay. If it’s too dry, it will be difficult to shape, and if it’s too wet, it will be too soft and won’t hold its shape. You can add water or clay to adjust the consistency as needed. Additionally, some potters prefer to wedge their clay by hand, while others use a machine to save time and energy.
Centering your clay can be challenging, especially for beginners. One technique is to use your hands to apply pressure to the clay while it’s spinning on the wheel head. Another technique is to use a sponge to apply pressure to the top of the clay while your hands apply pressure to the sides. It’s important to be patient and take your time when centering your clay, as it will affect the entire shaping process.
Throwing Basic Shapes on the Pottery Wheel: Cups, Bowls, and Plates
Once you’ve prepared your clay, it’s time to start shaping it on the pottery wheel. Basic shapes like cups, bowls, and plates are great starting points for a beginner. However, it takes practice to get these shapes just right. It’s important to maintain an even pressure on the clay and keep it moist throughout the process.
When throwing cups, it’s important to pay attention to the height and width of the walls. The walls should be thin enough to drink from comfortably, but thick enough to hold the weight of the liquid. Additionally, the base of the cup should be wide enough to provide stability and prevent tipping over.
Bowls and plates require a different approach. When throwing bowls, it’s important to create a smooth curve from the bottom to the rim. This will ensure that the bowl is functional and easy to use. Plates, on the other hand, require a flat surface with a slight curve at the edges to prevent food from sliding off. It’s also important to make sure the plate is thick enough to withstand the weight of food and utensils.
Advanced Pottery Wheel Techniques: Creating Unique Forms and Designs
Once you’ve mastered the basics, you can start experimenting with more advanced pottery wheel techniques. There are infinite possibilities when it comes to creating unique forms and designs, so don’t be afraid to get creative. You can add texture, carve into the clay, or even create layered pieces. The only limit is your imagination.
Perfecting Your Throwing Technique: Tips and Tricks from Master Potters
Perfecting your pottery wheel throwing technique takes time, but with the right tips and tricks, you can speed up the process. Master potters recommend practicing consistently, experimenting with different tools, and seeking out feedback from others. Additionally, it’s important to stay patient and not get discouraged if you don’t see immediate improvement.
Tools of the Trade: Essential Pottery Wheel Tools for Every Potter
There are a variety of tools you need to have on hand for successful pottery wheel throwing. Some essential tools include a sponge, trimming tools, and a wire cutter. Additionally, you may want to invest in a pottery wheel throwing kit that includes everything you need to get started. It’s important to invest in quality tools that will last, as they’ll be an essential part of your pottery practice for years to come.
Glazing Your Pottery: Techniques for Achieving Beautiful Finishes
Glazing your pottery is the final step before firing it in the kiln. Glazing can add a protective coating to your pottery and create beautiful finishes. There are different types of glazes available, including glossy, matte, and textured. It’s important to apply your glaze evenly and allow your pottery to dry completely before firing it.
Firing Your Pottery: Understanding Kilns and Temperature Control
Firing your pottery is the final step in the process, and it’s essential for creating durable and functional pieces. Firing can be done in either an electric or gas-fired kiln, and it’s important to understand the nuances of temperature control. You’ll need to choose the right firing temperature for your clay type and be mindful of the rate at which you’re increasing and decreasing the temperature.
Troubleshooting Common Problems in Pottery Wheel Throwing
Even the most experienced potters encounter problems from time to time. Common issues include cracking, warping, and uneven shapes. However, there are steps you can take to avoid these problems, such as keeping your clay moist and properly wedged and centered. Additionally, seeking out feedback and advice from more experienced potters can help you overcome these obstacles.
Creating a Successful Pottery Studio at Home or in a Shared Space
If you want to take your pottery wheel throwing practice to the next level, you may want to consider creating a dedicated space for it. Whether you have a spare room or want to set up a shared studio, there are a few key things to keep in mind. You’ll need to invest in equipment, such as a kiln and pottery wheel, and create a functional workspace that’s organized and spacious. Additionally, it’s important to invest in good lighting and ventilation to ensure a safe and comfortable working environment.
The Business of Selling Your Pottery: Marketing and Pricing Strategies for Potters
If you’re interested in turning your pottery wheel throwing hobby into a profitable business, there are a few key things to keep in mind. You’ll need to develop a marketing strategy, including building a website and creating a social media presence. Additionally, you’ll need to determine your pricing strategy based on the cost of materials and time required to make each piece. With dedication and hard work, you can turn your love of pottery into a successful business.
Mastering the art of pottery wheel throwing takes time and dedication, but with the right tools and techniques, you can create beautiful and functional pieces that will last a lifetime. Whether you’re a beginner or an experienced potter, there’s always something new to learn, so keep exploring and experimenting with this timeless craft.