Are you someone who loves pottery or collects antique ceramics? Or maybe you just want to give new life to an old piece of pottery that you couldn’t bear to part with? Reglazing pottery is a great way to reinvigorate your beloved ceramic pieces. This process may seem daunting at first, but with the right tools and a bit of patience, anyone can do it. In this step-by-step guide, we will explore the entire process of reglazing pottery, from the importance of reglazing to choosing the right type of glaze for your pottery, firing in a kiln, and caring for your reglazed pottery.
The Importance of Reglazing Pottery
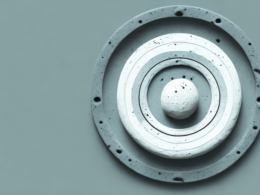
Reglazing pottery brings new life to old pieces of ceramic ware. Dull or chipped pieces can be given a fresh, vibrant look by glazing. You can also reglaze new pieces of pottery to provide a different color or texture.
Not only does reglazing pottery enhance its appearance, but it also helps to protect the piece from damage. The glaze creates a protective layer that shields the pottery from scratches, stains, and other types of wear and tear. This is especially important for functional pieces like plates and bowls that are used regularly. Reglazing can also increase the value of antique or collectible pottery, as it restores the piece to its original beauty and condition.
Tools and Materials Required for Reglazing Pottery
Several tools and materials are required for reglazing pottery. These include:
- Paint brush
- Masking tape
- Sandpaper
- Glaze
- Kiln
- Clean cloth
It is important to note that the type of glaze used will depend on the type of pottery being reglazed. For example, earthenware pottery requires a low-fire glaze, while stoneware pottery requires a high-fire glaze. Additionally, it is recommended to wear gloves and a mask when handling glaze to avoid any potential health hazards.
Preparing the Pottery for Reglazing
Clean the pottery using a mild detergent and water. Dry the pottery with a clean cloth before you start reglazing.
Before reglazing, it is important to inspect the pottery for any cracks or chips. These imperfections can affect the final result of the reglazing process. If you find any cracks or chips, it is best to repair them before proceeding with the reglazing.
Additionally, it is recommended to wear gloves and a mask while reglazing pottery. This will protect your skin from any chemicals in the reglazing solution and prevent you from inhaling any fumes. Safety should always be a top priority when working with any chemicals or materials.
Choosing the Right Type of Glaze for Your Pottery
Several types of glazes are available in the market. Research and choose a glaze that best suits the look you want. Ensure that you choose the right type of glaze for the type of pottery you are working on.
One important factor to consider when choosing a glaze is the firing temperature. Some glazes require a higher firing temperature than others, so it’s important to choose a glaze that is compatible with the type of clay you are using and the firing temperature of your kiln.
Another consideration is the intended use of the pottery. If the pottery will be used for food or drink, it’s important to choose a glaze that is food-safe and non-toxic. Some glazes may contain harmful chemicals that can leach into food or drink, so be sure to read the label carefully before purchasing a glaze.
Applying the First Coat of Glaze
Apply the first coat of glaze to the pottery using a paintbrush. Apply the glaze evenly and be careful not to use too much. If too much is applied, it can cause the glaze to chip off.
It is important to let the first coat of glaze dry completely before applying the second coat. This will ensure that the glaze adheres properly and does not crack or peel off. Depending on the type of glaze used, the drying time can vary from a few hours to overnight. It is best to refer to the manufacturer’s instructions for specific drying times.
Sanding the First Coat of Glaze for a Smooth Finish
Once the first coat of glaze dries, the pottery needs to be sanded to achieve a smooth finish. Use sandpaper to carefully sand the glaze before applying another coat of glaze. Make sure to clean the dust created by the sanding before further application of glaze.
It is important to note that the grit of the sandpaper used for sanding the glaze can affect the final finish of the pottery. A finer grit sandpaper will result in a smoother finish, while a coarser grit will leave a rougher texture. Experiment with different grits to achieve the desired finish.
Additionally, it is recommended to wear a dust mask while sanding the glaze to avoid inhaling any harmful particles. Proper ventilation in the workspace is also important to prevent the accumulation of dust. Take breaks as needed to avoid overexposure to the dust and to give your hands a rest from the sanding process.
Applying the Second Coat of Glaze
Apply the second layer of glaze in a similar way as the first coat. Ensure that you have a consistent layer that isn’t too thick.
It’s important to note that the second coat of glaze should be applied after the first coat has completely dried. This will prevent the glaze from becoming too thick and uneven. Additionally, if you notice any areas that need touch-ups, wait until the second coat has dried before making any adjustments. This will ensure that the glaze has a smooth and even finish.
Firing the Pottery in a Kiln
Bake the pottery in a kiln as instructed by the glaze manufacturer. Specific instructions may vary depending on the type of pottery and glaze you’re working with, so make sure to follow the manufacturer’s instructions.
It’s important to note that firing pottery in a kiln can be a lengthy process, often taking several hours or even days depending on the size and thickness of the pieces. It’s important to be patient and not rush the process, as this can lead to cracking or other damage to the pottery. Additionally, it’s important to allow the pottery to cool slowly once it’s been fired, as rapid cooling can also cause cracking or other damage.
Tips for Achieving a Professional-Looking Finish
To achieve a professional-looking finish, make sure to be patient and work carefully. It’s essential to be precise in applying the glaze coats evenly and sanding carefully; this ensures a uniform look.
Another important tip is to use high-quality materials. Using cheap or low-quality materials can result in an uneven finish or even damage to the surface you are working on. Additionally, it’s important to follow the manufacturer’s instructions carefully, including the recommended drying times between coats. Rushing the process can lead to a less-than-perfect finish. Finally, don’t be afraid to ask for help or advice from professionals or experienced DIYers. They may have tips or tricks that can help you achieve the best possible result.
Common Mistakes to Avoid While Reglazing Pottery
Common mistakes while reglazing pottery include mixing glaze incorrectly, using an inappropriate glaze, applying glaze unevenly, and not firing the pottery long enough. Avoiding these mistakes is essential when trying to achieve a perfect finish.
Another common mistake to avoid while reglazing pottery is not properly cleaning the pottery before applying the glaze. Any dirt, dust, or residue left on the pottery can affect the adhesion of the glaze and result in an uneven finish. It is important to thoroughly clean the pottery with soap and water and let it dry completely before applying the glaze.
Caring for Your Reglazed Pottery
Once your pottery is reglazed, ensure that you handle it carefully, avoiding scratches and touching it with dirty hands. It is best to clean it with a soft, clean cloth after use or display it as a beautiful work of art in your home.
Reglazing pottery is a tested and proven way to renew ceramic ware. Choose your glaze, gather your tools, and begin your reglazing journey today!
It is important to note that reglazed pottery may not be suitable for use with food or beverages. Some glazes may contain harmful chemicals that can leach into your food or drink. If you plan to use your reglazed pottery for food or drink, make sure to choose a food-safe glaze and follow all safety guidelines for handling and using ceramic ware.