Clay is a versatile material used in countless mediums, from sculpture to pottery. Understanding the five stages of clay is crucial for anyone who wants to develop their skills as an artist or craftsman. In this comprehensive guide, we’ll give you a thorough rundown of each stage and teach you how to work with clay more efficiently and effectively. Let’s begin.
An Introduction to Clay: Properties and Uses
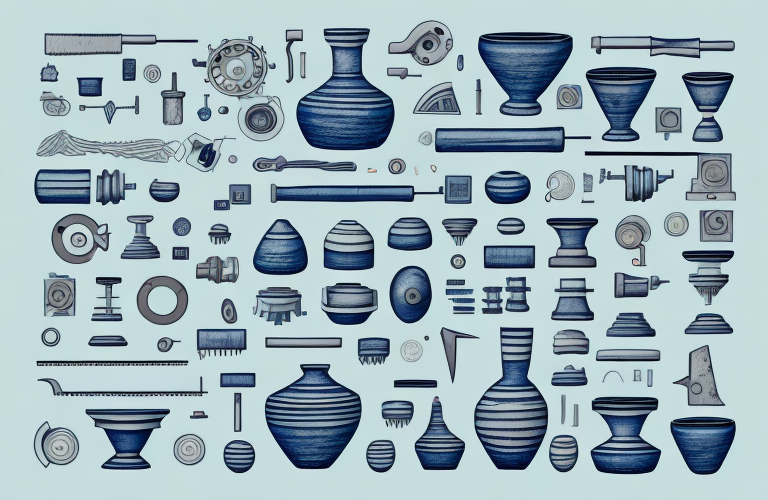
Before we delve into the five stages of clay, it’s essential to understand the properties of clay and its various uses. Clay is a sedimentary rock that is made up of tiny mineral particles. It is pliable and can be molded into any desired shape, which makes it a popular material for creating sculptures, figurines, and pottery. Clay is also used in construction and manufacturing, like in the bricks used to build houses and the pipelines that transport water and gas.
One of the unique properties of clay is its ability to retain water. This makes it an ideal material for creating planters and other gardening tools. Clay pots are porous, which allows air and moisture to circulate around the roots of plants, promoting healthy growth. Additionally, clay is an excellent insulator, which makes it useful in creating fireproof materials like oven bricks and tiles.
Clay has been used for centuries in traditional medicine practices. It is believed to have healing properties and is used in various forms, including clay masks, poultices, and baths. The clay is said to draw out toxins from the body and promote overall wellness. In recent years, clay has gained popularity in the beauty industry, with many skincare products containing clay as a key ingredient.
The Five Stages of Clay: Understanding the Process
Each stage of clay has distinct properties that dictate how it can be molded, cut, hardened, and used. The five stages of clay are slip, plastic, leather hard, bone dry, and bisqueware. Understanding the characteristics of each stage will help you create high-quality ceramics that are resistant to damage and cracks.
It is important to note that the drying process of clay can greatly affect the final outcome of your ceramic piece. If the clay dries too quickly, it can cause cracking and warping. To prevent this, it is recommended to cover your piece with plastic or a damp cloth during the drying process. Additionally, it is important to let your piece dry completely before firing it in the kiln to avoid any potential explosions or damage to the piece.
Stage 1: Slip – What It Is and How to Use It
Sugar and water create slip, a creamy liquid that is used for decoration or gluing clay pieces together. Slip is essential in stage one because it can be used to add extra moisture to dry clay or to bond different clay pieces. Slip can also be used to add surface detail to your ceramic piece. When working with slip, it’s important to follow these best practices:
- Wear gloves
- Only use small amounts
- Be precise in application
- Allow drying time before moving to the next stage
Another important use of slip in stage one is to create a smooth surface on your clay piece. By applying a thin layer of slip and then smoothing it out with a tool, you can eliminate any bumps or imperfections on the surface of your clay. This will make it easier to work with in the later stages of the ceramic-making process.
It’s also worth noting that slip can be colored using ceramic stains or oxides. This allows you to add color to your clay piece in the early stages of the process, rather than waiting until the glazing stage. Keep in mind that the color of the slip will change slightly after firing, so it’s important to test your colors before applying them to your piece.
Stage 2: Plastic – How to Manipulate Clay
Plastic clay is typically the most familiar form of clay for people, and it gets its name from its pliability. Working with plastic clay involves many techniques, including throwing, hand-building, carving, sculpting, and cutting. Here are some tips for working with plastic clay:
- Keep the clay moist
- Avoid overworking the clay
- Use tools designed for plastic clay
- Allow drying time before moving to the next stage
One important thing to keep in mind when working with plastic clay is to avoid introducing air bubbles into the clay. Air bubbles can cause the clay to crack or explode during firing. To prevent this, it is important to wedge the clay thoroughly before beginning to work with it. Wedging involves kneading the clay to remove any air pockets and ensure that the clay is uniform in texture.
Another technique that can be used when working with plastic clay is slip casting. Slip casting involves pouring liquid clay, or slip, into a plaster mold. The plaster absorbs the water from the slip, leaving a layer of solid clay on the inside of the mold. Slip casting is a great way to create multiples of the same object, and it can be used to create complex shapes that would be difficult to achieve through other methods.
Stage 3: Leather Hard – Tips for Working with Semi-Dry Clay
Leather hard clay is partially dry, yet still pliable. At this stage, the clay retains its shape but won’t stick to the table or modeling tools. When working with leather hard clay:
- Use a light touch with your tools
- Be careful not to break your piece
- Allow enough time for your piece to dry before moving to the next stage
Stage 4: Bone Dry – Preparing for Firing
Bone dry clay is entirely dry and ready for firing. At this stage, the ceramic piece will no longer bend or be malleable. Here are some precautions to keep in mind when working with bone dry clay:
- Avoid overhandling your piece
- Don’t use too much pressure with your tools
- Avoid touching your piece with water or any other liquids
- Be gentle while transporting your piece to the kiln
Stage 5: Bisqueware – Understanding the First Firing Process
Bisqueware is clay that has been fired at a high temperature but has not yet been glazed. The firing process removes water and other impurities and hardens the clay. Here are some tips for working with bisqueware:
- Be gentle when handling the piece
- Avoid applying pressure or bumping it
- Avoid getting water on the piece before glazing
- Be cautious when transporting to and from the kiln
The Importance of Consistency in Clay Stages
It’s essential to maintain consistency between the stages of clay, from its moisture content to its shape and texture. Proper consistency and timing ensure your ceramic pieces will have the desired shape and resist cracking and other defects.
Troubleshooting Common Issues in Each Clay Stage
Each stage of clay has its challenges, from cracking to drying unevenly. Here are some of the most common issues and how to troubleshoot them:
- Warping – caused by uneven drying, when one part dries faster than the rest of the piece. To avoid this problem, wrap your piece in plastic wrap or store it in a damp environment.
- Cracking – this happens due to a sudden change in temperature, causing the clay to contract and expand. To avoid cracking, make sure your piece is dry and at room temperature before firing, and avoid any drastic changes in temperature.
- Breaking – usually happens due to too much pressure or rapid changes in temperature. To avoid breaking, be gentle with your pieces and handle them with care.
Advanced Techniques for Working with Each Clay Stage
For more experienced artists and craftsmen, there are advanced techniques available to create unique and compelling ceramic pieces. We recommend attending workshops, reading tutorials, and practicing, to hone your skills and improve your craftsmanship.
How to Store and Rehydrate Your Clay Between Stages
Clay requires specific storage conditions, and it’s essential to keep it moist but not too wet. The best way to store clay is by using airtight containers or plastic bags. Make sure to label your container with the type of clay and date to avoid confusion. If your clay becomes too stiff or dry, use a spray bottle to rehydrate it slightly.
The Role of Temperature and Humidity in the Clay Drying Process
Temperature and humidity significantly impact the clay-drying process. Clay that is too dry can crack or warp during firing, while clay that is too wet can become moldy or unusable. A dehumidifier can be used to control the humidity level in the workspace, while fans or heaters can be used to maintain a consistent temperature.
Exploring Different Types of Clays and Their Unique Characteristics
There are many different types of clays, each with its unique properties, strengths, and weaknesses. Some of the most common clays include earthenware, stoneware, and porcelain. Each of these has a different firing temperature, texture, and color. We recommend experimenting with different types of clays to find which one suits your needs the most.
Comparing the Five Stages of Clay Across Different Types of Clays
While the five stages of clay are consistent across different types of clays, each type of clay has specific properties and requires different firing temperatures and techniques. Understanding how each type of clay reacts in different stages is essential for creating successful ceramics.
Utilizing Your Knowledge on the Five Stages of Clay in Ceramic Art Projects
Now that we’ve covered the five stages of clay in exhaustive detail, it’s time to put that knowledge into practice. Experiment with different techniques in each stage to create unique and exciting ceramic pieces that showcase your skills and creativity.
Safety Precautions When Handling Different Types of Clays
While working with clay, there are some safety precautions you should take to avoid injury or illness. Wear gloves while handling clay, and wash your hands frequently. Avoid inhaling dust or fumes, and store your clay in properly labeled containers to avoid contamination.
Best Practices for Cleaning Tools After Each Stage
Properly cleaning your tools after each stage of clay is crucial to maintain the quality and longevity of your tools. Wash your tools with soap and water, and dry them thoroughly before storing them. If there is any clay residue left on your tools, use a wire brush or sandpaper to remove it.
Tips for Maintaining a Clean and Efficient Workspace When Working with Clays
A clean and efficient workspace is critical when working with clay. We recommend having separate areas for each stage of clay, with designated tools and supplies for each area. Use a vacuum or dustpan to clean your workspace during and after each project to avoid contamination and keep your workspace tidy.
Congratulations! You’ve completed the comprehensive guide on the five stages of clay. With this knowledge and practice, you’re one step closer to becoming an efficient and skilled ceramic artist or craftsman.