Clay is a versatile and malleable material that can be used to create both functional objects and artistic works. Working with clay can be a difficult task, but with the right techniques and tools, it’s possible to create amazing masterpieces! In this article, we’ll discuss the 7 stages of working with clay and everything involved in the process.
What is the Process for Working with Clay?
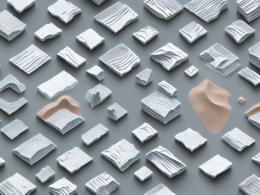
The process for working with clay typically starts with the gathering of raw materials. Clay must be carefully sourced from different sources to ensure the highest quality and the best results. The raw clay is called “lump” and must be processed before it can be used. This includes wedging, which will remove air bubbles, compact the clay, and make it easier to work with.
The next stage of clay processing involves preparing the clay for use. This includes using a potter’s knife to cut and trim, removing any debris, and rolling out a desired thickness. Once the clay is ready, sculpting, molding, and glazing can be applied to the structure to create a desired shape and finish.
What is Wedging and How Does it Affect Clay?
Wedging is an essential part of the clay-working process. It is a kneading motion used to remove air bubbles, distribute moisture evenly throughout the lump of clay, and compress it into a workable form. Essentially, it readies the clay for further manipulation and prevents air pockets which can cause your finished product to crack or crumble. Wedging is important as it ensures your clay is ready for sculpting, molding, glazing, or any other form of application.
What are the Steps to Preparing Clay for Use?
Preparing clay for use is the next step in the clay-working process. This includes using a potter’s knife to cut and trim the lump of clay – removing any excess lumps or debris – and rolling it out to the desired thickness. The thickness of your clay will depend on what you want to create. For example, if you’re making a flat plate or bowl, you may want to roll it out thinner than if you are planning to sculpt a vase or figurine.
Once the clay is ready, you can begin sculpting and molding it into your desired shape. This can be done either by hand or by using a pottery wheel. In either case, it’s important that the clay is kept moist throughout the process to ensure an even finish. Adding artistic detail, such as texture or glaze, will require extra time and effort – but this can also help make your work stand out.
What Tools and Equipment Are Needed for Working with Clay?
Working with clay requires a few essential tools and materials. These include a pottery wheel, potter’s knife, slip casting tools, underglaze colors, and glaze colors. You’ll also need a kiln – ideally a gas-fired one – this will be necessary for firing your final product.
In addition to these tools and materials, you’ll also need clay-working knowledge. This includes how to manipulate clay and achieve the desired shape and finish. Practice and experience go a long way in mastering this craft!
How to Achieve the Right Consistency with Different Types of Clay?
The way that different types of clays respond to manipulation will differ depending on factors like temperature, humidity and water content. Different types of clays have an ideal ‘working window’ at their optimal state of wetness before they become too dry or too wet to work with. To achieve the right consistency with clay you will need practice, as well as knowledge of how each type of clay behaves best.
Porcelain clays require the most precise attention when it comes to achieving the right consistency. They have a limited working window in which they are malleable enough to shape. Whereas earthenware clays are incredibly forgiving and hold their shape very well while they are drying.
The Importance of Drying and Firing Clay
Once your piece of art is complete and you are satisfied with the outcome, it’s time for drying and firing your work. Before firing can begin, the artwork must be dried thoroughly in order to prevent cracking or warping during the process. The time needed for drying will depend on the climate conditions in your area.
Once dry, the artwork will then proceed to firing. It is during this phase that you will see significant changes in your piece. Firing at higher temperatures can permanently alter the color and texture of your artwork as well as make it harder, stronger, and more durable.
Troubleshooting Common Problems When Working with Clay
Working with clay can be very challenging at times, especially when problems arise. The most common issues faced when working with clay are cracking, warping, and sagging. While these issues are inevitable experienced while working with clay – particularly if you’re new at pottery – they can be prevented or mitigated with good practice and knowledge of how each type of clay behaves.
Cracking is caused by uneven drying or drying too quickly; warping is caused by excess moisture in the clay; and sagging occurs when too much pressure has been applied during manipulation or when too much liquid or water has been added. Understanding your materials is essential in avoiding these common problems while working with clay.
Creative Ideas for Using Different Types of Clay in Art Projects
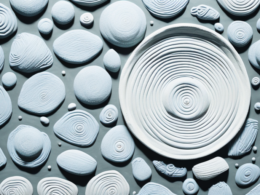
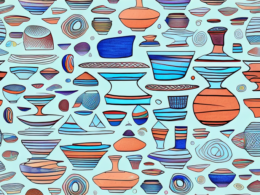
Clay is an incredibly versatile material that can be used to create sculptures, jewelry, pottery, and much more! With a bit of creativity and imagination, it’s possible to create beautiful works of art with clay. For example, you can use air-dry clays to make figurines that capture life-like poses or create bright porcelain sculptures illuminated by light. You can also use different glazing components like underglaze or overglaze to color your pieces or give them shiny finishes.
Clay is also great for creating functional objects; from gorgeous cups and plates to beautiful dishes and useful containers. Working with clay can also be a fun activity for children; as it’s an enjoyable way for them to express themselves creatively and explore their imaginations.
Alternatives to Working with Clay
Working with clay can be an immensely fulfilling hobby but unfortunately not everyone has easy access to resources. Fortunately there are alternatives available that provide similar results without having bulky equipment involved. These include polymer clays like CraftGuard, casting resins like Moldstar 36 Soft, and even kinetic sand! All of these materials can provide excellent results in making sculptures and other objects without having traditional clays.
So if you are looking for an alternative to working with clay but still want to create beautiful pieces of art and functional objects – don’t worry! There are plenty of options out there that you can try out.
The 7 stages of working with clay are:
- Gathering raw materials
- Wedging
- Preparing for use
- Sculpting/molding
- Glazing
- Drying
- Firing
By understanding each of these stages and learning how to properly manipulate them, you will be able to create amazing works with even the simplest of materials!