When it comes to ceramics and clay art, knowing the three basic hand building techniques can help you create amazing pieces of art. Hand building is a type of ceramic art form that involves creating a three-dimensional form out of clay or other ceramic materials without the use of a potter’s wheel. In this article, we’ll discuss the three basic hand building techniques and how they can be used to make beautiful and unique pieces of art. We’ll also include tips on working with clay, insights into the advantages of this method of clay work, and troubleshooting advice.
How to Roll a Coil
The first of the three hand building techniques is rolling a coil. This involves rolling out a long strip of clay and then joining the ends of the strip together to form a continuous coil. The first step is to roll out the clay on a flat surface to create a strip about 1/4 inch thick, round in cross-section, and about 4 inches wide. When rolling, make sure to apply even pressure and to move your hands in a circular motion to avoid creating flat spots.
Once you have a strip rolled out, join the ends together. Make sure that you have a good seal by running your fingers along the seam to make sure there are no gaps. You can then roll the coil onto itself to create a spiral shape. The thickness of the coil depends on the application, but for many applications you will want to create a coil that is between 1/4 and 1/2 inch thick.
When you are finished, you can then use the coil as part of a larger structure or form. Coils are great for making round vessels with walls of uniform thickness and can also be used to make handles or spouts. With practice, you can create beautiful and intricate designs by varying the thickness of the coil or using coils in creative combinations.
How to Pinch a Pot
The second of the basic hand building techniques is pinch potting. Pinch potting involves taking a small ball of clay and then pushing it against your thumb and forefinger to create a hollow form. It takes practice to get the form even and find the right pressure to pinching techniques. Start by rolling out your clay into a ball about 1 1/2 inches in diameter. Once you have done this, use your fingers to press into the ball and on the sides until you form an upside-down bowl shape.
During this process, you may find that your thumb is softening the clay too much which can lead to a deformed shape. To avoid this, use your forefinger to press against the base of the pot, ensuring that it keeps its shape. When finished with this step, use your fingers to pinch and smooth the sides of the pot, making sure that it doesn’t become too thin. Once you have finished pinching, you can add decorative elements such as handles or spouts that have been made using coil building.
How to Slab Build a Form
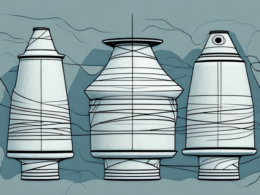
The third hand building technique is slab building. Slab building involves rolling out large pieces of clay in even thickness with flat planes or curves on either side. A typical slab should be between 1/4 and 3/4 inch thick. To begin creating a slab, roll out a piece of clay on a flat surface until it reaches the desired thickness. If you are creating curved forms, use a rolling pin to roll out larger pieces and then curve them by hand. You can also use molds or templates to create complex shapes.
Once you have your slabs rolled out, you can use slabs to create almost any kind of three-dimensional form. To do this, you will need to join two or more slabs together using a score-and-slip technique; score both surfaces with a needle tool, apply slip to each surface, then press them together until they join securely. This technique can also be used to create features such as spouts and handles.
Slab building is a versatile technique that can be used for making flat-bottomed vessels or for creating decorative elements for tiles or other ornamental pieces. With practice, you can create beautiful pieces that have complex shapes and curves.
Tips for Working with Clay
When working with clay, there are some general tips to keep in mind that will help make your process smoother:
- Choose the right type of clay: Different types of clay have different properties, so make sure you choose one that is appropriate for your project.
- Work on a clean surface: When working with clay, ensure that your work surface is clean and free from dirt or dust.
- Keep your hands moist: Keeping your hands moist will make the clay easier to manipulate and will help avoid cracks.
- Remove air bubbles: When working with clay, use a needle tool to puncture any air bubbles that may have formed.
- Work from the inside out: When shaping a vessel or other form, start by working on the inside before moving onto the outside.
- Take your time: Letting the clay rest and working slowly allows more time for details and finishing touches.
Benefits of Hand Building Ceramics
Hand building allows for great creativity and flexibility. You can quickly experiment with different shapes and forms without having to invest in expensive equipment or tools. Due to its tactile nature, hand building is also enjoyable and therapeutic which can lead to better mental health benefits. Lastly, hand building can also help pave the way towards using potter’s wheels; this method of construction can be used as an introduction to wheel throwing without the need for significant investment.
Common Mistakes When Hand Building
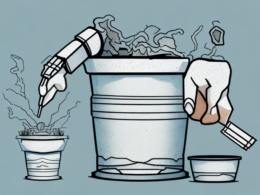
One common mistake when hand building is using too much water when working with clay. Too much water can cause cracking when drying and firing and will also weaken structures which can lead to pieces collapsing during firing. Make sure that when working with clay that you add only enough water needed to make it pliable enough for forming.
Another common mistake when hand building is not finishing edges properly. It is important to take time to carefully finish edges and shapes as rough edges can lead to cracking during drying or firing. For most pieces, sanding after drying and before firing will help create smoother edges.
Troubleshooting Hand Building Techniques
When hand building there are some common problems that may occur which can be easily remedied. One common problem is weak connections between parts of pieces due to lack of score-and-slip connection. Always take extra time making sure that parts are firmly connected, as this will ensure strong connections and avoid collapses or breakage during firing.
Another common problem is small cracks or warping in pieces during drying due to uneven thickness in sections. It is important to ensure even thickness of all sections before drying and if warping occurs during drying, carefully manipulate them into the desired shape before firing.
Creative Ways to Use Hand Building Techniques
Hand building techniques can be used for making anything from large vessels to small ornamental pieces. In addition to more traditional forms such as cups or jars, slab building techniques can also be used for making plates or decorative tiles. Coil techniques can be used for making handles or spouts for vessels as well as for making more free-form sculptures that don’t need a rigid structure.
You can also combine different techniques for making complex forms; for example, coils can be joined onto slabs for making lidded forms or adding decorativefeatures. You can also play with different colors by varying colors between sections; this can result in interesting marbling effects when firing.
Resources for Further Exploration of Hand Building Techniques
If you’re interested in further exploring hand building techniques there are plenty of resources available both online and in print. There are numerous videos available showing different hand building techniques as well as step-by-step tutorials demonstrating how to create specific forms. There are also plenty of books available on hand building that cover all topics from beginners through advanced.
No matter what your skill level or experience level is there are plenty of resources available to help hone your craft in hand building ceramics. From online courses and tutorials through educational books, there is something available that will help you become an expert at hand building end explore all its creative possibilities.