Have you ever thought of firing up those mugs, jars, and vases you’ve made in your own oven? Pottery with a glazed coating is the perfect way to make any unique piece of ceramic stand out. Glazing pottery takes talent and skill, and amazingly you can glaze pottery in your own oven! Here are all the things you need to know to get started.
What Kind of Oven Is Needed?
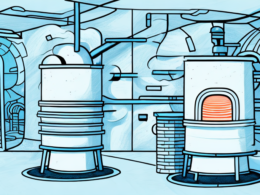
No matter what type of pottery you’re glazing, you need an oven that can reach high temperatures. If you don’t have the right type of oven, the glaze will never reach its full hardness or shine. You can use an electric or gas oven, outside wood-burning ovens, or kilns. Kilns are typically the most efficient and convenient way to glaze pottery.
When using an electric or gas oven, you should make sure that it can reach temperatures of at least 2000°F. If you’re using a wood-burning oven, you should make sure that it can reach temperatures of at least 2400°F. Kilns are the most reliable option, as they can reach temperatures of up to 3000°F. No matter which type of oven you choose, it’s important to make sure that it can reach the necessary temperatures for glazing pottery.
What Temperature Should the Oven Be Set To?
Before you get started glazing, you’ll need to get your oven hot enough to achieve the desired results. Depending on the type of glaze you’re using, you’ll need to set your oven temperature between 1500°F and 2000°F. Make sure to check the manufacturer’s instructions as not all glazes can handle these high temperatures.
When setting the oven temperature, it is important to remember that the temperature should be consistent throughout the baking process. If the temperature fluctuates, it can cause the glaze to crack or bubble. Additionally, it is important to preheat the oven before adding the glaze to ensure that the glaze is cooked evenly.
What Glazes Are Best Suited for Oven Glazing?
When it comes to selecting the right type of glaze for oven glazing, it’s important to consider how long it takes to make and how durable it is. Low-fire glazes are ideal because they require lower temperatures and create a strong, glossy finish. These glazes can also be made with ingredients that are easy to find and don’t require a lot of tools.
High-fire glazes are also an option, but they require higher temperatures and can be more difficult to work with. Additionally, they may require specialized tools and ingredients that can be harder to find. However, high-fire glazes are more durable and can create a more vibrant finish.
What Safety Measures Should I Take When Glazing Pottery in an Oven?
Glazing pottery in an oven is a great way to achieve professional results, but it does come with certain safety concerns. Make sure your area is well ventilated and always wear safety goggles and gloves when you’re working with high temperature materials. It’s also important to keep flammable materials away from your work area.
What Other Options Are There for Glazing Pottery?
If you don’t have access to an oven or kiln, there are still options for creating a beautiful glazed finish on your pottery. You can use acrylic paints, air-dry glazes, or spray sealants as an alternative way to add shine to your pieces. You can also use stains or oxides to add colors to your pieces.
How to Prepare the Clay Before Glazing
Preparing the clay before you apply the glaze is a crucial step in creating a successful end result. Make sure the clay is completely dry before you start. Sanding it helps smooth any edges and removes any particles from the surface of the piece. If using an oil-based glaze, you should also seal the ceramic piece before you begin glazing.
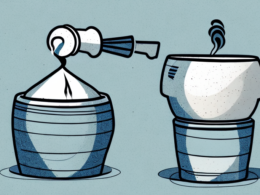
How to Apply the Glaze
Once your clay is prepared, it’s time to glaze. If you’re using a brush, gently dip it into the glaze and begin applying it from the center of the piece outward. After each layer has dried, use a clean brush to buff the glaze to a shine. If you’re using a sponge, hold it firmly against the surface of the piece and spread the glaze outward.
How to Fire the Pottery After Glazing
Once you’ve applied your desired amount of layers of glaze and let them dry, it’s time to fire up your oven. Place your pieces on an oven-safe shelf and set the temperature according to the manufacturer’s instructions. When the pieces are done firing, let them cool off inside the oven before removing them.
Tips and Tricks for Successful Oven Glazing
Glazing pottery in an oven requires skill and practice. Here are some tips and tricks for successful oven glazing:
- Double check that your oven is properly preheated to the desired temperature
- Use a soft brush for evenly spreading glaze
- Always wear safety equipment when working with high temperatures
- Keep your work area free of flammable materials
- Check your pieces every 15 minutes during firing
Glazing pottery in your own oven is an effective way to create beautiful, unique pieces of ceramic art. With a little practice, you can become confident in creating perfect pottery that has a colorful, glossy finish.