Ceramics is a brilliant art form in which you can display your creativity and passion. But, of course, you need to know the basics of ceramics to make sure you create strong, beautiful pieces. One particular rule to ceramics, known as the ‘thumb rule’, is a great way to ensure that your pieces come out perfect every time.
What is the purpose of the thumb rule in ceramics?
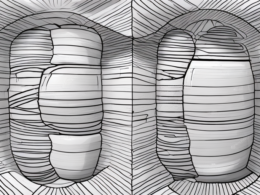
The thumb rule is a method of shaping a piece of ceramic in an even and consistent way. This ensures that your piece ends up being perfectly symmetrical and balanced. By measuring the angles, curvature and thickness of a piece in relation to the size of your thumb, it is easier to shape the piece in a controlled way, and keep it uniform at each stage.
How to use the thumb rule in ceramics
Using the thumb rule is relatively simple. All you need is a piece of ceramic that’s ready to be shaped and some basic tools like a potter’s wheel and a loop tool. Firstly, it’s important to measure the distance from the centre point of your piece of ceramic to the sides that you want to shape. This determines the angle at which you will make your cuts. Once you’ve marked your measurements carefully, you can use a loop tool to carefully carve into the clay until you are satisfied with the shape.
Once the shape is done, use your thumb to measure the thickness of your piece. You want it to be a uniform thickness all around. It is important that the outside edge is slightly thicker than the middle, as this ensures that your ceramic will remain strong over time.
Benefits of using the thumb rule in ceramics
Using the thumb rule when crafting ceramic pieces can be very time-saving and effective. Firstly, by using the measurements relative to your thumb, you are able to have greater control over the appearance of your piece. In turn, this is useful when producing items of import to ceramics enthusiasts such as mugs, bowls and plates that have perfectly formed edges and walls.
Another benefit of using the thumb rule is that it allows you to create pieces in a more consistent fashion. This means that you will likely get results that hold up better over time, as well as lasting perfection that you may be aiming for. As such, this technique is ideal for creating sturdy pieces with intricate designs.
Common mistakes to avoid when using the thumb rule
One mistake that often gets made when using the thumb rule is taking measurements from overly curved parts of the ceramic. When using this technique, it’s important to make sure that your measurements are taken from only straight lines or edges on the piece. Taking measurements from curved areas may result in an inconsistent shape after carving.
Another common mistake is applying too much pressure when you carve into the ceramic. Too much pressure is not only dangerous as there is a chance of breaking or damaging the piece by accident, but it can also cause issues with the uniformity of thickness and lower the quality of the final product.
Examples of using the thumb rule in various ceramic designs
If you are stuck for inspiration when it comes to using the thumb rule, here are a few examples of how this technique can be applied in various ways:
- Mugs: Measure the outside edge of your mug and use a loop tool to carve around it evenly and consistently. Cut evenly into each side until you are satisfied with the shape – remember to bear in mind the thickness of your mug.
- Bowls: Measure each side of your bowl and make sure that it is always symmetrical. Cut into the clay until your bowl has nice curved edges and walls.
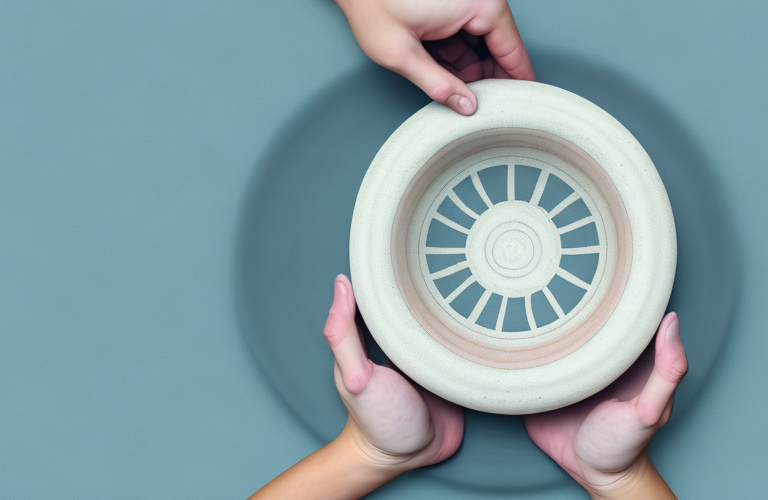
- Plates: Measure the rim of your plate in relation to your thumb. With a loop tool, make sure that it has equal thickness throughout – this will help it stand upright when being used.
Tips for mastering the thumb rule in ceramics
- Practice makes perfect: It takes time to master this technique, so don’t give up if your pieces don’t come out perfect right away.
- Take your time: Don’t rush through this process – take time with each phase and make sure that everything is on point.
- Below the surface: Keep in mind that what lies beneath what you carve also counts – so make sure that you sculpt at perfect angles in order for your piece to remain strong over time.
Alternatives to using the thumb rule in ceramics
Although using the thumb rule is an easy and reliable way to obtain uniform shapes with your ceramics, there are some alternatives available too.
- Slumping: This technique involves shaping two or more pieces together to form thicker pieces or curved walls.
- Slip trailing: This involves thinning ceramic slip, and then using it to build up thin layers in order to form thick pieces.
- Intermediate hump moulding: This involves rolling out a thin slab of clay and then pressing it into a mould.
Tools and materials needed for using the thumb rule in ceramics
- Potter’s wheel: A potter’s wheel will help you get a neat finish when shaping your ceramics.
- Loop tools: Loop tools come in all shapes and sizes, so make sure you pick one that is suitable for your piece.
- Rolling pin: You will need a rolling pin handy if you need to shape something that needs a curved edge.
- Sponge: To ensure that your ceramic piece remains relatively even, use a damp sponge for smoothing and rounding off edges.
- Clay knife: When taking measurements from the exterior of your piece or when making finer detailing, use a clay knife.
- Ceramic slip: Ceramic slip helps create thicker pieces or allows for creative detailing.
Troubleshooting tips for issues with the thumb rule in ceramics
If you’ve been having trouble with crafting your pieces with the thumb rule technique here are some trouble shooting tips which may help you get back on track:
- Check your tools: Make sure that all your tools are clean and sharp. Dull tools do not produce accurate results.
- Rework pieces: If something still doesn’t seem quite right after you’ve carved it make sure to rework or reconstruct it before letting it dry (and possibly snap off!).
- Be gentle: If you apply too much pressure while carving you may risked damaging either your piece or your tools. Keep things gentle!