Kneading clay––ever heard of it? For anyone wielding a potter’s wheel and attempting their first few pottery creations, this is one step you don’t want to miss! Kneading clay not only makes it softer and smoother to form, but can also increase its plasticity. Plus, kneading is an essential step for preventing air bubbles from forming in your eventual finished product.
The Benefits of Kneading Clay
Before focusing on how to knead, it’s important to understand why this step is necessary in the first place. Kneading clay has a few key benefits that should be taken into account before throwing a pot. The main reasons to knead clay include:
- Improved plasticity: Kneading clay will increase its plasticity, meaning the clay is softer, pliable, easier to shape into any form.
- Mix clay particles: Kneading will help combine all the clay particles evenly, ensuring each particle of clay is evenly distributed and works as one. This will be especially important for controlling water to plastic ratio in the clay.
- Removes air bubbles: Air bubbles can be detrimental to the quality of your end product. Kneading air bubbles out of the clay before throwing will help prevent any air bubbles from showing up in your finished product.
- Enhances the clay’s finish: Kneading the clay makes it softer and easier to work with, resulting in a more professional and attractive finish on your pottery.
What Tools are Needed to Knead Clay?
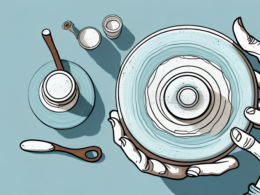
The great thing about kneading is that it doesn’t require any special tools. In fact, all you need are your hands and ceramic clay! Of course, it’s helpful to have some extra tools or items nearby to aid with the kneading process. For example, a cloth to wipe down hands is recommended, as clay can be quite sticky. Gloves or an apron may also be useful for those with sensitive skin. A rolling pin can also be helpful for kneading large amounts of clay.
Step-by-Step Guide to Kneading Clay
Ready for the kneading process? Here’s a step-by-step guide to guide you through the process. Follow these steps for the best results:
- Make sure to wear gloves or cover your hands with a wet cloth. This will prevent your hands from drying out and becoming an inhalation hazard.
- Portion out your clay and form it into a small mound. This will make it easier to knead.
- Press your hands down into the clay and rotate it in a circular motion. This is the basic movement used to knead the clay.
- Press down with your palms and begin to flatten the mound of clay. Push and pull everything together as you go.
- Add water to the clay if it requires it – this will make it easier to work with.
- Continue pushing, pulling and rotating the clay in a circular motion for 5-10 minutes or until the clay is soft and pliable.
- If necessary, add more water to ensure the clay isn’t too dry or too wet.
- Clean your hands to remove any remaining clay.
Tips for Successful Kneading
Kneading can be tricky, but with a few helpful tips and tricks you can get it right every single time! Here are our top tips for kneading clay the right way:
- Work in a clean and well-ventilated area – no one wants to work with dust and dirt in their clay.
- Knead one piece of clay at a time – kneading multiple pieces at once will mean less efficient kneading and unevenly distributed pieces.
- Use consistent speed and pressure – pushing too hard or too fast can cause air bubbles that may cause problems later.
- Use the right amount of water – too little water will lead to a hard piece of clay, while too much water can make it sticky and difficult to work with.
- If you experience any difficulty with kneading, stop and knead in sections – this may work better than trying to knead one large piece of clay all at once.
Common Mistakes to Avoid When Kneading Clay
Kneading clay isn’t as simple as it may look. As with any art form, it’s important to watch out for common mistakes when kneading that could lead to an unsuccessful outcome. Here are some common mistakes to avoid when kneading clay:
- Not wearing gloves: Most potters use gloves when kneading, as this keeps your hands from drying out. This dryness can lead to inhalation hazards and skin irritation.
- Not kneading for long enough: Too short of a kneading time can be just as detrimental as not kneading at all. Make sure you give yourself plenty of time and repeat every step several times to ensure all air bubbles and inconsistencies have been removed.
- Using too much water: Too much water can leave your clay too wet and can lead to an unsuccessful piece when throwing. Add just enough water to yield a soft, pliable clay that is easy to work with.
- Not kneading evenly: The goal of kneading is achieving an even texture throughout the entire lump of clay. To prevent any inconsistencies, make sure each stroke is even and consistent in its effort.
Troubleshooting Common Issues with Kneading Clay
Having trouble perfecting the kneading technique? Don’t worry! Here are some common issues many potters have faced when attempting the art of kneading that can be easily solved:
- Your Clay is Too Dry: If your clay feels too dry, there are a few methods you can use to moisten it. You can add a few drops of plain water directly onto the lump of clay or add small amounts of slip (liquid clay). Make sure not to add too much water, though – just enough to make it slightly softer and less rigid.
- Your Clay is Too Sticky: The opposite problem may arise if your lump of clay becomes too wet or sticky. If this happens, try adding some more powdered clay in small amounts, carefully working it in until you achieve the desired texture. Another trick may be adding a small amount of cornstarch or vegetable oil to make the lump less sticky.
- Your Clay Feels Too Hard: If your lump of clay feels too hard, add some more slip or a small amount of water. Then reassess after another minute or two of kneading. If this doesn’t help, you may have added too much powdered clay in comparison to the other ingredients when creating your mixture. Adding more liquid ingredients might help resolve this issue.
How Long Should You Knead Clay Before Throwing?
Kneading will usually take around 5-10 minutes depending on the size and texture of your lump of clay. We recommend taking your time and repeating every step several times – this not only ensures you have achieved a good texture but also allows you to become familiar with different aspects of the clay and its texture.
Alternatives for Preparing Clay for Throwing
In some cases, you may not have time or need for kneading a piece of clay. In these instances, there are some alternative preparation techniques you can use when throwing your pottery piece. Some approaches include scoring and slipping or using a wedging machine. Each preparation technique has its pros and cons, so make sure research each one thoroughly before proceeding.