Are you interested in the delicate art of pottery throwing? This creative and tactile process is both rewarding and satisfying, but can also present challenges for newbies. In this comprehensive beginner’s guide, we’ll take you through everything you need to know to get started in the world of pottery throwing. From understanding the pottery wheel to advanced techniques and everything in between, this guide will equip you with the knowledge you need to create your very own beautiful pieces.
Understanding the Pottery Wheel: A Comprehensive Overview
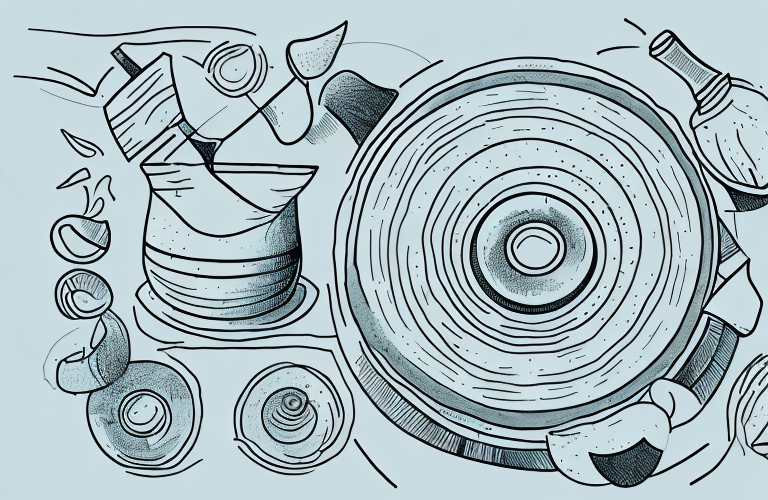
The cornerstone of pottery throwing is, of course, the pottery wheel. Understanding how the wheel works is crucial to achieving success as a potter. The wheel is essentially a spinning platform on which you can centre and manipulate moist clay. As the wheel spins, you can mould and shape the clay into any form you desire. It’s important to keep in mind that the spinning motion of the wheel will have a significant impact on the final shape and texture of your piece.
One important factor to consider when using the pottery wheel is the speed at which it spins. The speed can be adjusted to suit the potter’s needs and the type of clay being used. A slower speed is ideal for beginners, as it allows for more control and precision. However, as the potter gains experience, they may choose to increase the speed to achieve different effects and textures.
Another key aspect of using the pottery wheel is the use of tools. There are a variety of tools that can be used to shape and manipulate the clay, including ribs, sponges, and wire tools. Each tool has a specific purpose and can be used to create different textures and shapes. It’s important to experiment with different tools to find the ones that work best for you and your style of pottery.
Choosing the Right Clay for Your Project
When it comes to pottery making, selecting the right type of clay is paramount. Different types of clay have varying properties that can impact the final outcome of your project. Some of the most commonly used clays include earthenware, stoneware, and porcelain, each with their own unique set of characteristics. It’s important to understand the properties of each type of clay so that you can select the perfect one for your project or intended outcome.
Earthenware clay is a popular choice for beginners due to its affordability and ease of use. It’s a low-fire clay that is porous and has a rustic appearance. It’s great for making decorative pieces, but not recommended for functional items like plates or bowls as it’s not as durable as other types of clay.
Stoneware clay, on the other hand, is a high-fire clay that is known for its strength and durability. It’s a great choice for functional items like plates, bowls, and mugs. It’s also versatile and can be used for both hand-building and wheel-throwing techniques. However, it can be more difficult to work with than earthenware clay and requires a higher firing temperature.
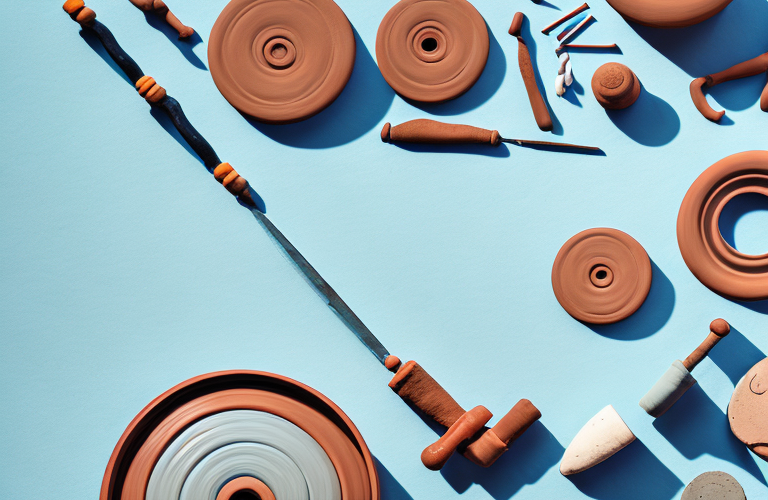
Essential Tools for Pottery Throwing
Having the right tools at your disposal is crucial to mastering the art of pottery throwing. Some of the essential tools you’ll need include a pottery wheel, clay, brushes, a bucket for water, a sponge, a wire cutter, and trimming tools. These are just some of the basics, but as you progress, you may find that there are additional tools that can aid in your pottery throwing process.
One such tool is a rib, which is used to smooth out the surface of the clay and create clean lines. Another useful tool is a needle tool, which can be used to create intricate designs and patterns in the clay. It’s important to experiment with different tools and techniques to find what works best for you and your unique style of pottery throwing.
Aside from tools, it’s also important to have a good understanding of the properties of clay and how it behaves during the throwing process. This includes knowing how much water to add to the clay, how to center the clay on the wheel, and how to shape the clay into the desired form. With practice and patience, you can develop your skills and create beautiful pieces of pottery that showcase your creativity and talent.
Techniques for Centering Clay on the Wheel
The first step to successful pottery throwing is getting your clay perfectly centred on the wheel. This is the foundation upon which you’ll build your masterpiece. To centre clay, you’ll need to use a technique called ‘coning.’ This involves sealing off the top of the clay on the wheel, then driving the cone back into the centre. It can take some practice to get it right, so don’t be discouraged if it doesn’t come easily at first.
Another technique that can be helpful in centering clay is using your body weight to apply pressure to the clay. This involves leaning into the clay with your body, while keeping your hands steady on the wheel. This can help to stabilize the clay and make it easier to center.
It’s also important to make sure that your wheel is level and stable before attempting to center clay. If the wheel is wobbling or uneven, it will be much more difficult to get the clay centered properly. Take the time to adjust the wheel and make sure it’s in good working order before you begin.
The Four Basic Steps to Pottery Throwing: Step-by-Step Guide
Once you have your clay centred, you’ll need to follow the four basic steps of pottery throwing. These include securing the clay, lifting the walls of the piece, shaping the piece, and trimming the excess. It’s important to take your time with each step to ensure that the final piece is balanced and symmetrical. Remember to keep the wheel spinning at a steady pace throughout the process.
How to Create Basic Shapes: Bowls, Cups, and Vases
Now that you’ve mastered the four basic steps of pottery throwing, it’s time to start creating some basic shapes. Three of the most popular and versatile basic shapes are bowls, cups, and vases. Each shape requires a slightly different technique, so it’s important to practice and experiment until you find the perfect method. Remember, practice makes perfect!
Adding Texture and Design Elements to Your Pottery
Once you’ve mastered the basic shapes, it’s time to start adding some texture and design elements to your pottery. This is where your creativity really comes into play. There are a variety of techniques you can use to add texture and design, including carving, stamping, and painting. Don’t be afraid to experiment and try new things to create truly unique pieces.
Common Mistakes to Avoid When Throwing Pottery
Even with practice and dedication, mistakes can still happen when throwing pottery. Some of the most common mistakes include uneven walls or thickness, collapsing during the throwing process, and cracking during drying or firing. To avoid these mistakes, it’s important to pay careful attention to each step of the process and take your time to ensure that each part is done properly.
Tips for Properly Drying and Firing Your Finished Pieces
Once you’ve completed your pottery masterpiece, it’s time to allow it to dry and then fire it in the kiln. The drying process should be done slowly to ensure that the piece doesn’t crack, while the firing process should be done at the appropriate temperature to achieve your desired finish. It’s important to follow the manufacturer’s instructions for your particular kiln to avoid any mishaps.
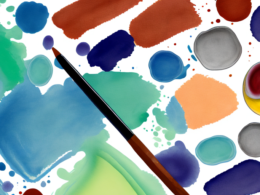
Decorating and Glazing Techniques for Your Pottery Masterpiece
After your piece has been fired, it’s time to add the finishing touches. Decorating and glazing techniques can take your piece from good to great. Whether you opt for glazed or unglazed, adding colour and texture can elevate your piece to a whole new level. Again, experimentation is key, so don’t be afraid to try new techniques and see what works best for you.
Advanced Techniques for the Experienced Potter
For the more experienced potter, there are a variety of advanced techniques and tricks that can be used to create even more complex and intricate pieces. These include altering, turning, and shaping techniques, as well as incorporating other materials such as glass or metal into the finished piece. These techniques require a higher degree of skill, but can result in truly stunning pieces of art.
How to Set Up a Home Pottery Studio
Setting up your own home pottery studio can be a fun and rewarding project. However, it’s important to do so safely and with the appropriate equipment. You’ll need a dedicated workspace with proper ventilation, access to water, electricity, and a kiln space. Additionally, you’ll need to invest in the appropriate tools and equipment to ensure that you have everything you need to create your pieces safely and efficiently.
The Benefits of Pottery as a Creative Outlet and Stress Reliever
Not only is pottery throwing a fun and rewarding creative outlet, it can also be an excellent way to reduce stress and improve mental health. Engaging in creative activities has been shown to reduce stress levels and improve overall wellbeing. Additionally, pottery throwing requires focus and dedication, which can be a great distraction from the stresses of daily life.
Famous Potters and Their Inspirational Works
Finally, it’s worth taking a look at some of the famous potters and their inspirational works. From Shoji Hamada to Bernard Leach, there are countless potters who have made significant contributions to the world of pottery. By studying their works and techniques, you can gain inspiration and ideas for your own pieces.
Building Your Own Pottery Business from Home
If you’ve mastered the art of pottery throwing and are ready to take your skills to the next level, you may consider turning your passion into a business. A home pottery business can be a great way to make a living doing something you love. However, it’s important to have a solid business plan in place, as well as proper marketing and sales strategies to ensure that you are successful.
Where to Find Inspiration for Your Next Pottery Project
Finally, if you’re in need of some inspiration for your next pottery project, there are a variety of sources to turn to. From nature to architecture, and everything in between, there are countless sources of inspiration that can be used to create beautiful and unique pieces of pottery.
With this beginner’s guide to pottery throwing, you’re now equipped with all the knowledge and tools you need to get started on your own pottery creations. Whether you’re a seasoned pro or just starting out, remember to have fun and embrace the creativity that pottery throwing offers.