Pottery throwing is a handicraft that involves molding and shaping clay on a potter’s wheel to create functional and decorative vessels. In this guide, we will teach you how to throw pottery in a step-by-step process, from understanding the basics of pottery throwing to exploring advanced techniques. Let us start with the fundamentals.
Understanding the Basics of Pottery Throwing
Pottery throwing requires technique and practice. First things first, you need to understand the basic principles of pottery throwing, such as the balance, momentum, and centering. Balancing refers to keeping the clay on the potter’s wheel even to prevent wobbling, which can disrupt the vessel’s design. Momentum is about the speed that your hands move and the direction they take while shaping the pottery. Finally, centering means making sure the clay is positioned at the center of the wheel, allowing you to create the desired shape with ease.
Once you have mastered the basics of pottery throwing, you can experiment with different techniques to create unique designs. For example, you can use a technique called “pulling” to create a tall, narrow vessel. This involves pulling the clay upwards while keeping your hands steady and maintaining the vessel’s shape. Another technique is “trimming,” which involves using a sharp tool to remove excess clay and refine the vessel’s shape.
It’s important to note that pottery throwing is not just about creating functional vessels, but also about expressing your creativity. You can experiment with different shapes, sizes, and textures to create pieces that are not only beautiful but also meaningful. Whether you’re a beginner or an experienced potter, there’s always something new to learn and discover in the world of pottery throwing.
Gathering the Essential Tools and Materials for Pottery Throwing
Now that you understand the fundamentals, gather the essential tools and materials for pottery throwing. They include a potter’s wheel, clay, water, a pottery rib, a wire clay cutter, a wooden modeling tool, and a sponge. The type of clay you use may depend on your experience, the desired method of firing, and the use of the finished pottery.
When selecting a potter’s wheel, consider the size and weight of the wheel, as well as its speed and durability. Some wheels are electric, while others are manually operated. Additionally, the type of pottery you plan to create may influence your choice of wheel.
It’s also important to choose the right clay for your project. Different types of clay have different properties, such as color, texture, and plasticity. Some clays are better suited for hand-building, while others are ideal for throwing on the wheel. Experiment with different types of clay to find the one that works best for you.
Preparing the Clay for Pottery Throwing
Before starting pottery throwing, prepare the clay. Wedge the clay to remove any air pockets that may cause the vessel to crack. Add a bit of water while kneading to create the desired consistency. The clay’s texture and thickness may vary for different pottery types, so it is essential to adjust it accordingly before starting the throwing process.
Once the clay is prepared, it is important to keep it moist to prevent it from drying out. Cover the clay with a damp cloth or plastic wrap while working on the pottery. If the clay does start to dry out, mist it with water to keep it moist.
Another important step in preparing the clay is to remove any impurities or debris. This can be done by passing the clay through a sieve or by handpicking any foreign objects. Removing impurities will ensure that the final product is of high quality and free from defects.
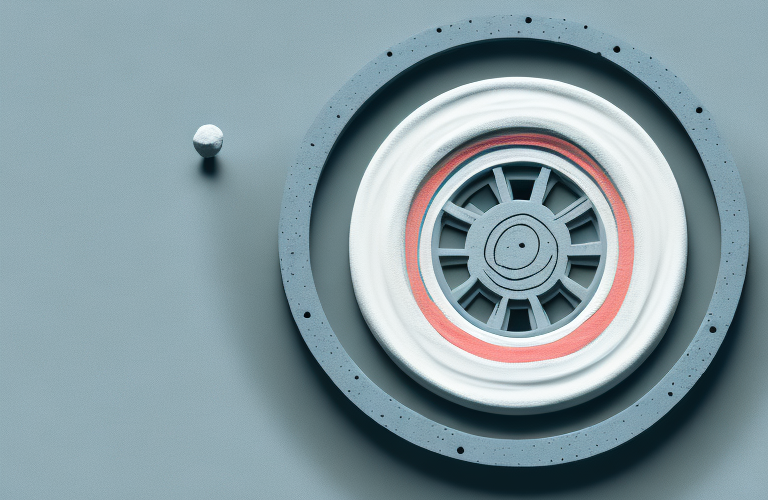
Centering the Clay on the Pottery Wheel
Now you are ready to start the throwing process. Position the clay at the center of the potter’s wheel and use your body weight to secure it into place. Use your fingers to shape the clay into a symmetrical mound, creating a hollow center for your vessel. Ensure that the clay is at an even thickness to prevent cracking or unevenness of the pottery.
It is important to note that the amount of pressure you apply to the clay while centering it can greatly affect the outcome of your pottery. Too much pressure can cause the clay to become misshapen or even collapse, while too little pressure can result in an uneven surface. It may take some practice to find the right balance, but with time and patience, you will be able to center the clay with ease.
Opening and Shaping the Clay to Form Your Pot
After centering the clay, you are now ready to shape your pot. Use your thumbs to make an opening in the center of the clay and slowly expand it to your desired width. Use your fingers to shape the inside and outside of the clay, creating varying vessels such as bowls, mugs, or vases. Keep in mind the basic principles such as balance, momentum, and centering while doing so to ensure that the vessel shape is symmetrical.
It is important to note that the amount of pressure you apply while shaping the clay can greatly affect the final outcome of your pot. Too much pressure can cause the clay to collapse or become misshapen, while too little pressure can result in a weak and fragile pot. It is important to find the right balance and pressure to create a sturdy and well-formed pot. Additionally, you can experiment with different techniques such as adding texture or carving designs into the clay to create unique and personalized pieces.
Creating Different Shapes and Forms with Your Pottery
Now that you have shaped the basic vessel form, it is time to experiment with different shapes and forms. Adding handles, spouts, or even fluted edges can add a unique touch to your pottery creation. Use a wooden modeling tool to create fine details and variations in texture that will give individuality to your pottery.
Another way to create unique shapes and forms is by using molds. Molds can be made from plaster, silicone, or even found objects like leaves or shells. Simply press your clay into the mold and then remove it to reveal a new shape. You can also combine different shapes and forms to create more complex pieces, like a teapot with a spout and handle. Don’t be afraid to experiment and try new things to make your pottery stand out!
Texturing and Detailing Your Pottery Creation
Creating textures and details can add character to your vessel. Texturing and detailing can be done using a pottery rib, a wooden modeling tool, or even an imprint in the clay. Consider the overall design of your vessel and think about which textures and details will best complement it.
One popular technique for adding texture is called sgraffito, which involves scratching designs into the surface of the clay. This can be done with a pointed tool or even a toothpick. Another option is to use slip, which is a liquid clay mixture that can be applied to the surface of your vessel to create raised designs.
When it comes to detailing, you can use a variety of techniques to add intricate designs to your pottery. For example, you can use a small brush to paint on details with underglaze or glaze. You can also use a carving tool to create intricate patterns or designs in the clay. Whatever technique you choose, remember to take your time and work carefully to achieve the desired effect.
Trimming and Finishing Your Pottery
Trimming and finishing are important steps in the pottery throwing process. Trimming involves removing excess clay from the bottom of the vessel, while finishing involves refining surfaces and edges with a wooden modeling tool. Both steps ensure that your pottery is symmetrical and smooth.
It is important to note that trimming and finishing should be done carefully and with attention to detail. Rushing through these steps can result in uneven surfaces or even cracking in the clay. Additionally, different types of clay may require different techniques for trimming and finishing, so it is important to experiment and find what works best for your specific project.
Drying and Firing Your Finished Pottery Creation
Now that you have completed your pottery throwing process, it is time to let your creation dry. This step can take anywhere from a day to a week, depending on your climate and the thickness of your pottery. Once your pottery is dry, it is ready for firing. Firing can be done using different methods such as electric or gas kilns. The type of firing depends on the type of clay and the desired effect of the pottery.
It is important to note that during the firing process, the pottery will undergo a chemical change. The heat will cause the clay particles to fuse together, creating a solid and durable piece of pottery. The temperature and duration of the firing process will vary depending on the type of clay and the desired outcome. It is important to follow the instructions for your specific clay and kiln to ensure the best results.
After the firing process is complete, your pottery will need to cool down slowly to prevent cracking or breaking. This process is called “cooling” or “annealing”. Once your pottery has cooled down, you can add any finishing touches such as glazing or painting. These final steps will give your pottery a unique and personalized look.
Decorating and Glazing Your Finished Pottery Piece
Decorating and glazing are the final touches to your pottery creation. Decorating can be done using different techniques such as hand-painting, stenciling, or even adding decals. Glazing adds a protective layer to your pottery and gives it a glossy or matte finish. The type of glaze used can affect the color, design, and texture of your pottery.
Tips and Tricks for Perfecting Your Pottery Throwing Technique
Pottery throwing requires technique and practice. Here are some tips and tricks to perfect your pottery throwing technique: Practice patience, keep your hands moist, don’t be afraid to experiment, and keep your pottery wheel clean to prevent contamination.
Common Mistakes to Avoid When Throwing Pottery
One of the main things to consider when throwing pottery is to avoid common mistakes such as starting with too much clay, neglecting to center it correctly, and not trimming and finishing correctly. Learning from other people’s mistakes can save you time and help you gain experience and skills.
Exploring Advanced Techniques in Pottery Throwing
Now that you have mastered the basics of pottery throwing, it is time to explore advanced techniques such as altering forms, creating handle attachments, and experimenting with texture and surface decoration. The possibilities are vast, and exploring advanced techniques can allow you to create unique and creative pottery creations.