If you’re an avid potter or ceramic artist, you know how important it is to have your own clay throwing wheel. But did you know that you can create your own wheel with a bit of effort and know-how? In this guide, we’ll take you through each step of building your own clay throwing wheel in detail, from materials to maintenance.
Introduction to Clay Throwing Wheels
Before we dive into the process of creating your own clay throwing wheel, it’s important to understand what a wheel is and how it works. A clay throwing wheel is a device that allows you to spin a platform or disc using a pedal-operated flywheel. This spinning platform allows you to mold clay into the desired shape with your hands while it rotates. Although electric-powered clay throwing wheels are readily available on the market, building your own is a fun and rewarding project for any DIY enthusiast.
One of the benefits of building your own clay throwing wheel is the ability to customize it to your specific needs. You can adjust the size and height of the platform, as well as the speed and torque of the flywheel. Additionally, building your own wheel allows you to save money compared to purchasing a pre-made electric-powered wheel. However, it’s important to note that building a clay throwing wheel requires some technical knowledge and skill, so it’s important to do thorough research and follow instructions carefully.
Benefits of Making Your Own Clay Throwing Wheel
Building your own clay throwing wheel has several advantages over purchasing a premade one. For one, you have complete control over the design and quality of the wheel, ensuring that it fits your specifications and needs. Additionally, you can save a considerable amount of money by choosing to build one yourself, as premade models can be quite expensive. Finally, the satisfaction of creating something from scratch that you’ll use for years to come cannot be overstated.
Another benefit of making your own clay throwing wheel is that it can be a fun and rewarding DIY project. Not only will you learn new skills and techniques, but you’ll also have the opportunity to customize your wheel to your liking. You can choose the type of wood, size, and shape of the wheel, as well as add any additional features that you may need. Plus, the process of building your own wheel can be a great way to unwind and relax after a long day of work or school.
Tools and Materials Needed for the Project
Before you start building your clay throwing wheel, you’ll need to gather the necessary tools and materials. At a minimum, you’ll need:
- Screws and bolts
- Nails
- Wood glue
- Wood for the base, platform, and pedal system
- Drive belt
- Flywheel
- PVC or metal pipe
- Pulley and bearings
- Leather strap
- Drill and bits
- Saw or jigsaw
- Hammer and screwdriver
- Tape measure, ruler, and level
Additionally, you may want to consider purchasing or gathering some safety equipment, such as gloves, safety glasses, and a dust mask. It’s also important to have a clear and well-ventilated workspace, as working with clay and woodworking materials can create dust and debris. Finally, make sure to have a plan for disposing of any waste materials, such as sawdust or excess clay, in an environmentally-friendly manner.
Step 1: Building the Base of the Wheel
The base is the foundation of the clay throwing wheel, and will support the weight of the platform and pedal system. Start by cutting four pieces of wood to serve as the base legs, making sure they’re an appropriate length for your height and workspace. Next, cut additional pieces of wood to form the base frame, attaching the legs to the corners using screws and wood glue. Finally, reinforce the base with diagonal bracing to ensure stability.
Once the base is complete, it’s important to ensure that it’s level. Use a spirit level to check that all four legs are even, adjusting as necessary. A level base will ensure that the wheel spins smoothly and evenly, making it easier to work with.
It’s also a good idea to add a shelf to the base, which can be used to store tools and materials. This can be done by attaching a piece of wood to the frame, just above the diagonal bracing. Make sure the shelf is sturdy enough to hold the weight of your supplies, and that it doesn’t interfere with the movement of the wheel.
Step 2: Constructing the Spinning Platform
The spinning platform will hold the clay and be rotated by the pedal system. Cut a circular piece of wood to the desired size for the platform, and attach it to a metal or PVC pipe using screws and bolts. The platform should be balanced and level to ensure smooth rotation. To prevent the clay from slipping off, wrap the platform with a leather or rubber strap firmly secured in place.
It is important to choose the right size for the spinning platform based on the size of the clay pieces you plan to work with. A larger platform may be necessary for larger pieces, while a smaller platform may be more suitable for smaller pieces. Additionally, consider the weight of the platform and the materials used to construct it. A heavier platform may be more stable, but also more difficult to rotate.
When attaching the circular piece of wood to the metal or PVC pipe, make sure to use strong screws and bolts that can withstand the weight and pressure of the spinning platform. It is also important to check the balance of the platform before use, as an unbalanced platform can cause the clay to wobble and affect the quality of your work. Finally, the leather or rubber strap used to wrap the platform should be tight enough to prevent the clay from slipping, but not so tight that it restricts the rotation of the platform.
Step 3: Creating the Pedal System
The pedal system is what drives the flywheel and rotates the platform. Start by creating a wooden pedal that’s comfortable and stable, with an attached metal or PVC pipe that connects to the spinning platform below. Next, attach a pulley and bearings to the base frame using screws and bolts, and connect a drive belt to the pulley and flywheel. Finally, attach the flywheel to the metal or PVC pipe using screws, and connect the pedal to the flywheel using a leather strap.
It’s important to ensure that the pedal system is properly lubricated to prevent any friction or resistance while pedaling. Apply a thin layer of grease or oil to the bearings and pulley, and check for any loose screws or bolts before use. Additionally, consider adding adjustable resistance to the pedal system by attaching a tension knob or brake pad to the flywheel. This will allow for a more challenging workout and increase the versatility of the machine.
Step 4: Attaching the Flywheel and Drive Belt
The flywheel is what stores the momentum needed to rotate the spinning platform. Cutting a circular piece of wood the same diameter as the spinning platform, attach it to the flywheel using screws and bolts. Finally, connect the flywheel to the pedal system using a drive belt, ensuring it’s tight enough to provide enough pressure but not so tight as to prevent easy rotation.
It’s important to choose the right size and weight for your flywheel, as this will affect the overall performance of your spinning platform. A heavier flywheel will provide a smoother and more consistent ride, while a lighter one will require more effort to maintain momentum.
When attaching the drive belt, make sure to align the pulleys correctly and adjust the tension as needed. A loose belt can slip and cause the pedals to lose traction, while an overly tight belt can put unnecessary strain on the system and cause premature wear and tear.
Step 5: Finishing Touches and Testing the Wheel
Once all the components are assembled, it’s time to test the wheel! Ensure that everything is properly aligned and secure, and test the rotation of the wheel with minimal pressure. If everything is working correctly, you can apply finishing touches to the wheel to make it more aesthetically pleasing such as sanding and polishing.
It’s important to note that the finishing touches should not compromise the functionality of the wheel. Avoid adding too much weight or altering the shape of the wheel in a way that affects its performance. Additionally, it’s a good idea to test the wheel again after applying any finishing touches to ensure that it still rotates smoothly and without any wobbling.
If you encounter any issues during the testing process, don’t hesitate to disassemble the wheel and troubleshoot the problem. It’s better to catch and fix any issues before using the wheel for its intended purpose. Once you’re confident that the wheel is functioning properly, you can install it on your project and enjoy the fruits of your labor!
Maintenance and Troubleshooting Tips for Your Homemade Clay Throwing Wheel
Preventative maintenance is key to ensuring your clay throwing wheel lasts as long as possible. Regularly check and tighten screws and bolts, oil bearings, and replace the leather strap if it becomes worn. Additionally, if there are any issues with the wheel, such as wobbling or squeaking, check for loose screws or poorly aligned components. Don’t hesitate to take it apart and inspect it regularly; it’s better to catch and fix small issues before they cause bigger problems.
Comparing Homemade vs Store-Bought Throwing Wheels
As mentioned earlier, building your own clay throwing wheel has some advantages over purchasing a premade one. For one, you can customize your wheel to meet your specific needs and preferences. Additionally, building your own wheel can be a fun DIY project that provides a great sense of satisfaction. However, it’s important to ensure that the quality and safety of the homemade wheel are on par with store-bought models before using it in a professional capacity.
Showcase of Projects Made with a Homemade Clay Throwing Wheel
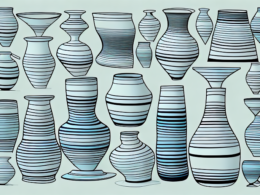
Once you’ve created your own clay throwing wheel, the sky’s the limit in terms of what you can create. From bowls and vases to sculptures and intricate designs, the possibilities are endless. Showcase your creations and be proud of the unique, handmade quality of your pieces.
Building your own clay throwing wheel takes some effort, but the satisfaction of creating something from scratch and the money saved in the long run can make it all worth it. With this guide, you’ll be well on your way to crafting your own clay masterpieces in no time.