Setting up a kiln for pottery at home is a great idea for anyone interested in taking their love for ceramics to the next level. With your own kiln, you can experiment with different types of clay, glazes, and firing techniques without having to rely on a pottery studio or kiln rental. In this article, we will guide you through the process of setting up a kiln in your own home, from choosing the right type of kiln to firing and maintaining it for longevity. So let’s get started!
Why Setting Up a Kiln for Pottery at Home is a Great Idea
Having your own kiln at home gives you complete control over your pottery projects. You can fire your pieces when it’s most convenient for you and experiment with different firing schedules to achieve different results. You can also save money in the long run by not having to pay for kiln rentals or studio fees. Plus, having a kiln at home creates a sense of independence and flexibility in your creative process.
Another benefit of having a kiln at home is that it allows you to work at your own pace. You don’t have to worry about rushing to finish your pieces before a studio or rental deadline. This can be especially helpful for those who have busy schedules or limited time to devote to their pottery projects. Additionally, having a kiln at home can provide a sense of pride and accomplishment as you see your finished pieces come to life right in your own space.
Different Types of Kilns: Which One is Right for You?
There are many different types of kilns available, each with their own pros and cons. The most common types for home use are electric, gas, and wood-fired kilns. Electric kilns are the easiest to use and maintain, while gas kilns offer more control over heat and atmosphere. Wood-fired kilns produce unique results but require a lot of time and effort to use. Consider your budget, space, and firing needs when choosing the right kiln for you.
If you are looking for a kiln that is environmentally friendly, then an electric kiln is the best option for you. They do not produce any harmful emissions and are energy efficient. However, if you are looking for a kiln that produces unique and unpredictable results, then a wood-fired kiln is the way to go. The wood ash and flame create natural glazes and patterns on the pottery.
Another factor to consider when choosing a kiln is the size and capacity. If you are a beginner or have limited space, then a smaller kiln may be sufficient. However, if you plan on creating larger pieces or need to fire multiple pieces at once, then a larger kiln with a higher capacity would be more suitable.
Finding the Right Space to Set Up Your Kiln
Before setting up your kiln, it’s important to find a suitable space for it. Kilns give off a lot of heat and require proper ventilation, so it’s best to set up your kiln in a well-ventilated area such as a garage or outdoor shed. Make sure the area is clean and dry, with no flammable materials nearby. You’ll also need access to a 240V electrical outlet if you’re using an electric kiln, or a gas line if you’re using a gas kiln.
Another important factor to consider when setting up your kiln is the flooring. Kilns can produce a lot of heat, which can damage certain types of flooring such as carpet or wood. It’s best to set up your kiln on a concrete or tile floor, or use a heat-resistant mat to protect the flooring.
Additionally, it’s important to consider the size of the space you’re setting up your kiln in. Kilns come in different sizes, so make sure the space you choose can accommodate the size of your kiln and allow for proper ventilation. You’ll also need enough space to store your clay and other materials, as well as any tools or equipment you’ll be using.
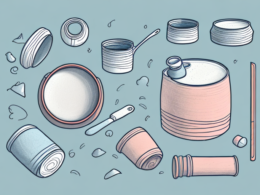
Essential Tools and Materials You Need to Set Up Your Kiln
In addition to your kiln, you’ll need some basic tools and materials to get started. These may include kiln shelves, posts, and stilts to support your pottery in the kiln, as well as kiln wash to protect your shelves from glaze drips. You’ll also need a pyrometer to monitor the temperature inside the kiln, and a set of tongs or gloves to handle hot pieces. Lastly, make sure you have plenty of clay, glazes, and other materials on hand to start creating!
It’s important to note that the type of clay and glazes you use can greatly affect the outcome of your pottery. Different clays have different properties, such as their ability to withstand high temperatures or their level of shrinkage. Similarly, different glazes can produce different colors and textures on your pottery. It’s a good idea to experiment with different types of clay and glazes to find what works best for your style and desired outcome.
Step-by-Step Guide to Setting Up Your Kiln
Now that you have all the necessary tools and materials, it’s time to set up your kiln. Follow these steps to get started:
- Assemble your kiln according to the manufacturer’s instructions.
- Place kiln shelves inside and stack them using kiln posts to form layers.
- Apply kiln wash to shelves to protect them from glaze drips.
- Connect the kiln to a 240V electrical outlet or gas line, depending on the type of kiln you have.
- Load your pottery onto the shelves, making sure to space them out evenly.
- Close the kiln and program your firing schedule according to the clay and glaze you’re using.
- Monitor the temperature using a pyrometer and adjust as needed.
- Once the firing is complete, allow the kiln to cool before unloading your pieces using tongs or gloves.
Safety Measures You Need to Take When Setting Up Your Kiln
Working with a kiln can be dangerous if proper safety precautions are not taken. Always wear heat-resistant gloves and eye protection when handling hot pottery or opening and closing the kiln. Make sure the kiln is properly ventilated to avoid inhaling harmful fumes. And never leave the kiln unattended while it’s firing.
How to Choose the Right Clay for Your Pottery Projects
Choosing the right type of clay for your projects is crucial for achieving the desired results. There are many different types of clay available, each with its own unique properties and firing requirements. Some popular types of clay include earthenware, stoneware, and porcelain. Consider the aesthetic and functional qualities you’re looking for in your pottery when choosing the right clay for your projects.
Tips for Firing Your Pottery in the Kiln
When firing your pottery in the kiln, there are a few tips to keep in mind to ensure the best results:
- Always make sure your pottery is completely dry before firing. Any excess moisture can cause the piece to crack or explode in the kiln.
- Choose the right firing schedule for the type of clay and glaze you’re using. This will ensure the piece is fired to the correct temperature and the glaze is properly melted.
- Use properly ventilated tongs or gloves to handle hot pieces. Do not touch the pottery with your bare hands until it has completely cooled down.
Common Mistakes to Avoid When Setting Up and Using Your Kiln
It’s important to be aware of common mistakes that can occur when setting up and using your kiln. Some of these include:
- Overloading the kiln or stacking shelves too closely together, which can cause uneven firing and damage to your pottery.
- Not properly ventilating the kiln, which can cause harmful fumes to build up and pose a health hazard.
- Using the wrong firing schedule for the type of clay and glaze you’re using, which can cause the piece to crack, warp, or explode.
Troubleshooting Common Issues with Your Kiln
If you’re experiencing issues with your kiln, there are a few troubleshooting steps you can take:
- If your kiln isn’t heating up properly, check the electrical outlet or gas line to ensure proper connection.
- If your pottery is cracking or warping during firing, make sure you’re using the correct firing schedule and spacing out your pieces evenly on the shelves.
- If you’re experiencing electrical or mechanical issues with your kiln, consult the manufacturer’s manual or contact a professional for assistance.
How to Clean and Maintain Your Kiln for Longevity
Properly cleaning and maintaining your kiln will help ensure it lasts for many years to come. After each firing, allow the kiln to cool down completely and remove any excess debris from the shelves and interior. Wipe down the interior with a damp cloth to remove any residual glaze or clay. Check for any cracks or damage to the shelves or posts, and replace as needed. Follow the manufacturer’s instructions for regular maintenance and cleaning.
Creative Pottery Ideas and Projects to Try with Your New Kiln
With your new kiln, you can try out a variety of creative pottery projects. Some ideas to get you started include:
- Making functional pieces such as mugs, bowls, and plates
- Creating decorative pieces such as vases, figurines, and sculptures
- Experimenting with different types of clay and glazes to achieve unique effects
Finding Inspiration and Resources in the Pottery Community Online
Joining the online pottery community can provide you with a wealth of inspiration, resources, and advice. Follow pottery blogs, join forums, and connect with other ceramic artists on social media platforms such as Instagram and Facebook. Attend workshops and classes to continue learning and growing your skills
Conclusion and Final Thoughts on Setting Up a Kiln for Pottery at Home
Setting up a kiln for pottery at home can be a rewarding and exciting experience. With the right tools, materials, and knowledge, you can create unique and beautiful pieces that reflect your own personal style. Remember to always follow safety precautions and have fun exploring the world of ceramics!