Air dry clay is a versatile medium widely used for sculpting and crafting. Though it is easy to use and requires minimal equipment, air dry clay is notorious for developing cracks while drying, which can ruin an otherwise well-executed project. If you’re tired of dealing with the frustration of seeing your air dry clay projects develop unsightly cracks, you’re not alone. In this article, we’ll discuss the properties of air dry clay and examine ways to keep it from cracking.
Introduction to Air Dry Clay and Its Properties
Air dry clay is a popular sculpting and crafting medium that is composed of natural ingredients. It’s an attractive option for those who don’t have access to a kiln or other heat-curing equipment typically required for traditional clay. Air dry clay is lightweight, pliable, and comes in a variety of colors, which can easily be mixed to create custom hues. Typically, air dry clay will dry and harden on its own in 24-48 hours, depending on the size and thickness of the project. However, one significant drawback of air dry clay is that it tends to crack while drying, which can be frustrating for beginners and experienced crafters alike.
Despite its tendency to crack, air dry clay has several advantages over traditional clay. For one, it’s much more affordable and accessible, making it an excellent option for those who want to experiment with sculpting without investing in expensive equipment. Additionally, air dry clay is non-toxic and safe for children to use, making it a popular choice for school projects and crafting activities. With a little bit of practice and patience, it’s possible to create beautiful and intricate sculptures using air dry clay, making it a versatile and exciting medium for artists and crafters of all skill levels.
Common Causes of Cracks in Air Dry Clay
Understanding the underlying reasons behind cracking in air dry clay can help prevent it from occurring in your future projects. There are various reasons why air dry clay cracks while drying, such as shrinkage, excess moisture, or using an insufficient amount of clay. When clay dries, it shrinks slightly, which can cause cracking if the clay mass is too large. Likewise, if the clay is too moist, it can cause the clay to crack, as the moisture evaporates too quickly.
Another common cause of cracking in air dry clay is improper handling during the drying process. If the clay is not supported properly while drying, it can warp or crack. Additionally, if the clay is exposed to drafts or direct sunlight while drying, it can dry too quickly and crack. It is important to handle the clay gently and allow it to dry slowly in a cool, dry place to prevent cracking.
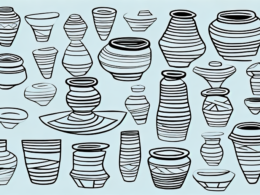
Choosing the Right Type of Air Dry Clay for Your Project
When choosing air dry clay, it’s important to keep your project in mind. There are various types of air dry clay available, each with their unique properties. For instance, some air dry clays are more suited for sculpting, while others are perfect for making jewelry, or wall art. Consider the project’s size, shape, and end goal when choosing the best clay type for your project. In addition, it’s essential to purchase air dry clay from a reputable supplier to avoid purchasing old, dried-out clay that will be more susceptible to cracking.
Another important factor to consider when choosing air dry clay is the level of experience you have with the material. If you’re a beginner, it’s best to start with a clay that is easy to work with and forgiving, such as a self-hardening clay. These clays are more pliable and forgiving, allowing you to make mistakes and correct them without ruining your project. On the other hand, if you’re an experienced artist, you may want to experiment with different types of air dry clay to achieve a specific texture or finish.
Preparing Your Workspace for Air Dry Clay Projects
Prepare your workspace before starting your air dry clay project to avoid contamination that can compromise your project. Cover your workspace with a non-porous material such as plastic or parchment paper, which will prevent moisture absorption by the air dry clay. Dust and debris can cause bumps and uneven surfaces in your project, so ensure that your workspace is clean before starting.
Additionally, it is important to have all necessary tools and materials within reach before starting your project. This will prevent you from having to leave your workspace and risk contaminating your clay. Some essential tools for air dry clay projects include a rolling pin, sculpting tools, and a spray bottle filled with water to keep the clay moist. By having everything you need within reach, you can focus on your project and create a successful finished product.
Tips for Properly Conditioning Air Dry Clay Before Use
Conditioning air dry clay well before use can help prevent cracking while drying. Condition your clay by kneading it until it’s soft and pliable, adding water drops at intervals, if necessary, to achieve a right consistency. Once conditioned, roll the clay out to the necessary thickness for your project using a rolling pin or a pasta maker. This process helps to homogenize the clay’s moisture content, which ensures a uniform drying process.
It’s important to note that over-conditioning air dry clay can also lead to cracking. If you notice your clay becoming too soft or sticky, take a break from kneading and let it rest for a few minutes before continuing. Additionally, storing your air dry clay in an airtight container can help prevent it from drying out too quickly and becoming difficult to work with. By properly conditioning and storing your clay, you can ensure a successful and enjoyable crafting experience.
Using the Right Tools for Air Dry Clay Projects
Using the right tools and techniques can significantly impact the quality and durability of your air dry clay project. Use tools that won’t damage or tear the clay, such as sharp-edged knives or toothpicks, to add details or texture. Ensure that you allow enough time for each layer to dry before adding another to avoid excess moisture buildup, which can lead to cracking.
Another important factor to consider when working with air dry clay is the environment in which you are working. It is best to work in a cool, dry area to prevent the clay from drying out too quickly or becoming too moist. If the clay becomes too dry, it can become brittle and crack easily. On the other hand, if it becomes too moist, it can become sticky and difficult to work with. Additionally, it is important to store any unused clay in an airtight container to prevent it from drying out.
Techniques to Prevent Cracks While Sculpting with Air Dry Clay
While sculpting with air dry clay, keep in mind techniques to prevent cracking while working. Don’t rush the process, work in small sections, and give the clay enough time to dry before molding both the large and small parts of the project. Additionally, avoid adding too much moisture in your clay while sculpting, as it can cause it to become more vulnerable to cracking.
Another technique to prevent cracking is to use armatures or support structures for larger pieces. This will help distribute the weight of the clay and prevent it from collapsing or cracking under its own weight. You can use materials such as wire, aluminum foil, or even cardboard to create the armature.
It’s also important to store your air dry clay properly to prevent it from drying out too quickly or becoming too moist. Keep it in an airtight container or plastic bag when not in use, and store it in a cool, dry place. If your clay does become too dry, you can add a small amount of water to it and knead it until it becomes pliable again.
How to Properly Store Your Air Dry Clay to Prevent Cracking
Once you’re done using your air dry clay, store it properly to avoid it from drying out or getting contaminated. Keep the clay in an airtight container or wrap it with cling wrap to avoid excess moisture loss that can cause it to dry out. Keep your clay in a cool, dry place that’s free of dust and moisture until you’re ready to use it again.
Tips for Adding Layers and Details to Your Air Dry Clay Project
Adding layers or details to your air dry clay project requires patience and a slow, steady hand. While adding layers or new details, take the time to let each layer dry completely before adding another to avoid moisture buildup in the clay. Layers that are too thick or too wet are at high risk of cracking, which can ruin your project entirely.
Common Mistakes to Avoid When Working with Air Dry Clay
Many crafting enthusiasts are quick to make mistakes when working with air dry clay, which can lead to cracking and other issues. Some of the most common mistakes include using too much clay, rushing the process, working without a proper workspace setup, or not allowing the clay to dry completely. Avoid these common mistakes to achieve the best possible results with your air dry clay project.
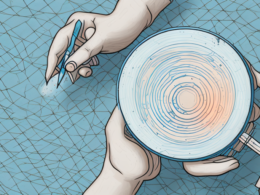
How to Fix Cracks in Already Dried Air Dry Clay
If, despite your best efforts, your air dry clay project still cracks, there are ways to fix it. You can use filler such as acrylic paints or water-soluble glue to fill the crack and blend with the rest of the clay surface. Alternatively, you can sand the surface imperfection lightly and apply a layer of paint or epoxy resin to the area.
Finishing Touches on Your Air Dry Clay Project
Finally, once your air dry clay project has finally dried, and all imperfections smoothed out, it’s time to add finishing touches. Depending on your project, choose a finishing medium that will preserve the color and texture of your air dry clay. Gloss or matte finish sprays, acrylic paints, or natural oils, are common finishing options that will ensure that your project is long-lasting and looking great for years to come.
Conclusion: Tips and Tricks Summarized
Air dry clay is a fun and versatile crafting material that is easy to work with. However, cracking while drying is a persistent issue that can ruin your project. Proper preparation and technique can significantly reduce cracking when working with air dry clay. Remember to select the right type of clay for your project, condition the clay well, use proper tools and workspace, allow proper drying time between layers, and apply a finishing coat to preserve the project’s longevity. By following these tips and tricks, you’ll achieve great results with your air dry clay projects every time.