As a lover of pottery, it can be heartbreaking to see your favorite vase, mug, or figurine go from a beautiful, functional piece to a pile of broken shards. However, all is not lost. With the proper tools, materials, and technique, you can repair your broken pottery and restore it to its former glory. Here is a step-by-step guide to help you fix your broken pottery.
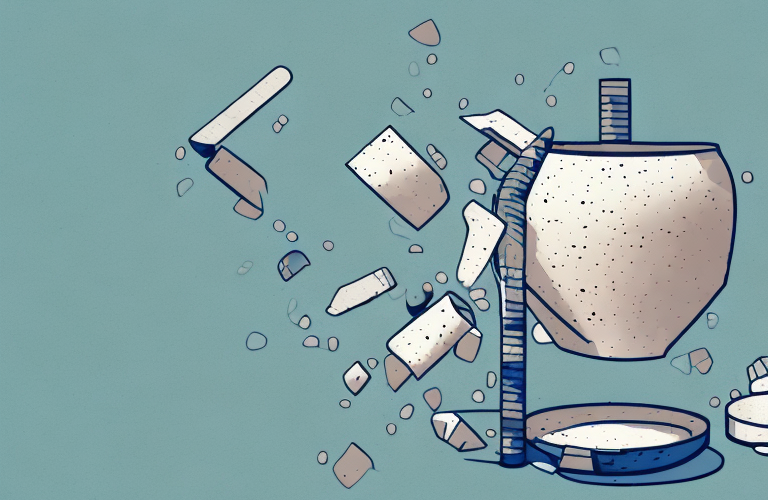
Assessing the Damage: Identifying the Severity of the Break
Before you start repairing your broken pottery, you need to assess the damage and determine how severe the break is. If the pottery has a clean break with no missing pieces, the repair process will be relatively straightforward. However, if the piece is chipped or there are missing pieces, it may require more advanced repair techniques or professional help. Check for any missing pieces and gather as many of them as possible.
If there are missing pieces, it’s important to take note of their size and shape. This will help you determine if you can create replacement pieces or if you need to seek professional help. Additionally, if the pottery has any intricate designs or patterns, it may be more difficult to repair and require more skill and patience. Take your time assessing the damage and don’t rush into the repair process.
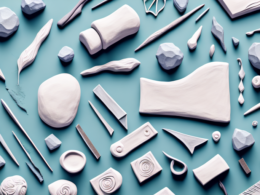
Gathering the Right Materials: Tools and Supplies for Pottery Repair
Once you have assessed the damage, it is time to gather the right tools and supplies. You will need clean, dry rags, a pair of gloves, a small bowl of water, sandpaper, putty or filler, adhesive, and clamps or tape. There are several types of adhesive you can use for pottery repair, such as cyanoacrylate (super glue) or epoxy. Choose the type of adhesive that suits your pottery repair needs.
When selecting the adhesive, it is important to consider the type of pottery you are repairing. For example, if you are repairing a delicate porcelain piece, you may want to use a clear, water-resistant adhesive that will not yellow over time. On the other hand, if you are repairing a stoneware piece, you may want to use a stronger adhesive that can withstand heat and moisture.
In addition to the tools and supplies mentioned above, you may also want to consider using a pottery repair kit. These kits typically include all of the necessary materials for repairing pottery, including adhesive, filler, and tools. They can be a convenient option for those who are new to pottery repair or who do not have all of the necessary tools on hand.
Preparing the Broken Pieces: Cleaning and Sanding the Edges
Clean the broken edges of the pottery with a dry rag, ensuring that any dirt, dust, or debris is removed. Run sandpaper over the edges to make them smooth and even. This will help the adhesive bond better and create a strong, seamless repair.
It is important to note that if the broken pieces have any glaze or paint on them, it is best to avoid sanding those areas as it may damage the finish. Instead, use a gentle cleaner and a soft-bristled brush to clean those areas. Once the broken edges are cleaned and sanded, it is recommended to test fit the pieces together before applying any adhesive to ensure a proper fit.
Choosing the Right Adhesive: Types of Glues for Pottery Repair
Depending on the severity of the damage, you may need a different type of adhesive. Cyanoacrylate and epoxy are common adhesives for pottery repair. Cyanoacrylate is a fast-drying adhesive that is perfect for clean, uncomplicated breaks. Epoxy is a two-part adhesive that is great for more substantial, complex repairs. Choose the right adhesive for your repair job.
It is important to note that not all adhesives are suitable for use on pottery. For example, superglue should be avoided as it can damage the surface of the pottery and leave a visible residue. Additionally, when using any adhesive, it is important to follow the manufacturer’s instructions carefully to ensure a strong and long-lasting bond. Always test the adhesive on a small, inconspicuous area of the pottery before applying it to the damaged area to ensure that it does not cause any further damage or discoloration.
Applying the Adhesive: Tips for Proper Application
Read the labels and instructions of your adhesive carefully before use. Spread a small amount of adhesive evenly over one of the edges of the broken pottery piece. Carefully press the other piece to the glue, holding it in place for at least a minute. Then, use a clamp or tape to hold the pieces together while the adhesive dries completely.
It is important to note that different types of adhesives may have different drying times and curing processes. Some may require longer drying times or exposure to heat or light to fully cure. It is recommended to follow the manufacturer’s instructions for the specific adhesive being used to ensure the best results.
Holding It All Together: Clamping and Securing Broken Pieces
While the adhesive dries, you will need to hold the broken pieces together. Use clamps or tape to secure the pieces in place. Avoid putting too much pressure on the broken pottery, as this can cause more damage. Check the instructions of your adhesive for the recommended drying time, and leave the clamps or tape on for that duration.
It is important to note that not all adhesives are suitable for all types of pottery. Some adhesives may not bond well with certain materials, or may not be strong enough to hold heavier pieces together. It is recommended to do some research or consult with a professional before selecting an adhesive for your broken pottery. Additionally, if the broken piece is a valuable or sentimental item, it may be best to seek the help of a professional restorer to ensure the best possible outcome.
Filling in Gaps and Chips: Using Putty and Filler for a Seamless Repair
If there are gaps or chips in the pottery after the adhesive has dried, use putty or filler to smooth the surface. Apply the putty or filler using a small tool, such as a toothpick or a stick. Be sure to shape it as close as possible to the original shape and let it dry completely.
It is important to note that different types of putty and filler may be more suitable for certain types of pottery. For example, a clay-based putty may work better for repairing earthenware, while a resin-based filler may be more appropriate for porcelain. It is recommended to do some research or consult with a professional to determine the best type of putty or filler for your specific repair job.
Sanding and Polishing: Achieving a Smooth Surface on Repaired Pottery
Sand the putty or filler using sandpaper until it is smooth and even with the surrounding pottery surface. Take care not to sand away any of the original pottery design or shape. Once the putty or filler is sanded to perfection, polish it to give it a shiny, finished look.
After polishing, it is important to let the pottery dry completely before handling it. This will ensure that the polish sets properly and does not smudge or rub off. Additionally, if the pottery has any intricate designs or patterns, it may be necessary to use a small brush or cloth to apply the polish to those areas.
If you are working with delicate or valuable pottery, it may be best to consult a professional before attempting any repairs. They will have the expertise and tools necessary to ensure that the repair is done correctly and does not cause any further damage to the piece.
Painting and Touch-ups: Restoring Color to Repaired Pottery
If your pottery is painted, you can restore the color by using acrylic paint or touch-up markers. Make sure to match the original color as closely as possible. For a more visible repair job, you can repaint the entire piece.
When using acrylic paint, it is important to apply it in thin layers and allow each layer to dry completely before applying the next. This will help to prevent the paint from cracking or peeling over time. Additionally, if you are using touch-up markers, be sure to test them on a small, inconspicuous area of the pottery first to ensure that the color matches and the marker does not cause any damage to the surface.
It is also important to note that if your pottery has a glossy or shiny finish, you may need to apply a clear coat of varnish or sealant over the painted area to help protect it from wear and tear. This will also help to ensure that the color remains vibrant and does not fade over time. When applying the varnish or sealant, be sure to follow the manufacturer’s instructions carefully and allow the piece to dry completely before handling or displaying it.
Curing Time and Aftercare: Best Practices for Maintaining Repaired Pottery
Once the repair is complete, let it dry completely for the recommended time. Afterward, handle it with care, as it may not be as sturdy as it was before. Avoid putting it under stress or sudden temperature changes. Your repaired pottery should be carefully cleaned with mild soap and water or as directed by the manufacturer.
Common Mistakes to Avoid When Fixing Broken Pottery
When fixing broken pottery, there are several common mistakes that people make. One mistake is using too much glue or filler, which can create uneven surfaces and a visible repair job. Another mistake is to rush the drying time, which can cause the adhesive to fail. One way to avoid these mistakes is to read the instructions carefully and to take your time.
Expert Tips for Advanced Pottery Repair Challenges
For advanced pottery repair challenges or more valuable pieces, it may be best to call in a professional. However, there are some expert tips you can use to create the best repair job possible. One tip is to use adhesive sparingly and to test it before using it on the pottery. Another tip is to match the original color and texture as closely as possible when repairing your pottery.
When to Call in a Professional for Pottery Repair Services
While many pottery repairs can be done at home, there are situations where it may be best to call in a professional. If your pottery piece has high value, if it is intricate or delicate, or if the damage is severe, it is best to call in a professional for help. A professional can use their expertise and advanced tools to restore your pottery to its former glory.
In conclusion, repairing broken pottery can be a delicate and precise process. With the right tools, materials, and technique, you can repair your broken pottery and restore it to its former beauty. Take your time, follow the instructions, and pay close attention to detail to create a seamless, long-lasting repair job.