Ceramics is an art form that has been around for centuries. The beauty of ceramics lies in the intricate designs and patterns that can be created on the surface of the objects, which is made possible by the use of glazes. Glazing is an essential step in the ceramics making process, as it both enhances the aesthetics and durability of your ceramic projects. In this article, we will discuss five glaze techniques that can help you take your ceramic projects to the next level.
Introduction to Glazing and Its Importance in Ceramics
Glazing is the process of applying a thin layer of glass or enamel coating to a ceramic object. The purpose of glazing is to provide an attractive surface finish and to protect the object from moisture, heat and chemicals. A glazed object is much more durable and long-lasting than an unglazed one. Glazing is, therefore, an essential step in the ceramics making process.
There are different types of glazes that can be used in ceramics, including transparent, opaque, and colored glazes. Transparent glazes allow the natural color and texture of the clay to show through, while opaque glazes completely cover the surface of the object. Colored glazes can be used to add decorative elements to the ceramic piece, and can be applied in a variety of ways, such as brushing, spraying, or dipping.
The Role of Glaze in Enhancing the Aesthetics and Durability of Your Ceramic Projects
Glazed objects are much more aesthetically pleasing than unglazed ones. Glazes can be used to create a number of different visual effects, such as matte, glossy, and textured finishes. Additionally, glazed objects are less likely to chip, scratch, or break. They are also much easier to clean and maintain, making them a popular choice for functional objects like plates, bowls, and vases.
However, it is important to note that not all glazes are created equal. Some glazes may contain harmful chemicals that can be released into the air or leach into food or drinks. It is important to choose glazes that are food-safe and environmentally friendly. You can also experiment with making your own glazes using natural materials like clay, ash, and minerals. By doing so, you can create unique and sustainable pieces that are both beautiful and safe to use.
Understanding the Different Types of Glazes: Matte, Glossy, Textured, and More
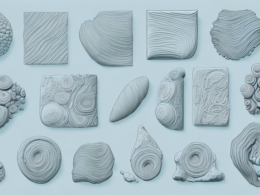
There are many different types of glazes available, each with its characteristics and visual effects. Matte glazes have a soft, velvety finish and are perfect for creating a subtle, understated look. Glossy glazes, on the other hand, have a shiny, reflective finish and are ideal for creating a vibrant, eye-catching look. Textured glazes can be used to create unique, tactile surfaces, while crystalline and iridescent glazes provide a range of iridescent colors.
Another type of glaze is the crackle glaze, which creates a cracked or crazed effect on the surface of the pottery. This type of glaze is often used to create an antique or vintage look. Another popular type of glaze is the reactive glaze, which creates a unique, unpredictable pattern of colors and textures. This type of glaze is created by using different chemicals and firing techniques, and each piece is one-of-a-kind.
When choosing a glaze, it’s important to consider the type of clay you’re using, as well as the firing temperature and atmosphere. Some glazes are better suited for high-fire temperatures, while others work best at lower temperatures. Additionally, some glazes may react differently in an oxidizing or reducing atmosphere, so it’s important to test your glazes before using them on your final piece.
How to Choose the Right Glaze for Your Ceramics Project
Choosing the right glaze for your ceramics project is an important step in the process. The glaze you choose will depend on the type of object you are making, the effect you want to create, and the firing temperature of your kiln. It is essential to test your glazes before applying them to your object to ensure the desired effects.
Another important factor to consider when choosing a glaze is the safety of the materials. Some glazes may contain toxic substances that can be harmful to your health if not handled properly. It is important to research and choose glazes that are safe for use and follow proper safety precautions when handling them. Additionally, some glazes may not be food-safe, so if you plan on using your ceramics for food or drink, make sure to choose a glaze that is labeled as such.
The Basic Steps for Applying Glaze to Your Ceramic Pieces
The process of applying glaze to your ceramic pieces involves several steps, including cleaning, preparing, and applying the glaze. To ensure the best results, it is essential to follow each of these steps carefully.
After applying the glaze, it is important to let your ceramic piece dry completely before firing it in the kiln. This can take anywhere from a few hours to a few days, depending on the thickness of the glaze and the humidity in the air. Once the piece is dry, it can be fired in the kiln according to the instructions for your specific glaze. Firing the piece will cause the glaze to melt and fuse to the ceramic, creating a durable and beautiful finish.
Experimenting with Layering Different Glazes for Unique Effects
Layering different glazes is a technique that can be used to create unique and interesting effects on your ceramic pieces. By layering glazes of different colors, textures, and finishes, you can achieve a range of different effects, including dimensional and multi-colored finishes.
One important thing to keep in mind when layering glazes is to make sure that each layer is completely dry before applying the next one. This will prevent the colors from bleeding into each other and ensure that each layer retains its distinct characteristics.
Another technique to try when layering glazes is to use wax resist to create patterns or designs. Apply the wax resist to the areas where you want the bottom layer of glaze to show through, then apply the top layer of glaze over the entire piece. When the piece is fired, the wax will burn off, revealing the pattern or design created by the bottom layer of glaze.
Creating Depth and Dimension with Underglazes and Overglazes
Underglazes and overglazes are a great way to add depth and dimension to your glazed pieces. Underglazes are applied before the glaze and can be used to create patterns and designs on the surface of the object, while overglazes are applied after the glaze and can be used to add highlights and accents to the surface of the object.
When using underglazes and overglazes, it’s important to keep in mind that they can interact with each other and with the glaze in unexpected ways. It’s a good idea to test your combinations on a small piece before applying them to your final piece. Additionally, underglazes and overglazes can be layered to create even more depth and complexity in your design. Experiment with different layering techniques to see what works best for your piece.
Techniques for Achieving a Smooth, Even Glaze Coat on Your Ceramics
A smooth, even coat of glaze is essential for achieving the desired visual effects on your ceramic objects. There are several techniques you can use to apply the glaze, including dipping, brushing, and spraying. Each of these techniques requires patience and practice to achieve the best results.
Dipping is a popular technique for applying glaze to ceramics. It involves immersing the object in a container of glaze and then removing it, allowing the excess glaze to drip off. This technique is ideal for achieving a uniform coating on the entire surface of the object. However, it can be challenging to control the thickness of the glaze, and it may require multiple dips to achieve the desired effect.
Brushing is another technique that is commonly used to apply glaze to ceramics. It involves using a brush to apply the glaze to the surface of the object. This technique allows for greater control over the thickness of the glaze and can be used to create intricate designs and patterns. However, it can be time-consuming and may require multiple coats to achieve the desired effect.
Troubleshooting Common Issues When Working with Glaze on Ceramics
Working with glaze can be a challenging process, and there are several common issues that can arise. These issues include glaze crawling, pinholing, and cracking. By understanding the causes of these issues, you can take steps to prevent them from occurring and troubleshoot problems that arise during the glazing process.
One of the most common causes of glaze crawling is applying the glaze too thickly. This can cause the glaze to pull away from the surface of the ceramic, leaving bare spots. To prevent this, make sure to apply the glaze in thin, even layers. Pinholing, on the other hand, is often caused by trapped air bubbles in the glaze. To avoid this issue, make sure to mix your glaze thoroughly and apply it to a clean, dust-free surface. Finally, cracking can occur if the glaze is not compatible with the clay body or if the piece is not fired correctly. Always check the compatibility of your glaze and clay, and follow the firing instructions carefully to avoid cracking.
Tips for Firing Your Glazed Ceramic Pieces to Achieve Optimal Results
Firing your glazed ceramic pieces is the final step in the ceramics making process. It is essential to understand the firing temperatures and schedules required for each type of glaze you use to achieve optimal results. Careful monitoring of the firing process is essential to avoid over or under-firing, which can affect the final visual and physical qualities of your ceramic pieces.
Additionally, it is important to consider the type of kiln you are using for firing. Electric kilns are commonly used for small-scale ceramics production, while gas kilns are preferred for larger pieces. The type of kiln can also affect the firing schedule and temperature required for optimal results. It is recommended to consult with experienced ceramicists or kiln manufacturers to determine the best firing approach for your specific ceramic pieces and glazes.
Conclusion: Why Glazing is Essential for Taking Your Ceramic Projects to the Next Level
Glazing is an essential part of the ceramics making process, providing both visual and physical enhancements to your ceramic objects. By understanding the different types of glazes available, choosing the right glaze for your project, experimenting with layering, and applying the glaze techniques discussed in this article, you can enhance the aesthetics and durability of your ceramics projects and take them to the next level.