Pottery making is a fascinating art form that has been around for thousands of years. It involves the use of clay, a natural material that is abundant in the earth’s crust. In pottery making, it’s essential to understand the different stages of clay, as they all play a crucial role in the creation of the final product. This article will delve into the various aspects of clay, the importance of clay in pottery making, the different types of clay, and the four stages of clay.
What is Clay and How is it Formed?
Clay is a type of sedimentary rock that is formed by the weathering and erosion of rocks that contain feldspar. The process of weathering and erosion breaks down the rocks and minerals, creating smaller and smaller particles. Over time, these particles settle in layers, and pressure from the earth’s crust compresses them into a dense material known as clay.
Clay is a versatile material that has been used for centuries in various applications. It is commonly used in pottery, construction, and even cosmetics. The properties of clay, such as its plasticity and ability to retain water, make it an ideal material for sculpting and molding. Additionally, clay has natural healing properties and is often used in skincare products to absorb excess oil and impurities from the skin.
The Importance of Clay in Pottery Making
Clay is a vital component of pottery making, as it is malleable, making it easy to mold into different shapes and forms. It also possesses an inherent adhesive quality, which allows it to bond with itself and other materials such as glazes. Additionally, clay can withstand high temperatures, making it ideal for use in kilns for firing the pottery.
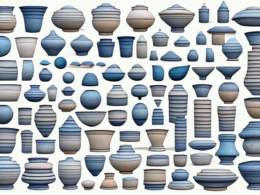
There are different types of clay used in pottery making, each with its own unique properties. For example, earthenware clay is porous and is often used for decorative pieces, while stoneware clay is denser and more durable, making it suitable for functional items such as plates and bowls. Porcelain clay is known for its translucency and is often used for delicate and intricate pieces.
The Different Types of Clay Used in Pottery
There are three main types of clay used in pottery making, which include earthenware, stoneware, and porcelain. Earthenware is the most porous and can be easily decorated with glazes, making it suitable for decorative pieces. Stoneware is more robust and can withstand higher temperatures, making it perfect for functional ware such as plates and bowls. Porcelain is the most refined and delicate, making it ideal for decorative pieces that are not intended for everyday use.
Each type of clay has its own unique properties and characteristics that make it suitable for different types of pottery. Earthenware is typically reddish-brown in color and is fired at a lower temperature than stoneware or porcelain. Stoneware is usually gray or brown in color and is fired at a higher temperature, which makes it more durable and less porous than earthenware. Porcelain is white and translucent, and is fired at the highest temperature, which gives it its delicate and refined appearance.
The Four Stages of Clay: Overview and Explanation
Understanding the four stages of clay is essential for successful pottery making. The four stages include slip, plasticity, leather hard, and bone dry. Each stage requires specific handling and attention to detail to achieve the desired results.
The first stage of clay is slip, which is a liquid form of clay that is used for casting and decorating. Slip is made by mixing clay with water until it reaches a smooth consistency. It is then applied to the surface of the pottery to create intricate designs and patterns.
Plasticity is the second stage of clay, which is the most important stage for pottery making. At this stage, the clay is soft and malleable, making it easy to shape and mold into various forms. It is important to keep the clay moist during this stage to prevent cracking and drying out.
First Stage: Slip – What it is and How to Use it
Slip is a liquid form of clay that is used to bond two pieces of clay together. It is essential to use slip that is the same consistency as the clay being used and to score or rough up the clay surfaces that will be joined.
When making slip, it is important to mix it thoroughly to ensure that it is smooth and free of lumps. This can be done by adding water to dry clay and mixing it until it reaches the desired consistency. Slip can also be made by adding water to clay scraps and letting it sit until it becomes a liquid.
Slip can be used not only for joining two pieces of clay together, but also for adding decorative elements to a piece. For example, slip can be used to create intricate designs by applying it to the surface of the clay and then carving away the excess to reveal the design.
Second Stage: Plasticity – How to Achieve the Perfect Consistency
Plasticity is the stage where the clay becomes malleable and can be molded into shapes. The ideal consistency for plasticity is when the clay is easy to mold and doesn’t crack or split when bent or stretched. Achieving the perfect consistency requires proper wedging, the process of kneading and folding the clay to remove air pockets and create a smooth, homogenous texture.
It’s important to note that achieving the perfect consistency for plasticity also depends on the type of clay being used. Different types of clay have different ideal consistencies for plasticity. For example, porcelain clay requires a much finer texture than stoneware clay to achieve the same level of plasticity. It’s important to research and understand the specific needs of the clay being used to achieve the best results.
Third Stage: Leather Hard – When to Stop Working the Clay
Leather hard is when the clay has partially dried and has the consistency of leather. At this stage, the clay can still be worked on, but it is crucial to know when to stop working it. Overworking the clay can cause it to crack or lose its shape, resulting in an undesired final product.
One way to determine if the clay is at the leather hard stage is to gently press your finger into the surface. If the clay is still soft and leaves an indentation, it is not yet leather hard. If the clay is firm and does not leave an indentation, it is at the leather hard stage.
It is important to note that different types of clay may reach the leather hard stage at different rates. Factors such as humidity, temperature, and the type of clay used can all affect the drying time. It is important to monitor the clay closely and adjust your working time accordingly.
Fourth Stage: Bone Dry – Preparing the Clay for the Kiln
Bone dry is the final stage of the clay, where it has completely dried out and is ready to be fired in the kiln. At this stage, it is essential to remove any excess moisture from the clay to prevent cracking during firing. This can be achieved by allowing the clay to air dry for a few days or by using a dehumidifier.
It is important to note that bone dry clay is extremely fragile and can easily break or crack. Therefore, it is crucial to handle it with care and avoid any sudden movements or impacts. Additionally, it is recommended to store bone dry clay in a cool, dry place to prevent any moisture from being absorbed back into the clay.
Techniques for Testing the Moisture Content of Your Clay
Testing the moisture content of the clay is essential to ensure that it is ready for firing. One technique involves weighing a small amount of clay and then drying it out in the oven. The weight difference between the wet and dry clay will give an indication of the moisture content. Another technique involves using a moisture meter to measure the moisture content directly.
It is important to note that different types of clay may require different testing techniques. For example, some clays may require longer drying times or higher temperatures in the oven to accurately determine their moisture content. Additionally, it is important to consider the ambient humidity and temperature when testing the clay, as these factors can affect the accuracy of the results. It is recommended to test the moisture content of the clay multiple times throughout the process to ensure consistency and avoid any issues during firing.
Common Mistakes to Avoid When Working with Different Clay Stages
Common mistakes when working with different clay stages include not wedging the clay properly, not scoring and using slip when joining pieces, and overworking the clay in the leather hard stage. Additionally, it is crucial to use the right type of clay for the intended purpose and to achieve the right consistency for each stage.
Tips for Successful Pottery Making Using Different Clay Stages
Successful pottery making using different clay stages requires attention to detail and patience. It is essential to use the right type of clay and to achieve the right consistency for each stage. Proper wedging, scoring, and using slip when joining pieces are also essential for successful pottery making. Additionally, it’s crucial to know when to stop working the clay and to test the moisture content before firing.
Troubleshooting Common Issues with Different Clay Stages
Common issues when working with different clay stages include cracking during firing, warping, and uneven drying. To prevent these issues, it’s essential to follow the right steps for each stage, such as properly wedging and scoring the clay, avoiding overworking it in the leather hard stage, and ensuring proper drying before firing.
The Importance of Properly Drying Your Pottery After Firing
After firing, it’s essential to allow the pottery to cool and dry properly before handling it. Sudden temperature changes or exposure to moisture can cause cracking, warping, or other damage. It’s also important to use proper storage techniques, such as stacking plates horizontally and not nesting them, to prevent damage.
Final Thoughts on Understanding the Different Clay Stages for Pottery Making
Understanding the different clay stages is essential for successful pottery making. Each stage requires specific handling and attention to detail, such as proper wedging, scoring, and using slip when joining pieces. It’s crucial to use the right type of clay and to achieve the right consistency for each stage. Additionally, testing the moisture content before firing, allowing proper cooling and drying after firing, and proper storage techniques are all essential components of successful pottery making.