If you’re a pottery enthusiast, you know that kilns can be expensive investments. However, that shouldn’t stop you from firing your work. In fact, firing clay without a kiln is entirely possible with a little bit of ingenuity and patience. In this step-by-step guide, we will go over the materials, history, and techniques involved in firing clay without a kiln. Read on to learn more.
Introduction: Why Firing Clay Without a Kiln is Useful
Firing clay without a kiln is a useful technique for several reasons. For starters, it is more accessible and cost-effective than kiln firing for a beginner. Secondly, it allows you to create unique pieces that cannot be made in a traditional kiln, such as pit-fired pottery. Additionally, firing without a kiln can be a fun and rewarding DIY project for those who enjoy getting creative in the studio.
Another advantage of firing clay without a kiln is that it can produce a more natural and organic look to the finished piece. This is because the firing process is often done using natural materials such as sawdust, leaves, or even horsehair, which can create unique patterns and textures on the surface of the clay.
Furthermore, firing without a kiln can be a great way to experiment with different firing techniques and temperatures. This can lead to a deeper understanding of the firing process and how it affects the final outcome of the piece. It also allows for more flexibility in terms of the size and shape of the pieces that can be fired, as kilns have limitations on the size and shape of the objects that can be fired.
The History of Firing Clay Without a Kiln
The technique of firing clay without a kiln dates back thousands of years. It was used by ancient civilizations as a way to create pottery before kilns were invented. In fact, pit-firing was one of the earliest ways humans discovered how to create functional pottery. Today, pit-firing is still used by potters around the world to create unique pieces with beautiful, natural finishes.
Another method of firing clay without a kiln is called bonfire firing. This technique involves stacking the pottery in a pile and surrounding it with wood or other combustible materials. The fire is then lit and allowed to burn for several hours, until the pottery is fully fired. Bonfire firing can produce a range of colors and textures on the pottery, depending on the type of wood and other materials used in the firing process.
In addition to pit-firing and bonfire firing, there are other techniques for firing clay without a kiln, such as raku firing and sawdust firing. Raku firing involves removing the pottery from the kiln while it is still hot and placing it in a container filled with combustible materials, such as sawdust or newspaper. The heat from the pottery ignites the materials, creating unique patterns and colors on the surface of the pottery. Sawdust firing is similar to bonfire firing, but instead of using wood, the pottery is surrounded by sawdust and other materials that produce smoke and carbon, which create unique patterns and colors on the surface of the pottery.
Materials Needed for Firing Clay Without a Kiln
The materials needed for firing clay without a kiln are relatively simple, and can be found around your home or purchased locally. Here are the materials you’ll need:
- Clay (of course!)
- A fire-resistant container, such as a metal trash can or large terracotta pot
- A supply of combustible materials, such as wood chips, sawdust, or dried leaves
- A source of heat, such as a campfire or propane torch
- Tongs or heat-resistant gloves
It’s important to note that firing clay without a kiln can be a bit unpredictable, and the results may not be as consistent as with a kiln. It’s also important to take safety precautions, such as wearing protective gear and being aware of fire hazards. However, firing clay without a kiln can be a fun and accessible way to experiment with ceramics, especially for those who don’t have access to a kiln or want to try something new.
Step 1: Preparing the Clay for Firing
Before you can fire your clay, it needs to be bone-dry. This means all of the moisture must be removed from the clay to prevent it from cracking during firing. Once your clay is completely dry, you can sand it smooth or carve in designs if desired.
It is important to note that the drying process can take several days or even weeks, depending on the thickness of the clay and the humidity of the environment. To speed up the drying process, you can place the clay in a warm, dry area or use a fan to circulate air around it. However, be careful not to dry it too quickly, as this can also cause cracking. It is best to let the clay dry naturally and check it regularly for any signs of cracking or warping.
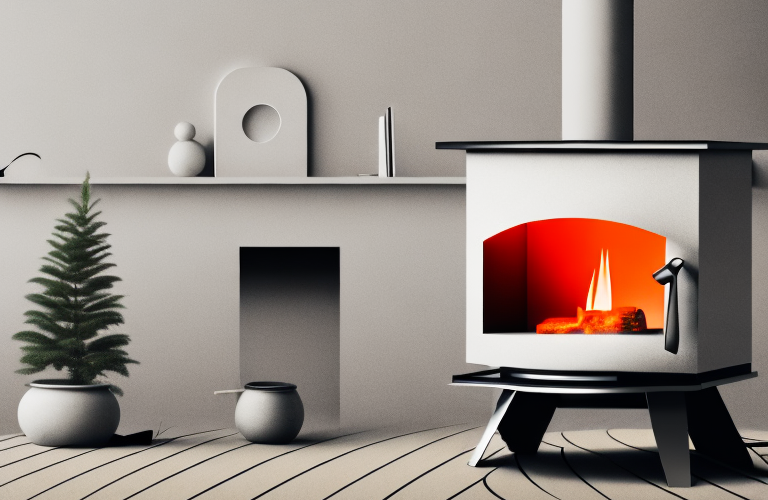
Step 2: Building Your Own Kiln
Now that your clay is ready, it’s time to build your own kiln. Begin by choosing a fire-resistant container. A large metal trash can or a large terracotta pot with a lid can work well. You’ll also need combustible materials, such as wood chips, sawdust, or dried leaves, to create a fire. Start by filling the bottom of the container with a layer of combustibles, then place your clay pieces on top.
It’s important to note that building your own kiln can be dangerous if not done properly. Always make sure to build your kiln in a well-ventilated area, away from any flammable materials. It’s also recommended to have a fire extinguisher nearby in case of any accidents. Take the necessary precautions to ensure your safety and the safety of those around you.
Step 3: Loading the Kiln with Clay
Once your kiln is ready, it’s time to load your clay. Make sure your pieces of clay are spaced out and not touching each other. This will ensure that they fire evenly.
It’s important to note that the type of clay you use will also affect the firing process. Different types of clay require different firing temperatures and schedules. Be sure to consult with your clay supplier or do research to determine the appropriate firing specifications for your specific clay.
Step 4: Starting the Firing Process
Light your combustible materials on fire, and let the flames slowly spread throughout the container. Keep adding combustibles to keep the fire going. Once the flames die down, cover the container with its lid to keep the heat inside. Continue adding combustibles and maintaining the fire until you reach the desired temperature.
It is important to monitor the temperature of the firing process regularly. Use a pyrometer to measure the temperature inside the container. If the temperature rises too quickly, it can cause the clay to crack or even explode. If the temperature rises too slowly, it can cause the glaze to not properly mature.
Once you have reached the desired temperature, turn off the heat source and let the container cool down slowly. Do not remove the lid until the container has cooled down to room temperature. Removing the lid too soon can cause the glaze to crack or even fall off the pottery.
Step 5: Monitoring the Temperature of the Kiln
Monitoring the temperature inside your kiln is crucial for successful firing. Different types of clay require different temperatures to fire properly, so check your clay’s firing temperature before starting. You can use a temperature gun or a pyrometer to measure the temperature inside the container. Keep adding combustibles and monitoring the temperature until you reach the desired temperature.
It is important to note that the temperature inside the kiln can vary depending on the location of the temperature measurement. It is recommended to take multiple temperature readings at different locations inside the kiln to ensure an even firing. Additionally, it is important to maintain a consistent temperature throughout the firing process. Sudden changes in temperature can cause the clay to crack or even explode.
Once the desired temperature is reached, it is important to maintain that temperature for the recommended amount of time. This can vary depending on the type of clay and the desired outcome of the firing. It is recommended to refer to the manufacturer’s instructions or consult with a pottery expert for guidance on firing times.
Step 6: Cooling and Finishing Your Clay Creation
Once your clay has reached the desired temperature, it’s time to cool it down. Remove the lid of the container and allow it to cool naturally. Your clay creation should now be hard and durable.
After your clay creation has cooled down, you can begin the finishing process. This involves sanding any rough edges or surfaces with sandpaper. You can also use a damp sponge to smooth out any imperfections on the surface of your creation.
Once you have finished sanding and smoothing, you can add any final touches to your creation. This could include painting, glazing, or adding decorative elements such as beads or stones. Allow your creation to dry completely before handling or displaying it.
Tips and Tricks for Successful Clay Firing without a Kiln
- Make sure your clay is bone-dry before firing to prevent cracking
- Choose combustibles that will burn evenly and provide enough heat
- Keep an eye on the temperature and add combustibles as needed
- Allow your clay to cool down naturally to prevent cracking
Common Problems Encountered While Firing Clay without a Kiln
The most common problem encountered while firing clay without a kiln is cracking. This can be prevented by ensuring the clay is bone-dry before firing and by allowing it to cool down naturally. Another problem is not reaching the desired temperature, which can result in pottery that is not hardened enough. Monitoring the temperature and adding combustibles as needed can help prevent this.
Safety Precautions to Take While Firing Clay without a Kiln
Always take safety precautions while firing clay without a kiln. Make sure to wear heat-resistant gloves or use tongs to handle the hot container. Keep a bucket of water or sand nearby in case of emergencies, and never try to move a hot container. Always fire your clay in a well-ventilated area, and never leave it unattended.
Conclusion: The Advantages of Knowing How to Fire Clay without a Kiln
Firing clay without a kiln is a useful and cost-effective technique, especially for beginners. This step-by-step guide has shown you how to build your own kiln, fire your clay, and avoid common problems. With some practice, you’ll be able to experiment with different types of clay, combustibles, and techniques to create unique, one-of-a-kind pieces.