Pottery is a popular art form, and the glaze that is added to create stunning finishes is an essential element of the design process. However, sometimes you may want to remove the glaze to achieve a different effect or correct mistakes. Removing glaze from pottery can be a challenging task, but with the proper tools and techniques, you can achieve excellent results. In this article, we will take you through a step-by-step guide on how to remove glaze from pottery using multiple methods and share tips and tricks for successful glaze removal.
Why Remove Glaze from Pottery?
There are many reasons why you may want to remove glaze from pottery. One of the most common reasons is to fix mistakes made during the glazing process. For example, if you accidentally applied too much glaze, your pottery could look uneven, or if the glaze did not adhere correctly, it could result in an uneven surface. Additionally, you may want to change the pottery’s appearance by removing the glaze entirely, using a different glaze, or leaving the pottery unglazed to showcase the clay’s natural color. Whatever your reason may be, it’s crucial to know the proper techniques for removing glaze from pottery.
Another reason why you may want to remove glaze from pottery is to create a textured surface. By removing the glaze in certain areas, you can create a unique texture that adds depth and interest to your pottery. This technique is often used in pottery that is meant to be decorative rather than functional. Additionally, removing glaze can be a way to add intricate designs or patterns to your pottery. By carefully removing the glaze in specific areas, you can create intricate designs that are not possible with traditional glazing techniques.
The Tools You Need for Glaze Removal
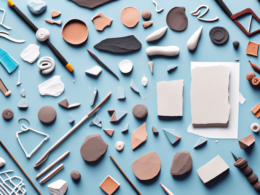
Removing the glaze from pottery requires specific tools that can vary depending on the method you choose. However, there are some essential tools that you will need regardless of the technique, including safety gear like goggles, gloves, and a respirator. You will also need a sharp scraper, sandpaper, and a brush to create abrasive surfaces for removing the glaze. Additionally, depending on the method you choose, you may require specific tools like sandblasting equipment or chemicals for chemical stripping.
If you are using the sandblasting method, you will need a sandblasting gun, an air compressor, and a blasting cabinet. The blasting cabinet is essential for containing the sand and preventing it from spreading all over your workspace. You will also need to use a dust collector to remove the sand particles from the air and prevent them from entering your lungs.
On the other hand, if you are using the chemical stripping method, you will need to use a chemical stripper that is specifically designed for removing glaze. You will also need a container to hold the chemical stripper, a brush to apply it, and a scraper to remove the glaze once it has been softened by the chemical. It is important to follow the manufacturer’s instructions carefully when using chemical strippers, as they can be hazardous if not used properly.
Preparing Your Work Area for Glaze Removal
The next step is to prepare your work area for the glaze removal process. Lay down a tarp, newspaper, or a sheet of plastic to protect the work surface, and ensure that you have adequate ventilation. If you’re using chemicals for glaze removal, make sure to wear a respirator, and if you’re outdoors, work in an area where you won’t contaminate the soil.
It’s also important to have the necessary tools and equipment on hand before starting the glaze removal process. This may include a scraper, sandpaper, or a chemical stripper, depending on the type of glaze and the surface it’s on. Make sure to read the instructions carefully and follow all safety precautions when using these tools. Additionally, if you’re working on a delicate or intricate surface, such as a piece of pottery or a decorative tile, take extra care to avoid damaging the underlying material during the glaze removal process.
How to Safely Handle Pottery during Glaze Removal
It’s essential to handle your pottery safely during the glaze removal process. Wear gloves to protect your hands, and handle the pottery carefully to prevent damage. If you’re using thermal shock or kiln firing, it’s essential to follow the proper firing technique to avoid breakages or cracking.
Another important aspect of safely handling pottery during glaze removal is to work in a well-ventilated area. The chemicals used in the glaze removal process can release harmful fumes, so it’s crucial to have proper ventilation to avoid inhaling them. Additionally, it’s recommended to wear a mask to further protect yourself from any potential respiratory issues.
Finally, after the glaze removal process is complete, it’s important to thoroughly clean your pottery. Use warm water and soap to remove any remaining glaze or chemicals, and dry the pottery completely before using or firing it again. Proper cleaning ensures that your pottery is safe to handle and use, and helps to maintain its quality and longevity.
The Different Methods of Glaze Removal: Pros and Cons
There are four primary methods for removing glaze from pottery: sandblasting, chemical stripping, grinding and buffing, and thermal shock. Each technique has its pros and cons, so it’s essential to choose the method that is best suited for your project.
Method 1: Sandblasting
Sandblasting involves using a pressurized stream of sand or abrasive particles to remove the glaze from the pottery’s surface. It’s ideal for large or bulky pottery items and can remove the glaze quickly and efficiently. However, sandblasting requires special equipment and can be costly. Additionally, the sandblasting process can cause micro-fractures on the pottery’s surface that can weaken it, and the sand can create a significant amount of dust.
Method 2: Chemical Stripping
Chemical stripping involves using chemicals to dissolve the glaze from the pottery’s surface. It’s an excellent choice for delicate pottery items as it’s gentle on the surface and can create even results. Chemical stripping is also relatively inexpensive compared to other methods. However, the chemicals used for this method can be hazardous and require proper handling and disposal.
Method 3: Grinding and Buffing
Grinding and buffing involve using a rotary tool or electric sander to remove the glaze from the pottery surface. This method is perfect for small or intricate pottery items as it allows for a high level of precision. Additionally, it’s relatively affordable and easy to do at home. However, grinding and buffing can be time-consuming and can be challenging to achieve even results on larger pottery items.
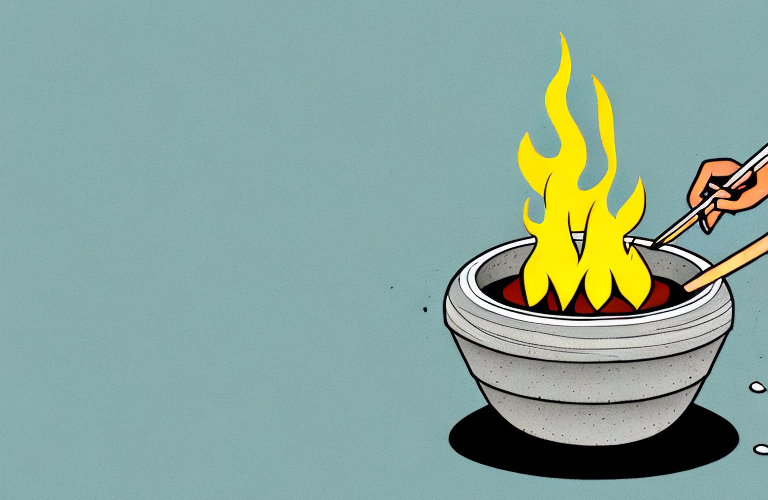
Method 4: Thermal Shock or Kiln Firing
Thermal Shock, also known as kiln firing, involves exposing the pottery to extreme temperatures to shock off the glaze. It’s an excellent choice for large pottery items and creates even results. Additionally, it’s a relatively affordable method with no additional costs. However, thermal shock can be dangerous, and it’s crucial to use the proper firing technique to avoid damaging the pottery.
Choosing the Right Method for Your Pottery Type
The method you choose for glaze removal will depend on your pottery’s size, shape, and thickness. For large pottery items, sandblasting or thermal shock may be the best option, while smaller, more delicate pottery items may require chemical stripping or grinding and buffing.
Step-by-Step Guide to Sandblasting Your Pottery
1. Set up the sandblasting equipment in a well-ventilated area that is covered with a tarp or sheet of plastic.
2. Wear your safety gear, including a respirator, gloves, and goggles.
3. Load your pottery into the sandblasting cabinet and adjust the pressure settings according to the pottery’s thickness.
4. Sandblast the pottery in short bursts, making sure to cover the entire surface, except for any areas you want to leave glazed.
5. Examine the pottery to ensure you’ve removed all the glaze and clean it with a brush or water to remove any sand residue.
Step-by-Step Guide to Chemical Stripping Your Pottery
1. Set up your work area in a well-ventilated area covered with a tarp or sheet of plastic.
2. Wear your safety gear, including gloves, goggles, and a respirator.
3. Mix the chemical stripper as per the manufacturer’s instructions.
4. Apply the mixture to the pottery’s surface, making sure to avoid any areas you want to leave glazed.
5. Let the chemical stripper sit for the recommended time according to the manufacturer’s instructions.
6. Use a scraper or brush to remove the glaze from the pottery’s surface, and clean the pottery with water to remove any residue.
Step-by-Step Guide to Grinding and Buffing Your Pottery
1. Set up your work area in a well-ventilated area covered with a tarp or sheet of plastic.
2. Wear your safety gear, including goggles and gloves.
3. Use a rotary tool or electric sander to remove the glaze from the pottery’s surface, working in short bursts and being careful not to damage the pottery.
4. Switch to finer-grit sandpaper or buffing wheels to smooth the pottery’s surface and clean the pottery with water to remove any residue.
Step-by-Step Guide to Thermal Shock or Kiln Firing Your Pottery
1. Set up your kiln in a well-ventilated area and ensure that the pottery is placed securely on a shelf.
2. Set the kiln to the appropriate temperature and let it run for the recommended time to kiln fire the pottery.
3. Let the pottery cool down before removing it from the kiln.
4. Check the pottery for any remaining glaze, and clean the pottery with a brush or water to remove any residue.
Tips and Tricks for Successful Glaze Removal
When removing glaze from pottery, it’s essential to use safety gear, work in a well-ventilated area, and follow the manufacturer’s instructions when using chemicals. Additionally, it’s essential to handle the pottery with care to prevent damage, no matter the method you choose. Make sure to observe the pottery’s condition and adjust the pressure or temperature settings to avoid damaging the pottery’s surface. You may also consider testing a small area of the pottery first to ensure the chosen method won’t cause any additional issues.
How to Clean and Maintain Your Pottery after Glaze Removal
Once you’ve removed the glaze from your pottery, you need to clean it thoroughly to remove any residue left from the glaze removal process. Use a brush or water to clean the pottery and remove any remaining debris. Additionally, it’s crucial to maintain your pottery to prevent it from deteriorating. Store it in a dry, cool place, and avoid exposing it to moisture or direct sunlight.
Final Thoughts on Removing Glaze from Pottery
Removing glaze from pottery can be a challenging but rewarding process. Regardless of the technique you choose, it’s essential to use safety gear and handle the pottery with care to prevent damage. Additionally, maintain your pottery correctly to prevent it from deteriorating over time. By following the techniques outlined in this article, you can achieve an excellent outcome and enjoy your pottery for years to come.