Working with clay can be an incredibly rewarding experience, from expressing your creativity to creating functional pieces of art. However, you need to be aware of the different stages involved in order to ensure that your pieces turn out just the way you want them. In this article, we will be exploring the 5 distinct stages of clay manipulation – Preparation, Kneading, Wedging, Forming and Finishing.
Overview of the 5 Stages
When it comes to clay work, it’s important to first understand the 5 distinct stages: Preparation, Kneading, Wedging, Forming and Finishing. Each stage involves different methods of manipulation and the order in which you work through the stages has a big impact on the final product.
Step 1: Preparation
The first step is to prepare the clay for manipulation. This involves ensuring that the clay is in the right condition before beginning. If you are using a newly purchased clay block it should be as soft and malleable as possible. To achieve this, submerge the clay in a bucket of water overnight before shaping. If the clay is too wet you can dry it with a piece of felt, terry cloth or a newspaper.
Step 2: Kneading
The next stage is kneading. This is when you use your hands to combine and mix different forms of clay together. To begin this process, spread a thin layer of water over the surface of the clay you are going to be working with. Make sure it doesn’t become too wet as this will enable air bubbles to enter the clay, which may affect the final piece. To knead the clay, use your hands or a rolling pin to mix it together until it takes on a malleable consistency.
Step 3: Wedging
Wedging is when you press the clay down into a concave shape with your hands or a wedging tool. This is done in order to reduce the number of air bubbles that are present in the clay and improve its strength and durability. To wedge the clay, it should first be slightly damp so that it is malleable enough for you to shape. Use a back and forth motion with your hands or a wedging tool to press the clay downwards into a concave shape.
Step 4: Forming
Forming is when you use different tools to shape your clay into the desired shape. Common tools used in this step include a variety of rolling pins, knives, and ribbons. Rollers can be used to soften and flatten out your clay as well as create curved shapes. Knives can be used to achieve sharper lines and create finer details in your design. Ribbons can be used to create smoother surfaces.
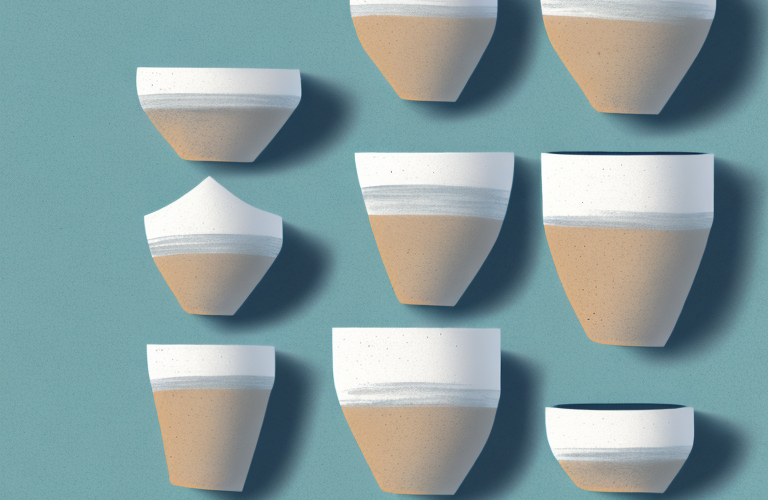
Step 5: Finishing
The final step is finishing. This is when you use various techniques to create texture on your piece of art. Paddles and stamps are two common tools used for this purpose. Paddles are used to create various textures such as grooves and holes in the clay. Stamps can be used for finer details such as leaves, animals or words. Glass beads, glitter and various paints can also be used to further enhance the design of your piece.
Benefits of Utilizing the 5 Stages
There are many advantages to utilizing all 5 stages when working with clay. The most important is that each stage ensures that the final product is as close to the desired design as possible. Adhering to all 5 stages means you will have better control over your project right from the beginning, allowing you to take corrective measures throughout the entire process if necessary.
Tips for Working with Clay
There are several tips that can help when working with clay:
- Keep your workspace clean and organized, as this will enable you to keep track of all the tools you are using.
- Ensure that all surfaces come into contact with the clay are completely dry and dust-free, as this will improve adhesion.
- Always add more water rather than less when submerging the clay, as too little water can cause drying out and cracking.
- Knock off excess water from the surface of your clay before adding glazes or paints.
- When glazing and firing, always use a kiln monitor as this will ensure optimal firing temperatures.
Common Mistakes to Avoid when Working with Clay
While there is much joy to be found when working with clay, there are also a number of common mistakes that you should be aware of in order to produce successful pieces. Some of these include:
- Using too much water – Using too much water will result in too much air being present in the clay, resulting in a weak, cracked finished product.
- Drying out the clay too slowly – Drying out clay too slowly results in a poor quality product with poor adhesion.
- Not fine-tuning your desired shape – Ensure that you take time to refine your design during the forming stage, as this will ensure a finished piece that is true to your vision.
- Not allowing enough time for drying – Make sure to allow enough time for each step, especially drying, as this is key in avoiding cracks or imperfections in your piece.
By familiarizing yourself with the 5 distinct steps involved in working with clay and avoiding these common mistakes, you will be able to successfully create beautiful and unique pieces that are perfect for displaying in your home, giving as a gift or using for functional purposes!