It can be difficult to get the perfect consistency with glaze, and oftentimes it can seem too thick. Thicker glazes can mean uneven texture, run-off, and inconsistent application. But, how do you know when your glaze is too thick?
Factors to Consider When Deciding if Glaze is Too Thick
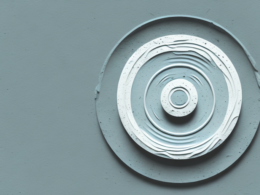
The first step in determining if your glaze is too thick is to observe the texture. If your glaze appears lumpy or lumpy, it is likely too thick. Additionally, a strong and visible sheen or congealed surface suggests that the glaze is indeed too thick for application.
When glaze is too thick, it typically does not spread evenly over a surface. Glazes that seem too sticky or hard to spread might also be thicker than desired. As the glaze dries, look for signs of cracking or uneven texture. These are telltale signs that the glaze has become too thick.
Tips to Help Thicken or Thin Glaze
Once you’ve identified that your glaze is too thick, there are several techniques you can use to help adjust thickness. To reduce thickness, slowly add water to the glaze and stir until the desired consistency is achieved. This process may take several attempts, so pay close attention to the texture of the glaze for optimal results.
Alternatively, if the glaze is too thin, you can increase its viscosity by adding more ingredients or by using a food processor. Processed glazes will generally have a smooth and even texture. This technique can also be done with a blender or a stick blender.
Common Causes of Thick Glazes
Thick glazes can be caused by several factors including the recipes used, environmental conditions, and improper storage. Make sure to use correct recipes and amounts when making glazes as this will influence how thick or thin the glaze will be. Additionally, temperature and humidity significantly impact the consistency of a glaze as they can evaporate or absorb moisture.
Pay special attention to how you store your glazes as well. Exposure to air can cause them to dry out, so keep glazes covered when not in use. Inadequate stirring before use can also lead to thicker glazes. It is important to stir or mix the ingredients before use so that all components are incorporated fully.
How to Adjust Thick Glaze to the Desired Consistency
Once you’ve identified that your glaze is too thick, you need to adjust it to the desired consistency for optimal application. For this, you’ll need a few basic supplies.
First and foremost, get yourself a dry measuring cup which is used to measure out portions of the ingredients used to make the glaze. This can also be used to measure out how much water you’ll need to add during the thinning process. Once you’ve determined how much water needs to be added, use a mixing spoon to combine the liquids and ingredients. Finally, use a whisk or a rubber spatula to stir the mixture until it has reached its desired thickness.
Tools and Techniques for Testing Glaze Consistency
It is important to test your glaze before use to make sure it has reached the desired consistency. To do this, use a small paint brush and dip it in the mixture then remove. Examine the loaded brush carefully for texture and texture changes. If your glaze has reached its desired consistency, it should be smooth, even, and glossy in appearance when laid on a piece of paper.
You can also use a digital thermometer or hydrometer to measure viscosity in more detail if needed. The reading will give an approximate temperature for viscosity as well as a specific gravity that helps indicate if the glaze is too thick or too thin.
Benefits of a Properly-Thickened Glaze
Properly thickening your glazes is essential when creating original works of art or simply recreating classic designs. Not only does it help maintain the integrity of your work but it also provides an even surface which allows for easier manipulation during the application process. A smooth and even surface will help maintain consistency in your work, ensuring that each piece looks as beautiful as you imagined.
Troubleshooting Guide for Dealing with Thickened Glaze
If you have identified that your glaze is too thick, there are several techniques you can use to alter the viscosity. Start by adding small amounts of water slowly and stir until the desired consistency is achieved. If your recipes call for additional ingredients, add them in carefully and stir until fully incorporated. Additionally, you can use a blender or food processor to whisk the glaze until it reaches the proper thickness.
If all else fails, start from scratch and create a new recipe taking into account climate, recipes ingredients, and stirring techniques when considering altering your glaze.
Knowing when your glaze is too thick and knowing how to adjust it is an important part of successful artistry and pottery crafting. Properly-thickened glazes not only make your work look better but also guarantee better results in the long run. Now that you know what to look for and what techniques you can try, you should have no problem keeping your glazes at the ideal consistency.