Pottery is an ancient art form that has been practiced for thousands of years. It involves using clay to create a variety of objects, such as bowls, mugs, and sculptures. In order to create these objects, potters sometimes use a special mixture called clay slip. Clay slip is a liquid form of clay that can be easily applied to the surface of other pieces of clay before they are fired. In this article, we’ll show you how to make your own clay slip in a step-by-step guide.
What is Clay Slip and Why Do You Need It?
Clay slip is a mixture of clay and water that has been blended to a specific consistency. It is used to create a variety of effects in pottery, such as smooth surfaces, decorative designs, and even repairs. Clay slip is especially useful in pottery projects where sculpting or carving is required, as it can be applied to the surface of the clay and manipulated with tools.
Additionally, clay slip can also be used as a bonding agent between two pieces of clay. By applying a thin layer of slip to the edges of two pieces of clay and pressing them together, the slip acts as a glue and helps to hold the pieces in place while they dry and are fired in the kiln. This technique is commonly used in creating handles for mugs and other vessels, as well as in joining different parts of a larger sculpture together.
The Benefits of Using Clay Slip in Pottery Projects
In addition to its versatility, clay slip has several benefits over other methods of surface decoration. One of the primary advantages of using clay slip is that it bonds well with other pieces of clay, making it ideal for building up layers in a project. Additionally, clay slip can be used to create a variety of textures and patterns, from smooth and polished to rough and gritty. Clay slip can also be used as a pigment, allowing potters to apply color to their projects without the use of glazes.
Another benefit of using clay slip is that it can be used to repair cracks or imperfections in a finished piece. By applying a small amount of slip to the affected area and smoothing it out, the crack can be filled and the piece can be salvaged. This is a useful technique for potters who want to avoid having to start a project over from scratch.
Finally, clay slip is a cost-effective option for potters who want to experiment with different surface decorations. Because it can be made from scraps of clay and water, it is a low-cost alternative to purchasing pre-made glazes or other decorative materials. This makes it an ideal choice for beginners or those on a tight budget.
Understanding the Different Types of Clay Slip
There are two main types of clay slip: casting slip and decorating slip. Casting slip is a thin, watery mixture that is used to create molds for casting pieces of clay. Decorating slip, on the other hand, is a thicker mixture that is used for surface decoration. Decorating slip can be used to build up layers on a piece of pottery, whereas casting slip is typically used only to create molds.
Another type of clay slip is engobe, which is a type of decorating slip that is applied to the surface of a piece of pottery before it is fired. Engobe can be used to create a smooth surface for glazing or to add color and texture to the piece. It is often used in combination with other decorating techniques, such as sgraffito or underglaze.
It is important to note that the composition of clay slip can vary depending on the desired effect. For example, some potters may add materials such as oxides or stains to their decorating slip to achieve a specific color or texture. Additionally, the firing temperature and atmosphere can also affect the final appearance of the slip. Understanding the different types of clay slip and their properties can help potters create unique and beautiful pieces of pottery.
How to Choose the Right Ingredients for Making Clay Slip
Before you begin making clay slip, it’s important to choose the right ingredients. The primary ingredient in clay slip is clay, which can come in a variety of types and colors. The type of clay you choose will depend on the nature and color of the project you’re working on. Other ingredients you’ll need include water, a deflocculant (a substance that helps to break up the clay particles), and a preservative to prevent the clay from spoiling.
When selecting a deflocculant, it’s important to choose one that is appropriate for the type of clay you’re using. Sodium silicate is a common deflocculant that works well with many types of clay, but it may not be the best choice for all clays. Other deflocculants, such as soda ash or Epsom salts, may be more suitable for certain types of clay. It’s important to do your research and choose the right deflocculant for your specific clay and project.
The Equipment You Need for Making Clay Slip
In addition to the ingredients, you’ll need several pieces of equipment for making clay slip. These include a mixing tool, such as a blender or a drill with a mixing attachment, as well as a container for mixing the slip in. You’ll also need a scale for measuring out the ingredients, a hydrometer for measuring the specific gravity of the slip, and a pH meter for checking the acidity of the slip.
Another important piece of equipment for making clay slip is a sieve or strainer. This will help remove any lumps or impurities from the mixture, resulting in a smoother and more consistent slip. It’s also recommended to have a spray bottle filled with water on hand, as you may need to add small amounts of water to adjust the consistency of the slip.
When it comes to storing your clay slip, you’ll need airtight containers to prevent it from drying out or becoming contaminated. Glass jars with tight-fitting lids or plastic containers with snap-on lids are good options. It’s important to label your containers with the date and type of slip, so you can keep track of your inventory and ensure that you’re using the right slip for your project.
How to Prepare Your Workspace for Making Clay Slip
Before you begin making clay slip, you’ll need to prepare your workspace. Begin by cleaning and disinfecting all of your equipment and containers. You should also make sure that your workspace is well-ventilated, as some of the materials you’ll be using can produce fumes. Finally, you should prepare a clear and clean area to work in, making sure to cover any nearby surfaces with newspaper to protect them from spills or splashes.
Once you have prepared your workspace, it’s important to gather all of the necessary materials. This includes clay, water, a mixing container, and a mixing tool. You may also want to have a scale on hand to measure out precise amounts of clay and water.
Before mixing your clay slip, it’s important to understand the desired consistency. Clay slip that is too thick will be difficult to work with, while clay slip that is too thin may not adhere properly. You can test the consistency by dipping a tool into the slip and observing how it drips off. The ideal consistency should be similar to heavy cream.
Step 1: Mixing the Dry Ingredients for Clay Slip
Begin by measuring out the dry ingredients for your clay slip. You’ll need to measure out the clay and the deflocculant in the correct proportions according to the recipe you’re following. Place the dry ingredients in your mixing container and stir them together thoroughly, making sure there are no clumps or lumps.
Step 2: Adding Water to Your Clay Slip Mixture
Once you’ve mixed the dry ingredients together, it’s time to add water to the mixture. Slowly pour the water into the mixing container while stirring the mixture constantly. The amount of water you add will depend on the specific gravity of your slip, so you’ll need to use your hydrometer to make sure you’re adding the correct amount. Continue stirring the mixture until the water is evenly distributed throughout the clay and the slip is smooth and homogeneous.
Step 3: Mixing and Consistency Check of Your Clay Slip
After you’ve added the water to the mixture, it’s time to blend the slip until it reaches the right consistency. You can do this using a blender or a drill with a mixing attachment. Slowly add more water or deflocculant as necessary until the mixture is smooth and free from lumps. Be sure to use your pH meter to check the acidity of the slip, as the acidity can affect the consistency and quality of the slip.
Tips and Tricks for Adjusting the Consistency of Your Clay Slip
If your clay slip is too thick, you can thin it out by adding more water. If it’s too thin, you can thicken it up by adding more clay or deflocculant. Keep in mind that the consistency of the slip will affect how well it bonds with other pieces of clay, so it’s important to get it right.
How to Store Your Clay Slip Properly
Once you’ve made your clay slip, it’s important to store it properly to keep it from spoiling. You can store your clay slip in a sealed container in a cool, dry place. Be sure to label the container with the date and the type of clay slip, so you can keep track of its age and quality.
Common Mistakes to Avoid When Making Clay Slip
One common mistake when making clay slip is not measuring the ingredients accurately. Even small variations in the proportions of the ingredients can have a big impact on the quality of the slip. Another mistake to avoid is not blending the slip thoroughly enough, which can result in lumps or inconsistencies in the mixture.
How to Use Your Homemade Clay Slip in Pottery Projects
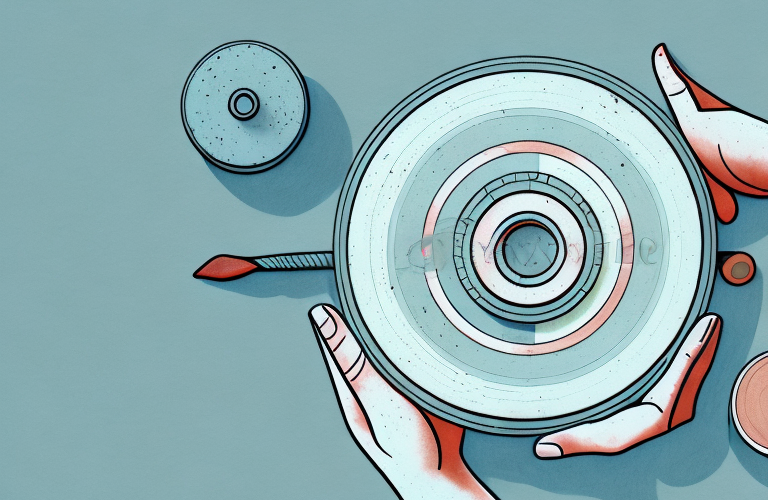
Now that you’ve made your own clay slip, it’s time to put it to use in your pottery projects. You can apply your slip to the surface of your pottery using a brush, a sponge, or even your fingers. Make sure to smooth out the slip and remove any air bubbles or inconsistencies. You can also use other tools, such as carving tools or texture stamps, to create designs and patterns in the slip.
Conclusion: How Learning to Make Clay Slip Can Elevate Your Pottery Game
Making your own clay slip can be a fun and rewarding experience for potters of all skill levels. By learning how to make your own clay slip, you’ll have the ability to create a variety of textures, designs, and patterns in your pottery projects. With a little practice, you’ll be able to take your pottery game to the next level.