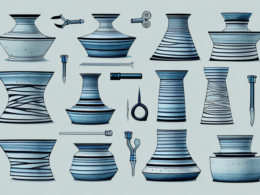
Ceramic glazing is a crucial step in pottery-making that can truly make or break a piece. Glaze is a liquid coating that’s applied to the surface of a ceramic piece to create a glossy finish, seal the porous clay, and add color and texture. However, if you’re looking to add intricate designs and deeper layers to your pottery, you may want to incorporate underglaze. Underglaze is a pigment-based liquid that’s applied to raw or bisque-fired clay as an undercoat before glazing. When these two techniques are combined, they can produce stunning results that elevate your pottery to a professional level. Here’s a comprehensive guide on how to glaze over underglaze for a professional finish that’ll help you to achieve those brilliant and intricate designs.
Understanding the Difference between Underglaze and Glaze
Before we dive into the step-by-step process of glazing over underglaze, it’s essential first to understand the fundamental differences between these two techniques. Underglaze acts as a base coat for your piece’s surface, giving you an opaque surface that you can paint on to create intricate designs. Glaze, on the other hand, is a transparent or translucent coating that’s placed over your underglaze (or unglazed) piece to create a finished, glossy, and colorful exterior. Knowing these differences can greatly enhance your ability to choose the right underglaze and glaze combination for your pottery piece.
It’s important to note that underglaze and glaze have different firing temperatures. Underglaze is typically fired at a lower temperature than glaze, which means that if you plan to use both techniques on the same piece, you’ll need to carefully consider the firing schedule. Firing the piece at the wrong temperature can result in the underglaze melting or the glaze not adhering properly. It’s always a good idea to consult with a pottery expert or refer to the manufacturer’s instructions to ensure that you’re firing your piece correctly.
Step-by-Step Guide to Applying Underglaze on Your Ceramic Piece
The next step is to apply your underglaze to your bisque-fired pottery. Dip your brush into the underglaze container and apply the underglaze coat systematically on the surface of the piece. Ensure that you apply the underglaze evenly while leaving a neat and clean ceramic surface. It’s essential to allow the underglaze coating to dry and become firm before applying a second coat. The thickness and sheen of the underglaze coat depend on the desired effect, as well as the type of underglaze being used. Once the underglaze has become dry and firm, you’re now ready to begin glazing.
When applying underglaze, it’s important to keep in mind that the color of the underglaze may appear different after firing. It’s always a good idea to test the underglaze on a small area of the piece before applying it to the entire surface. This will give you an idea of how the color will look after firing and allow you to make any necessary adjustments.
Another important factor to consider when applying underglaze is the temperature at which it will be fired. Different types of underglaze have different firing temperatures, and it’s important to make sure that the underglaze you’re using is compatible with the firing temperature of your piece. Firing at the wrong temperature can cause the underglaze to crack or peel, ruining the finish of your piece.
Tips to Achieve a Smooth and Even Underglaze Coat
When it comes to applying your underglaze, it’s vital to pay attention to detail to get that even and smooth undercoat. Here are a few tips to ensure a professional finish:
- Use a soft-bristled brush to prevent streaks and extra texture.
- Make sure to clean your brush between strokes so that colors don’t mix or bleed.
- Apply thin but even layers of underglaze, and don’t oversaturate the brush.
- Let each coat dry before applying another layer for best results.
Another important tip to keep in mind is to apply your underglaze to a bone-dry surface. If the surface is not completely dry, the underglaze may not adhere properly, resulting in an uneven finish. Additionally, make sure to apply the underglaze evenly across the entire surface, paying extra attention to any crevices or details in the piece. By following these tips, you can achieve a smooth and professional-looking underglaze coat.
How to Choose the Right Glaze for Your Underglazed Piece
Choosing the right glaze is critical when it comes to achieving a high-quality finish for your underglazed piece. The type of glaze you select will depend on your desired color, texture, and finish. Consider selecting a glaze that is compatible with your underglaze, and one that fires at a similar temperature. This way, the two coatings will fuse properly and give you the desired thickness and texture. Glossy glazes can be the perfect finish to bring out the colors and design of the underglaze, while matte glazes create a muted but textured appearance.
Another important factor to consider when choosing a glaze is the intended use of the piece. If the piece will be used for food or drink, it is important to select a glaze that is food-safe and non-toxic. Some glazes may contain harmful chemicals that can leach into food or drink, so it is important to do your research and select a glaze that is safe for its intended use.
It is also important to consider the firing process when selecting a glaze. Some glazes may require multiple firings, while others may only require one. Additionally, some glazes may require a specific type of firing, such as oxidation or reduction firing. Make sure to read the instructions carefully and select a glaze that is compatible with your firing process and kiln.
Preparing Your Ceramic Piece for Glazing
Before you apply the glaze to your underglaze coating, it’s crucial to prepare your pottery piece. Start by cleaning your ceramics to remove dust, oil, and other contaminants that can interfere with your glaze application. You can wash your ceramics with soap and water to remove oil and dust, and then use a soft, damp cloth to remove any remaining residue. Make sure to handle your piece with care when cleaning to avoid damaging or chipping it.
After cleaning your ceramics, you may want to consider sanding the surface of your piece to create a better bond between the glaze and the pottery. Use a fine-grit sandpaper to gently sand the surface of your ceramics, being careful not to sand too hard or too long in one spot. This will help the glaze adhere better to the surface of your pottery and create a smoother finish.
Another important step in preparing your ceramic piece for glazing is to ensure that it is completely dry before applying the glaze. Any moisture left on the surface of your pottery can cause the glaze to bubble or crack during firing. To dry your ceramics, you can leave them out in a well-ventilated area for a few hours or use a hairdryer on a low setting to speed up the process. Once your piece is completely dry, you can begin applying your glaze with a brush or spray gun.
Applying Glaze on Top of Underglaze: Best Practices
Now that you have an underglazed pottery piece and a compatible glaze, it’s time to apply the glaze. Use a glaze brush to apply the glaze in thin, even coats to your pottery piece. Be careful not to leave any drips, bumps, or extra texture on the surface of the piece. Applying two to three thin coats of glaze will give you a robust and even finish. Once you’ve applied the glaze, you’ll need to allow it to dry completely before firing the piece in the kiln.
Common Mistakes to Avoid When Glazing Over Underglaze
Mistakes can happen even with careful application, but here are some common mistakes you’ll want to avoid:
- Dipping or brushing the underglaze on top of the glaze can discolor or damage the coating.
- Using incompatible underglaze and glaze can cause shrinkage, cracking, or blistering during firing.
- Thickness or application mistakes can lead to bubbles, peeling, or flaking after firing.
How Long Should You Wait Before Firing Your Glazed Pottery?
Once your glaze has been applied, it’s essential to allow the coating to dry completely before proceeding with kiln firing. Most glazes and underglazes will require between 24-48 hours of drying time before firing. Firing too soon can cause the glaze to crack or bubble, while too much delay can cause the glaze layer to peel off during firing. The ideal drying time will depend on the type of glaze and underglaze you’re using, as well as your environment’s humidity and temperature.
Troubleshooting: Fixes for Common Glazing Problems
Even with all precautions taken, glaze firing problems can still arise. Below are some common glazing issues and their remedies:
- Bubbles or craters in the glaze can be fixed by sanding the area and applying a new layer of glaze.
- Surface cracks or peeling can often indicate a thermal shock or cooling too fast after firing. Slow down the cooling process to prevent this.
- Glossy glazes with white flakes or pits can occur if the firing temperature is too low. Check your kiln temperature and increase it next time.
Enhancing the Sheen of Your Glazed Piece with Wax Resist Techniques
For added texture and design elements, some potters use wax resist techniques. Applying wax before glazing allows you to create unique patterns that will resist the glaze’s effects, leading to a more textured look. Once you’ve applied the wax, glaze your pottery piece as you normally would, and then remove the wax resist areas. This will give you an added layer of design and depth to your finished piece.
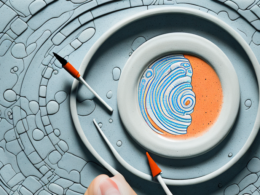
Experimenting with Layering Different Glazes Over Underglaze
To add more complexity to your work, you can experiment with different glaze color combinations over your underglaze base coat. For instance, layering a glossy white over a black underglaze results in subtle and raw textures that can add depth and interest to your finished piece. Working with different glazes can enhance your creative expression.
The Best Firing Techniques for Achieving a Professional-Looking Finish
Firing techniques can often determine whether or not a pottery piece has a professional or amateur finish. The type of firing technique you use will depend on the type of clay, glaze, or underglaze you’re working with. Make sure to experiment with different firing techniques and schedules to find what works best for your materials and environment.
Caring for and Maintaining Your Finished Ceramic Piece
Caring for your finished ceramic piece is essential to ensure its longevity and aesthetic quality. Always handle with care and avoid dropping, slamming or hitting it. Make sure to clean it regularly to avoid each day dirt and direct sunlight to prevent fading. You can also use a sealant to protect from scratches and stains.
By following these guidelines, you’re sure to create beautiful and professional-level pottery pieces that you and others will admire for years to come.