The slab technique is a method of clay-building used by potters, sculptors, and other ceramic artists to create 3-dimensional pieces. As its name implies, the technique involves the use of slabs of clay to shape forms. Unlike wheel-throwing and other traditional methods of clay-building, the slab technique can deliver an array of effects and textures that are otherwise difficult to achieve. If you’re interested in clay work, the slab technique is an indispensable tool for creating unique pieces of artwork.
History of the slab technique
The slab technique is believed to have originated in ancient Mesopotamia. Archaeological evidence suggests that ancient peoples used this method to craft artifacts such as cylinders, dishes, and other vessels. Later on, in the 14th century classical period, potters in the Middle East took slab-building to new heights. During this era, these artisans developed a range of ceramic pieces with intricate textures and patterns.
In the modern era, the slab technique has been adapted to create a variety of art forms. Contemporary potters use the technique to craft functional pieces such as plates, bowls, and mugs. Sculptors also use the technique to create abstract and figurative works. Additionally, the slab technique is used to create architectural elements such as tiles and wall panels.
Materials Needed for the Slab Technique
The materials needed for the slab technique are fairly simple, but it’s important to get the right ones. At its most basic, the slab technique requires clay and a rolling surface. Beyond that, you’ll need a good quality metal or plastic slatt or rib tool, a sponge, and something to cut the clay with — like knives, scissors, or wire. You’ll also want some slurry or slip (a mixture of clay and water), which acts as a glue when joining pieces of clay together. A good set of pottery tools will also come in handy.
Step-by-Step Guide to the Slab Technique
The step-by-step guide for the slab technique is as follows:
- Select your clay and knead it until soft.
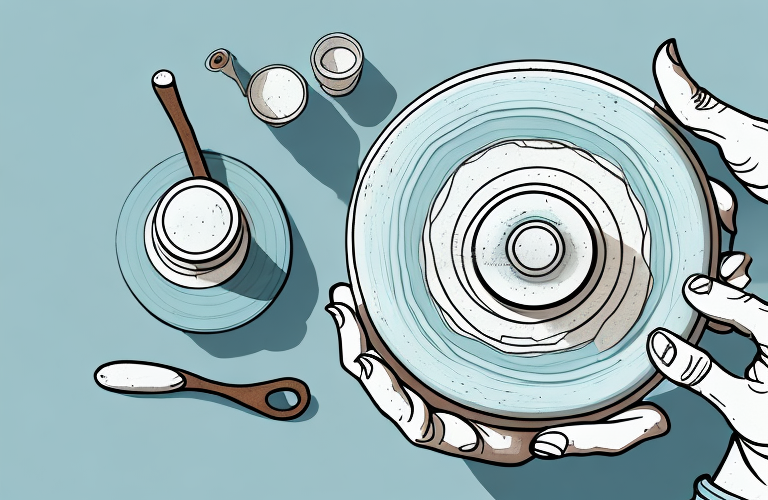
- Roll out your clay with a roller until you achieve the desired thickness.
- Use templates or cut out shapes in your rolled clay with the desired tools.
- Create any textures and forms you’d like on the surface of your slab.
- Put together your individual parts using slip as glue or secure pieces together with stitches.
- Let your piece dry until leather-hard.
- Once leather-hard, clean up edges and add any details with your pottery tools.
- Fire your work in a kiln until bone-dry.
- Glaze and fire your piece at a high temperature.
Benefits of Using the Slab Technique
The slab technique offers a range of benefits over traditional wheel-throwing. First and foremost, it’s much quicker and easier to manage than wheel-throwing. The slab technique also offers more versatility for live demonstrations, as it can be done on a flat surface rather than a wheel. It also allows for more intricate textural details than wheels do; plus, it’s a great way to learn handbuilding fundamentals that can transfer over to other clay-building techniques.
Tips for Applying the Slab Technique
When applying the slab technique for the first time, it’s best to begin by learning how to make basic shapes like cubes and cones. With those forms mastered, it’s easier to move on to shaping more organic forms — like bowls, baskets, and cups — using slabs. It’s also helpful to experiment with texture; indentations are one way to add texture, but so are stencils or stamps. To avoid cracks in your clay while working with slabs, try not to put too much pressure on them or roll them out too thin.
Common Mistakes to Avoid with the Slab Technique
The most common mistakes associated with the slab technique include inexperience with coils and scoring, clay that is too dry when attempting to join pieces together, attaching pieces too close together which can cause warping when firing, and making uniform shapes that lack character. It’s important to become familiar with basic hand-building principles so these mistakes can be avoided.
Alternatives to the Slab Technique
The slab technique isn’t the only way to create clay forms — there are several alternatives. Coil-building is one option, which involves building from coils of clay instead of from slabs. Paper mache sculpture is another method; this involves cutting paper mache strips into desired forms and attaching them together using glue or paste. Finally, soft slabs are vertical slabs that are built layer by layer like paper mache sculptures, then joined in the same way.
Examples of Artwork Created with the Slab Technique
The slab technique is great for creating pots and vessels, but can also be used to craft intricate sculptures. Some recent examples of artwork created with the slab technique include ceramic wall hangings by contemporary artist Egey Ergun; sculptural vases by Clara Iglesias-Cole; and bottles by Brooklyn-based potter Reanna De La Rosa.
Conclusion
The slab technique is a versatile method for creating ceramic objects — from basic containers to elaborate sculptures — which has been used by artisans for centuries. With some practice and muscle memory, this technique can be mastered easily, yielding amazing results. So whether you’re a novice potter or an experienced sculptor, the slab technique is an invaluable tool for producing unique works of art.