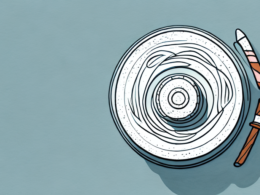
Clay is a versatile and fascinating material that has been used for thousands of years for various purposes. Whether you are moulding a pot, a sculpture, or a tile, understanding the stages of clay formation is essential for a successful outcome. In this article, we will provide you with a comprehensive guide to the four stages of clay, from raw materials to finished products. We will also give you tips on how to prepare and work with clay, as well as common mistakes to avoid. So, let’s dive in!
An Introduction to Clay: Its Origins and Uses
Clay is a type of sedimentary rock that is composed mainly of minerals such as silica, alumina, and water. It is one of the most common natural materials on earth and has been used for various purposes by different civilizations throughout history. The ancient Egyptians, for instance, used clay to make pottery, bricks, and sculptures, while the Native Americans used it for cooking vessels and pipes. Today, clay is still used for pottery, but it is also used in construction, industrial applications, and even as a cosmetic ingredient.
Clay is formed through the weathering and erosion of rocks over time. The minerals in the rocks break down and combine with water to form a soft, malleable substance that can be molded into various shapes. The color of clay can vary depending on the type of minerals present, ranging from white to red to brown.
One of the unique properties of clay is its ability to retain water. This makes it an ideal material for creating water storage vessels, such as jars and pots. It also has insulating properties, which makes it useful for creating ovens and other heat-retaining structures. In addition, clay has been used for medicinal purposes, such as treating skin conditions and digestive issues.
Understanding the Different Types of Clay
Not all clays are the same. The type of clay you choose depends on your project, as each type has different properties and characteristics. The most common types of clay are earthenware, stoneware, and porcelain. Earthenware is the most porous and brittle type of clay, making it suitable for decorative items and low-temperature firing. Stoneware is denser and more durable than earthenware, making it ideal for functional ware such as plates and bowls. Porcelain is the most refined and hard type of clay, making it suitable for fine art and high-temperature firing.
The Science Behind the Stages of Clay Formation
Clay is formed by the weathering and erosion of rocks and minerals over millions of years. The process involves the breakdown of certain minerals such as feldspar and mica, resulting in the formation of clay particles. These particles are then transported by water, wind, or ice and deposited in a sedimentary environment, where they undergo further changes such as compaction, cementation, and chemical alteration. The result is a fine-grained material that we call clay.
The Four Stages of Clay: A Comprehensive Guide
The four stages of clay formation are as follows: digging, preparing, throwing or hand-building, and firing. Let’s look at each stage in more detail.
Digging
The first stage of clay formation is digging. In this stage, the raw clay is extracted from the ground using a shovel, backhoe, or other heavy equipment. The clay is then transported to a processing facility where it is cleaned, sorted, and stored. The quality of the clay depends on the purity of the raw material and the processing method. It is essential to choose the right type of clay for your project and to ensure that it is free of impurities such as rocks, sticks, and debris.
Preparing
Once the clay is extracted, it needs to be prepared for moulding or shaping. This stage involves adding water, wedging or kneading, and testing for consistency. The amount of water added to the clay depends on the type of clay and the desired texture. Wedging or kneading is essential to remove air bubbles and improve plasticity. Testing the consistency involves pulling a sample of the clay and checking its elasticity, strength, and plasticity. The clay should be consistent throughout and free of cracks or lumps.
Throwing or Hand-Building
The third stage of clay formation is throwing or hand-building. This stage involves shaping the wet clay into a desired form using a potter’s wheel, hand tools, or a combination of both. The technique used depends on the type of clay and the desired outcome. The potter’s wheel is used for symmetrical shapes such as bowls, vases, and mugs, while hand-building is used for asymmetrical shapes such as sculptures, figurines, and tiles. It is essential to work with wet clay and to use the right amount of pressure and support to achieve the desired shape and texture.
Firing
The final stage of clay formation is firing. This stage involves heating the clay to a certain temperature to harden and dry it. There are two main types of firing: bisque firing and glaze firing. Bisque firing is done at a lower temperature, typically between 800 and 1000 degrees Celsius, and is used to harden the clay and remove any remaining moisture. Glaze firing is done at a higher temperature, typically between 1200 and 1400 degrees Celsius, and is used to fuse the glaze to the clay and make it water-resistant. It is essential to follow the firing instructions carefully and to use the right type of kiln and fuel source for your project.
Preparing Your Clay for Molding and Shaping
Before you start moulding or shaping your clay, it is essential to prepare it properly. This involves adding water, wedging or kneading, and testing for consistency. The amount of water added to the clay depends on the type of clay and the desired texture. Wedging or kneading is essential to remove air bubbles and improve plasticity. Testing the consistency involves pulling a sample of the clay and checking its elasticity, strength, and plasticity. The clay should be consistent throughout and free of cracks or lumps.
Techniques for Working with Wet Clay
Working with wet clay requires a specific set of skills and techniques to achieve the desired shape and texture. Whether you are using a potter’s wheel or hand-building, it is essential to work slowly and steadily, applying the right amount of pressure and support as you go. You should also keep your hands and tools moist to avoid drying out the clay and causing cracks or warping. Some common techniques for working with wet clay include pinching, coiling, slabbing, and throwing.
How to Dry and Harden Your Clay Creations
After you have finished moulding or shaping your clay, you need to dry and harden it before firing it. This involves leaving it to air dry for a few days to remove any remaining moisture. It is essential to dry your clay slowly and evenly and to avoid exposing it to direct sunlight or heat, as this can cause cracks or warping. Once the clay is dry, you can sand it down or trim any excess material before firing it in a kiln.
Firing Your Clay: Methods and Considerations
Firing your clay is a crucial part of the process, as it determines the final outcome and durability of your creation. There are two main types of firing: bisque firing and glaze firing. Bisque firing is done at a lower temperature, typically between 800 and 1000 degrees Celsius, and is used to harden the clay and remove any remaining moisture. Glaze firing is done at a higher temperature, typically between 1200 and 1400 degrees Celsius, and is used to fuse the glaze to the clay and make it water-resistant. It is essential to follow the firing instructions carefully and to use the right type of kiln and fuel source for your project.
Glazing and Finishing Your Clay Artwork
After firing your clay, you can apply a glaze or other finishing material to give it a smooth, glossy, or decorative surface. Glazing involves applying a liquid material composed of clay, silica, and various pigments to the surface of the clay and firing it again. This process creates a thin, glassy layer that makes the clay waterproof and resistant to scratching or chipping. Other finishing techniques include polishing, waxing, and painting.
Common Mistakes to Avoid When Working with Clay
Working with clay can be a challenging and rewarding experience, but it’s easy to make mistakes that can ruin your creation. Some common mistakes include not preparing your clay properly, using too much or too little water, working too quickly or too forcefully, and firing at the wrong temperature or for too long. To avoid these mistakes, it’s essential to follow the instructions carefully and to take your time.
Tips for Creating Beautiful and Lasting Ceramic Pieces
To create beautiful and lasting ceramic pieces, there are some tips you can follow. These include choosing the right type of clay for your project, preparing your clay properly, using the right techniques for working with wet clay, and firing at the right temperature and for the right amount of time. It’s also essential to practice regularly and to seek feedback and guidance from experienced potters or instructors.
The Role of Patience and Practice in Perfecting Your Craft
Working with clay is a craft that requires patience and practice to perfect. It takes time to develop the necessary skills and techniques, as well as to learn from your mistakes and successes. The key is to be persistent, to take your time, and to enjoy the journey. With practice and dedication, you can create beautiful and lasting ceramic pieces that will bring joy and satisfaction for years to come.
Finding Inspiration in the World of Clay Artistry
If you are looking for inspiration in the world of clay artistry, there are plenty of resources available to you. From books and magazines to online forums and exhibitions, you can find a wealth of ideas and techniques to explore. You can also take classes or workshops to learn from experienced potters and instructors and to connect with other clay enthusiasts.
Building a Successful Career as a Ceramic Artist or Potter
If you have a passion for clay artistry, you can turn it into a successful career as a ceramic artist or potter. Building a successful career requires a combination of artistic skill, business acumen, and marketing savvy. You need to create a portfolio of your work, find a niche or target market, and promote your brand through social media, exhibitions, and other channels. You can also join professional organizations and networks to connect with other artists and gain exposure to new opportunities.