Clay has been used as an artistic medium for thousands of years, and it is an incredibly versatile material in the hands of a talented artist. Knowing the 6 stages of clay is essential for anyone hoping to master the craft of clay sculpting. In this article, we will discuss what each stage of the clayworking process entails and provide information on how to troubleshoot any issues that arise along the way.
Understanding the Different Clay Stages
The 6 stages of clayworking are wedging and kneading, coiling and slab building, assembling and joining, smoothing and trimming, finishing and glazing, and firing and cooling. Each stage is essential in transforming a lump of clay into a beautiful and intricate piece.
Wedging and kneading is the process of mixing and preparing the clay for use. Coiling and slab building involves forming the clay into the desired shape. Assembling and joining is the process of connecting the pieces together. Smoothing and trimming is the process of refining the shape and surface of the clay. Finishing and glazing is the process of adding color and texture to the clay. Finally, firing and cooling is the process of hardening the clay in a kiln.
The Benefits of Knowing the 6 Stages of Clay
By having a thorough understanding of the six stages of clayworking, you can get a better handle on what you are doing and how your project will take shape. Knowing the correct techniques at each stage will ensure that your finished product looks the way you want it to. Additionally, because people learn differently, knowing how each stage affects the outcome can help you better understand the overall process.
The six stages of clayworking are wedging, centering, opening, raising, shaping, and finishing. Wedging is the process of kneading the clay to remove air bubbles and make it easier to work with. Centering is the process of creating a symmetrical shape with the clay. Opening is the process of creating a larger shape with the clay. Raising is the process of creating a three-dimensional shape with the clay. Shaping is the process of refining the form of the clay. Finishing is the process of smoothing the surface of the clay and adding any decorative elements.
The First Stage: Wedging and Kneading
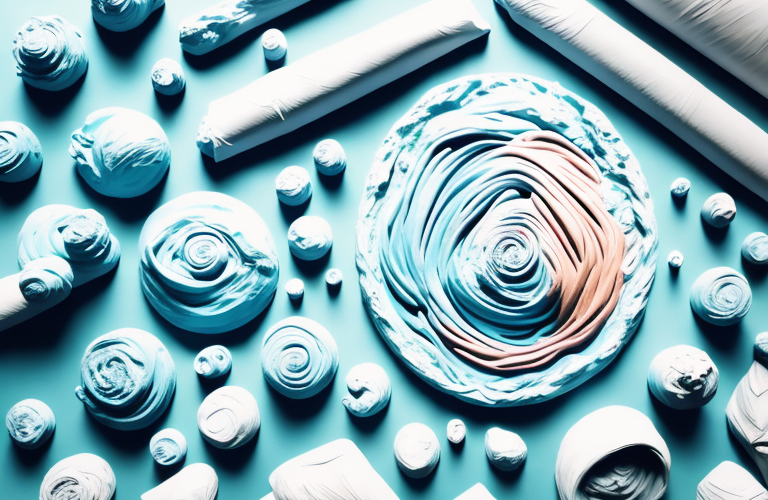
Wedging and kneading are the first two stages of clayworking, when you prepare the clay for further sculpting. Wedging involves pounding the clay with your hands, flattening it and expelling any air bubbles. Kneading follows wedging – firmly squeezing the clay in your hands in order to evenly distribute its moisture content. This stage is important for preventing cracking later on in the process.
The Second Stage: Coiling and Slab Building
Once the clay is properly wedged and kneaded, it is ready to be shaped. The second stage of clayworking is coiling and slab-building. Coiling involves wrapping the clay into a coil, which can then be modified into a shape or structure. Slab-building is when flat pieces of clay are stacked on top of one another and joined together. Both techniques can be used at this stage to create a finished piece.
The Third Stage: Assembling and Joining
After shaping the clay into a desired form, it is time to assemble and join it together. This involves combining two or more pieces of clay into one cohesive form. This can be done by either using a clay knife to cut pieces from one shape and join them with another, or by using slip to bind two surfaces together.
The Fourth Stage: Smoothing and Trimming
Once a piece is assembled, it needs to be smoothed out. This is done using a variety of tools, such as a rubber rib or a wooden rib. Once smoothed out, the piece can be trimmed in order to give it definition or to make it visually appealing. Trimming can be done either by cutting or carving away sections of clay.
The Fifth Stage: Finishing and Glazing
Once the piece is trimmed and smoothed, it is ready for glazing and finishing. Glazing is optional, but it can help create a glossy finish for your piece as well as make it more resistant to damage. To apply glaze, you simply need to brush it onto the surface of the piece. Once glazed, it is ready for firing.
The Sixth Stage: Firing and Cooling
Firing is an essential part of the sixth stage of clayworking. This stage involves heating the piece in a kiln in order to permanently harden it. The pieces should then be allowed to cool slowly in order to prevent cracking or other damage. Once cooled, your finished piece will be ready for display.
Troubleshooting Common Clay Issues
When working with clay there are several common issues that may arise, but thankfully many of these can be easily resolved with some quick troubleshooting. If air bubbles appear in your piece during the wedging stage, simply use a wooden rib or other tool to pop them. If the piece splits apart during firing, it could be due to uneven moisture distribution during kneading – try using slip to join pieces back together before firing again. If your glaze does not turn out as desired, try re-working it with a different type of glaze.
By understanding the 6 stages of clayworking, you can have confidence and control over your projects – from start to finish. Knowing the correct techniques at each stage can help ensure that your finished product looks great and meets your expectations.